
Garlic is one of the most versatile and widely used ingredients in kitchens worldwide. Not only does it add flavor to a variety of dishes, but it also boasts numerous health benefits, including anti-inflammatory and antioxidant properties. If you’re looking to add a fresh ingredient to your meals, why not grow your own garlic at home? This comprehensive guide will take you through the entire process of growing garlic in containers, allowing you to enjoy fresh, homegrown garlic right from your own balcony or patio. Let’s dig in!
Why Grow Garlic in Containers?
Growing garlic in containers is an excellent option for several reasons:
- Space Efficiency: Container gardening allows you to grow garlic in small spaces like balconies, patios, or even indoors.
- Control Over Soil Quality: You can choose the best soil and ensure proper drainage, which is crucial for garlic’s growth.
- Mobility: Containers can be moved around to catch the best sunlight or protect them from harsh weather conditions.
- Less Pest Problems: Growing garlic in containers can help reduce the risk of soil-borne pests and diseases.
With these advantages in mind, let’s explore the step-by-step process of growing garlic in containers.
Step 1: Choosing the Right Container
The first step to successfully growing garlic is selecting the right container. Here’s what you should consider:
- Size: Choose a pot that is at least 8-12 inches deep and wide. Garlic needs ample room for its bulbs to grow. Larger containers allow for more cloves and better yields.
- Material: Clay, ceramic, and plastic containers are all suitable options. Ensure the material allows for adequate drainage.
- Drainage Holes: Always ensure that your container has drainage holes at the bottom to prevent waterlogging, which can lead to bulb rot.
Recommended Container Types:
- Plastic Pots: Lightweight and easy to handle, perfect for beginners.
- Clay Pots: Porous, allowing for better air circulation, but can dry out faster.
- Fabric Grow Bags: Great for aeration and drainage, ideal for garlic.
Step 2: Selecting the Right Garlic Varieties
Next, you’ll want to select the type of garlic you wish to grow. There are two main types of garlic: hardneck and softneck.
Hardneck Garlic
- Description: Typically has a stiff central stalk, larger cloves, and a more robust flavor.
- Ideal For: Cooler climates. Varieties include Rocambole and Porcelain.
Softneck Garlic
- Description: Has a softer stem, smaller cloves, and is generally easier to braid.
- Ideal For: Warmer climates. Varieties include Silverskin and Artichoke.
When purchasing garlic for planting, always choose seed garlic from a reputable source rather than store-bought garlic, which may be treated with growth inhibitors.
Step 3: Preparing the Soil
Garlic thrives in well-draining, nutrient-rich soil. Here’s how to prepare the perfect mix:
- Potting Mix: Use a high-quality potting mix designed for container gardening. Look for one that includes organic matter like compost.
- Amendments: Consider adding perlite or vermiculite to improve drainage. A handful of organic fertilizer will provide the nutrients needed for healthy growth.
Soil Recipe:
- 50% potting mix
- 30% compost
- 20% perlite or vermiculite
Step 4: Planting the Garlic Cloves
Once you have your container and soil ready, it’s time to plant the garlic cloves.
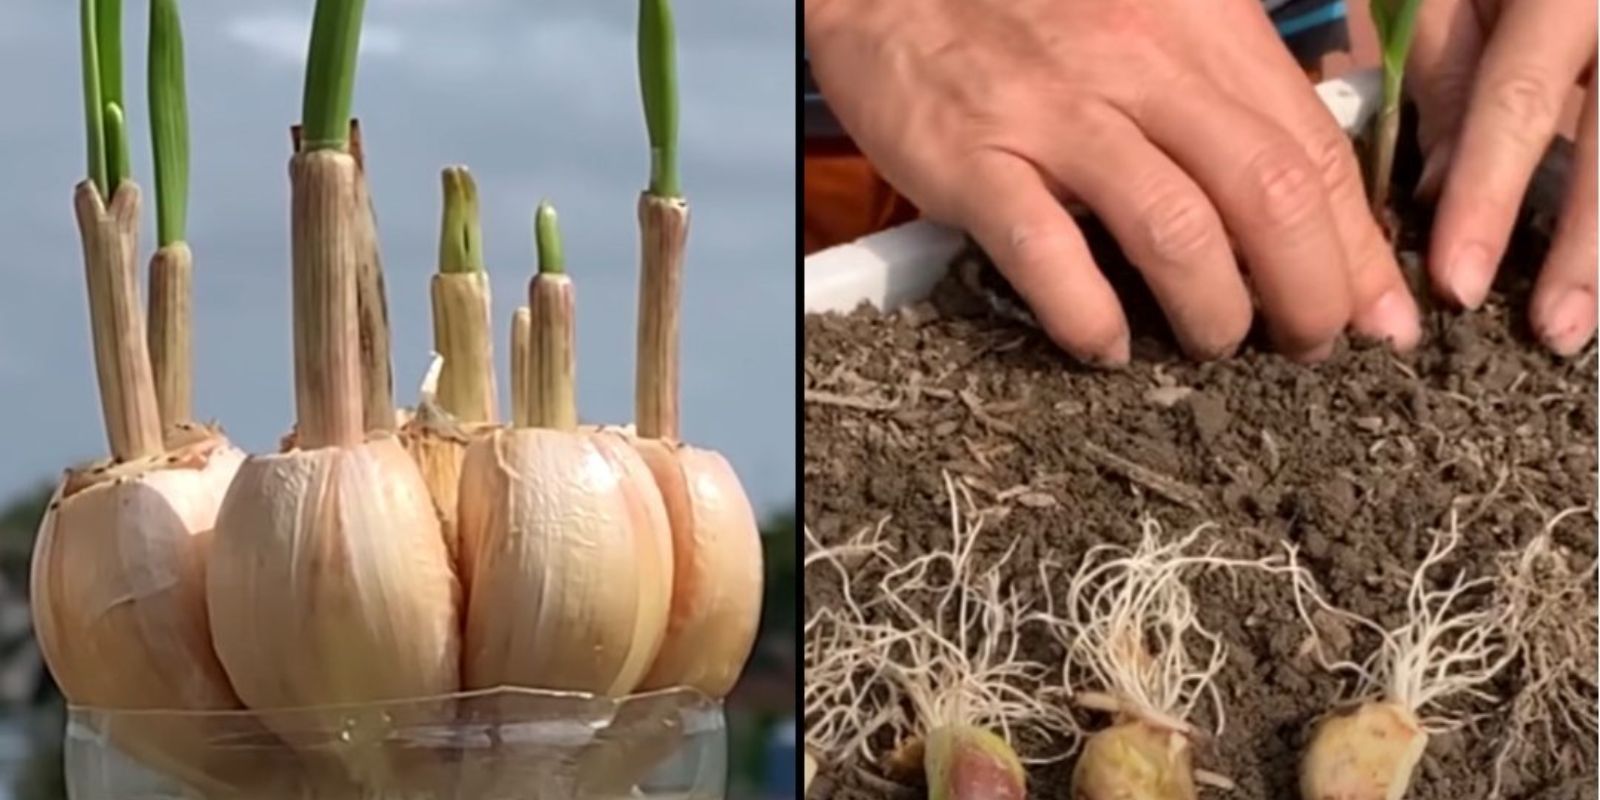
- Prepare the Cloves: Gently break apart the garlic bulb into individual cloves. Leave the papery skin on, as it helps protect the clove during the growing process.
- Planting Depth: Plant each clove upright, about 2 inches deep. Space the cloves 4-6 inches apart to allow for proper bulb development.
- Watering: After planting, give the soil a good watering to help settle it around the cloves.
Step 5: Caring for Your Garlic Plants
Garlic requires specific care to grow successfully:
Sunlight Requirements
Garlic loves sunlight! Place your container in a location that receives at least 6-8 hours of direct sunlight daily. A south-facing balcony or patio is ideal.
Watering
- Initial Watering: After planting, keep the soil consistently moist, but not soggy. Water thoroughly, allowing excess water to drain out.
- Ongoing Care: As the garlic grows, reduce watering slightly. Garlic prefers slightly dry conditions, especially when the bulbs begin to form.
Fertilizing
Garlic benefits from regular fertilization. Use an organic, balanced fertilizer every 4-6 weeks during the growing season. Look for fertilizers high in nitrogen, such as fish emulsion or blood meal, especially in the early stages of growth.
Step 6: Pest and Disease Management
While garlic is relatively pest-resistant, you should still keep an eye out for potential issues:
Common Pests
- Garlic Bloat Nematode: This pest can cause stunted growth. To manage, rotate your crops and ensure good drainage.
- Aphids: These pests can infest garlic, sucking the sap from the leaves. Spray with insecticidal soap or neem oil for control.
Diseases
- White Rot: A fungal disease that can affect garlic. Avoid planting garlic in the same spot for multiple years and ensure proper drainage.
- Downy Mildew: This can occur in humid conditions. Space plants adequately to improve airflow.
Step 7: Harvesting Garlic
Knowing when to harvest garlic is crucial for a successful yield. Here’s how to tell when your garlic is ready:
- Timing: Garlic is typically ready to harvest in late spring to early summer, around 8-9 months after planting.
- Visual Cues: When the lower leaves turn brown and dry while the upper leaves remain green, it’s time to harvest.
- Harvesting Method: Carefully dig up the bulbs using a garden fork or shovel, taking care not to damage them. Brush off excess soil but avoid washing them before curing.
Step 8: Curing and Storing Garlic
Curing is essential for extending the shelf life of garlic:
- Curing Process: Hang the harvested garlic in a cool, dry place with good airflow. You can also lay them flat on a mesh screen or wire rack.
- Duration: Allow the garlic to cure for 2-4 weeks until the skins are dry and papery.
- Storage: Once cured, store garlic in a cool, dark, and dry place. Avoid plastic bags, as they trap moisture. Instead, use mesh bags or baskets.
Step 9: Enjoy Your Homegrown Garlic!
Once you’ve successfully grown and cured your garlic, it’s time to enjoy the fruits of your labor. Fresh garlic can be used in various dishes, and it’s a great addition to any recipe that calls for garlic.
You can also share your homegrown garlic with friends and family or use it as a thoughtful gift.
Final Thoughts
Growing garlic in containers is a rewarding experience that brings fresh flavors to your kitchen while beautifying your living space. With just a little care and attention, you can enjoy a bountiful harvest of garlic right at home. So gather your supplies, follow the steps outlined in this guide, and start your garlic-growing adventure today!
Get your hands dirty, and watch your culinary creations come alive with the fresh taste of homegrown garlic! 🌱🧄
#GarlicGrowing #HomeGardening #ContainerGardening #FreshProduce #GrowYourOwnFood #GardenToTable