
Introduction
Orchids are exquisite plants known for their stunning, long-lasting blooms. To keep these beauties flourishing, repotting is an essential practice that ensures their roots have enough space and the right growing conditions. While it might seem daunting, repotting orchids is straightforward once you understand the process and the best times to do it. This guide will walk you through the steps of repotting your orchids, providing tips to help you rejuvenate your plant and keep it thriving.
Why Repot Orchids?
Repotting orchids serves several crucial purposes:
- Refreshes the Growing Medium: Over time, the potting mix can break down, losing its ability to drain well and retain nutrients. Fresh potting mix provides better aeration and nutrient availability.
- Prevents Root Overcrowding: As orchids grow, their roots can become cramped. Repotting allows you to untangle and trim the roots, giving them more space to expand.
- Encourages Healthy Growth: A new pot and fresh mix can stimulate growth and improve overall plant health, leading to more vigorous blooms.
- Addresses Root Health Issues: Repotting offers an opportunity to check for and address any root rot or damage, which can be hidden in the old potting mix.
When to Repot Orchids
Timing is important when repotting orchids. Here’s when you should consider repotting:
- After Blooming: The best time to repot orchids is after they have finished blooming. This is when the plant is not actively putting energy into flowering and can better handle the stress of repotting.
- Every 1-2 Years: Orchids generally need repotting every 1-2 years, depending on their growth rate and the condition of the potting mix. Some types of orchids might need repotting more frequently.
- When the Potting Mix Breaks Down: If you notice that the potting mix has decomposed into a mushy, compacted mess, it’s time for a change.
- Root Overcrowding: If you see roots growing out of the pot or through drainage holes, it’s a sign that the orchid needs more space.
Materials Needed for Repotting
Before you begin repotting, gather the following materials:
- New Pot: Select a pot that is 1-2 inches larger in diameter than the current one. Ensure it has adequate drainage holes.
- Potting Mix: Use a well-draining orchid mix, which may include bark, sphagnum moss, perlite, or a combination. Avoid regular potting soil, as it retains too much moisture for orchids.
- Tools: You’ll need clean scissors or pruning shears for trimming roots, and a small trowel or spoon for handling the potting mix.
- Water: Room-temperature water is ideal for moistening the potting mix and the orchid roots.
Step-by-Step Repotting Process
1. Choose the Right Time
Repot your orchid after it has finished its blooming cycle. This allows the plant to recover more quickly from the repotting stress.
2. Select a New Pot
Choose a pot that is slightly larger than the current one. Ensure the pot has good drainage holes to prevent waterlogging, which can cause root rot. The new pot should be just big enough to accommodate the orchid’s roots without leaving too much empty space.
3. Prepare the Potting Mix
Prepare the new potting mix by soaking it in water to moisten it slightly before use. This helps the mix settle more easily around the roots. If you are using a pre-made orchid mix, ensure it is well-draining and free from any clumps.
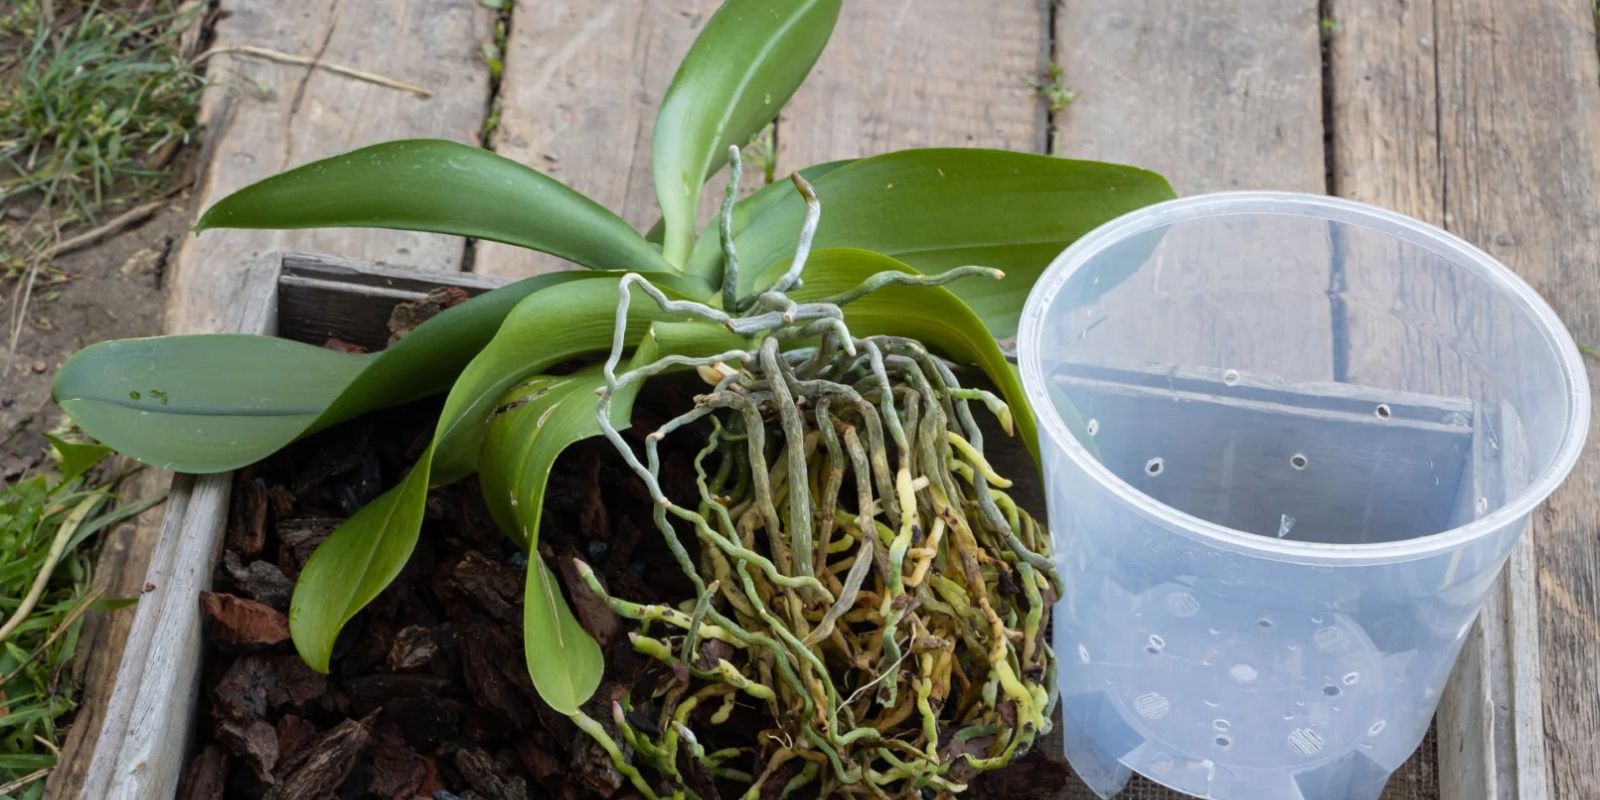
4. Remove the Orchid
Gently remove the orchid from its current pot. Carefully grasp the base of the plant and ease it out, supporting the root ball to prevent damage. If the plant is stuck, gently tap the sides of the pot or use a blunt knife to loosen the edges.
5. Clean and Trim the Roots
Once the orchid is out of the pot, examine the roots. Remove any old potting mix that is stuck to the roots. Trim away any dead or damaged roots using clean, sharp scissors or pruning shears. Healthy roots should be firm and white or light green, while unhealthy roots may be brown or mushy.
6. Repot the Orchid
Place a small amount of fresh potting mix into the bottom of the new pot. Position the orchid in the center of the pot and gently spread the roots out. Add more potting mix around the roots, gently pressing it down to eliminate air pockets. Be careful not to bury the orchid too deep; the base of the plant should be level with the top of the potting mix.
7. Water Thoroughly
Water the orchid thoroughly after repotting, allowing the excess water to drain out of the bottom of the pot. This helps settle the potting mix around the roots and ensures they receive adequate moisture.
8. Care After Repotting
Place the repotted orchid in a location with bright, indirect light. Avoid direct sunlight, which can stress the plant further. Maintain proper humidity levels and water the orchid as needed, allowing the potting mix to dry out slightly between waterings.
Common Repotting Mistakes to Avoid
1. Overpotting: Choosing a pot that is too large can lead to waterlogged soil and root rot. Stick to a pot that is just slightly larger than the current one.
2. Using the Wrong Potting Mix: Regular potting soil retains too much moisture for orchids. Use a specialized orchid mix for the best results.
3. Neglecting Root Health: Always inspect and trim the roots before repotting. Unhealthy roots can compromise the plant’s recovery.
4. Immediate Watering: Avoid watering the orchid excessively right after repotting. Allow the plant to adjust to its new environment before resuming regular watering.
Conclusion
Repotting your orchids is a vital part of their care routine, ensuring they have the space and fresh medium they need to thrive. By following these steps, you can rejuvenate your orchids, prevent common problems, and encourage vibrant blooms. Remember to choose the right time, use the appropriate materials, and handle the plant with care.
With these tips, you’ll be well-equipped to give your orchids a fresh start and enjoy their stunning beauty for years to come. What are your top tips for repotting orchids? Share your experiences and help others achieve thriving, beautiful orchids! 🌸