
Pruning roses may sound intimidating, but with a few simple guidelines, it can be one of the most rewarding tasks in your garden. When done correctly, pruning promotes healthier plants, more abundant blooms, and helps keep your rose bushes free from disease and pests. In this guide, we’ll take you through six essential steps to prune roses, ensuring your garden is filled with vibrant, fragrant roses all season long.
Why Prune Roses?
Roses naturally grow toward sunlight, and without pruning, they can become leggy and sparse. Pruning:
- Stimulates new growth
- Encourages larger, fuller blooms
- Reduces the risk of diseases and pests
- Shapes the plant for a more aesthetic appeal
Let’s dive into the step-by-step guide on how to prune your roses for maximum beauty and health.
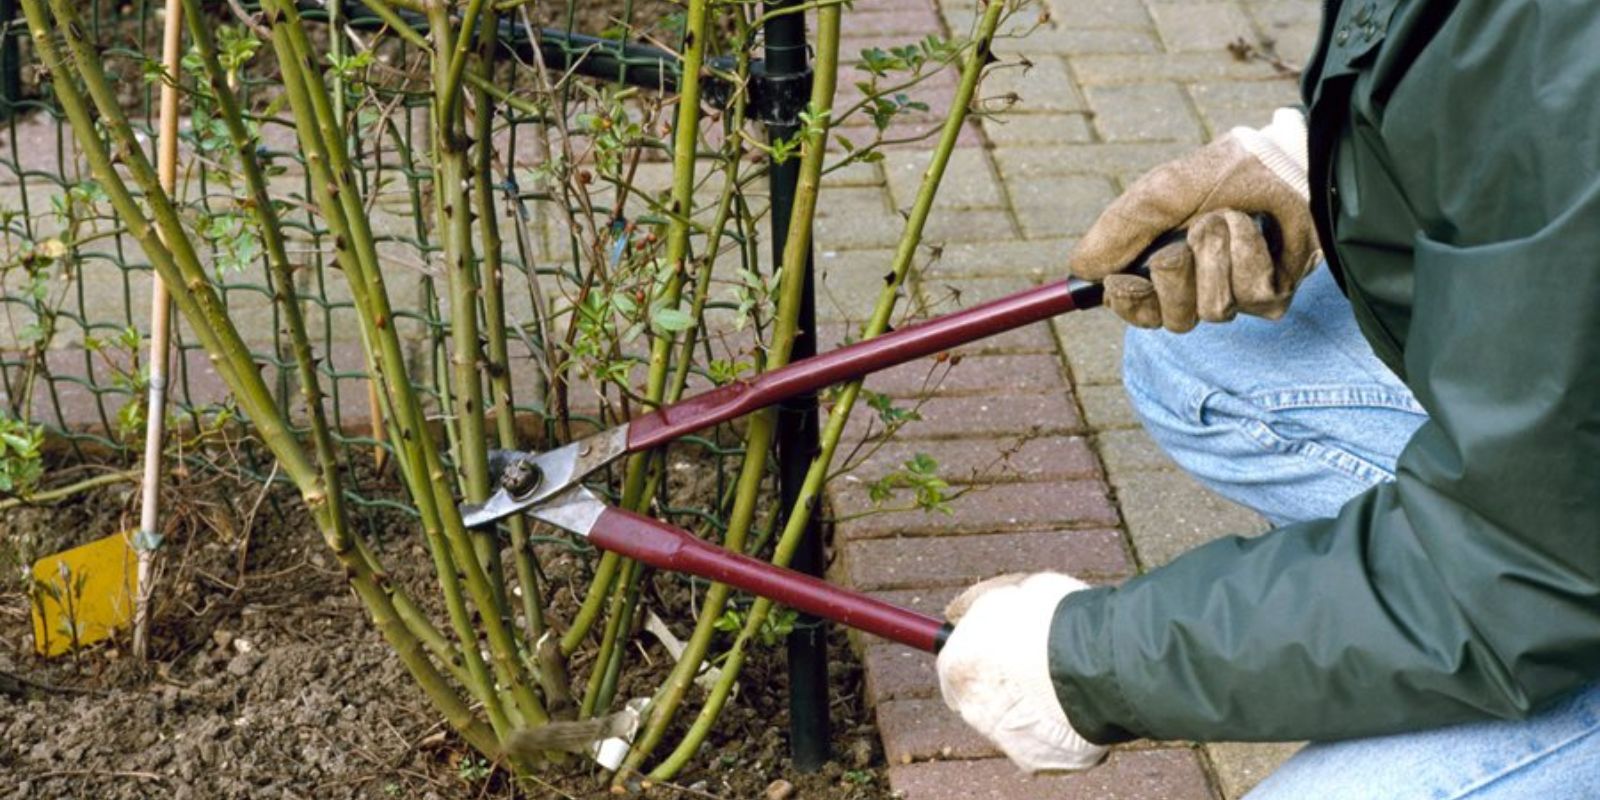
Step 1: Gather Your Tools
Having the right tools is essential for effective pruning. Here’s what you’ll need:
- Sharp Pruning Shears: Sharp, clean shears make neat cuts, which reduces the chance of infection.
- Gloves: Protects your hands from thorns.
- Disinfectant: Dip your tools in a disinfectant solution between cuts to prevent the spread of diseases.
- Bypass Loppers: For thicker branches that are too tough for regular shears.
Having your tools ready before you start helps make the process smooth and efficient, allowing you to prune with precision and care.
Step 2: Identify Dead, Damaged, or Diseased Branches
The first cuts you make should be on dead, damaged, or diseased parts of the plant. Removing these areas:
- Prevents the spread of disease
- Directs energy towards healthy growth
- Improves air circulation around the plant
Carefully inspect your rose bush for branches that look brown, shriveled, or have signs of rot. Prune these branches back to healthy wood. If a diseased branch is cut, disinfect your tools to avoid spreading it to healthy parts.
Step 3: Locate Outward-Facing Buds
A key to shaping your rose bush is to cut just above outward-facing buds. This approach has several benefits:
- Open Growth: An outward-facing bud encourages the branch to grow outward, creating a vase-like shape that maximizes airflow and light.
- Less Overlapping Growth: Reduces the chance of crossing branches that can rub together and create wounds vulnerable to infection.
Make your cut about ¼ inch above the bud at a 45-degree angle. Angled cuts help prevent water from collecting on the stem, reducing rot risks.
Step 4: Trim Weak or Spindly Growth
Weak or spindly growth is common in rose bushes but can make your plant look thin and underdeveloped. Removing these weak branches allows the plant to focus its energy on strong, productive stems that will yield bigger, healthier flowers. Look for thin, weak stems that don’t seem to support blooms well, and cut them away to strengthen the overall structure of the bush.
Step 5: Shape the Plant
One of the most satisfying parts of pruning is shaping your rose bush. This step isn’t only for aesthetics; it’s also important for the plant’s health. Here’s how to shape it properly:
- Aim for a vase-like shape with an open center. This design allows sunlight to reach the inner parts and improves airflow, helping reduce disease.
- Keep your cuts even for symmetry, which gives the rose bush a balanced, attractive appearance.
- Remove any crossing branches, as these can cause damage to each other.
Taking the time to shape your rose bush enhances its visual appeal and strengthens its overall structure.
Step 6: Clean Up Debris Around the Base
Once you’ve finished pruning, it’s essential to clean up any leaves, twigs, or cut branches around the base of the plant. This debris can:
- Harbor diseases
- Attract pests
- Hinder healthy growth
Clearing the area helps maintain a healthier garden environment, protecting your roses from common threats. Mulching around the base afterward is a great way to retain moisture and keep weeds at bay.
Timing Your Pruning
Knowing when to prune is crucial for successful rose care. Here’s a general guideline:
- Early Spring: Prune most roses in early spring, as they’re beginning to break dormancy and new growth appears. This timing allows the plant to maximize its blooming potential for the upcoming season.
- After the First Frost in Fall: For colder climates, a light prune in late fall after the first frost can help shape and prepare the rose bush for winter dormancy.
Avoid pruning in mid-fall or late summer, as this can stimulate new growth vulnerable to cold weather.
Additional Tips for Healthy, Blooming Roses
- Fertilize Regularly: Use a balanced rose fertilizer throughout the growing season for lush blooms.
- Water Consistently: Roses need about an inch of water per week. Water at the base of the plant to avoid wetting leaves, which can encourage fungal diseases.
- Monitor for Pests and Diseases: Keep an eye out for pests like aphids, spider mites, and fungal diseases. Treat early to prevent severe issues.
Final Thoughts
Pruning roses is an art, but with these simple steps, it’s easy to transform a neglected bush into a garden showstopper. A well-pruned rose bush will not only reward you with gorgeous blooms but will also stay healthier and last longer.
So, gather your tools, follow these steps, and enjoy the beauty of a blooming rose garden!
🌹 Have your own pruning tips or photos to share? Drop them below! Let’s inspire each other to grow beautiful, vibrant roses. 🌹