
Plant propagation is a skill every gardener should have in their arsenal. Not only is it a cost-effective way to expand your garden, but it also allows you to share your favorite plants with friends and family. Among the various methods, propagating plants from cuttings is one of the simplest and most rewarding techniques. In this comprehensive guide, we’ll explore everything you need to know about propagating plants from cuttings, from selecting the right plants to ensuring successful growth.
Why Propagate Plants from Cuttings?
Propagating plants from cuttings offers several benefits:
- Cost-Effective: Grow more plants without spending money on new seeds or nursery plants.
- Preserve Plant Traits: Ensure the new plants inherit the exact characteristics of the parent plant, such as flower color or growth habits.
- Quick Results: Unlike growing plants from seeds, cuttings establish and grow faster.
- Eco-Friendly: Reusing parts of existing plants reduces waste and promotes sustainable gardening.
Types of Plant Cuttings
Before you begin, it’s essential to understand the types of cuttings and their suitability for different plants:
- Stem Cuttings: Taken from the plant’s stem, this is the most common method. Suitable for plants like roses, pothos, and geraniums.
- Leaf Cuttings: Used for plants like succulents, begonias, and African violets, where a leaf can generate new growth.
- Root Cuttings: Ideal for woody perennials and trees like figs or raspberries.
- Softwood vs. Hardwood Cuttings:
- Softwood Cuttings: Taken from new growth during spring or early summer.
- Hardwood Cuttings: Taken from mature stems during fall or winter.
Step-by-Step Guide to Propagating Plants from Cuttings
1. Choose the Right Plant and Cutting
Healthy parent plants are essential for successful propagation.
- Look for a plant that is disease-free and thriving.
- Select a stem with at least 4-6 inches of healthy growth.
2. Make a Clean Cut
A clean, precise cut improves the chances of successful rooting.
- Use sterilized scissors or pruning shears to avoid transmitting diseases.
- Cut just below a leaf node (the point where leaves attach to the stem), as this is where roots are most likely to form.
3. Prepare the Cutting
Proper preparation sets the stage for growth.
- Remove leaves from the bottom two-thirds of the stem. This prevents rotting when the cutting is placed in water or soil.
- Trim any flowers or buds to allow the plant to focus its energy on root development.
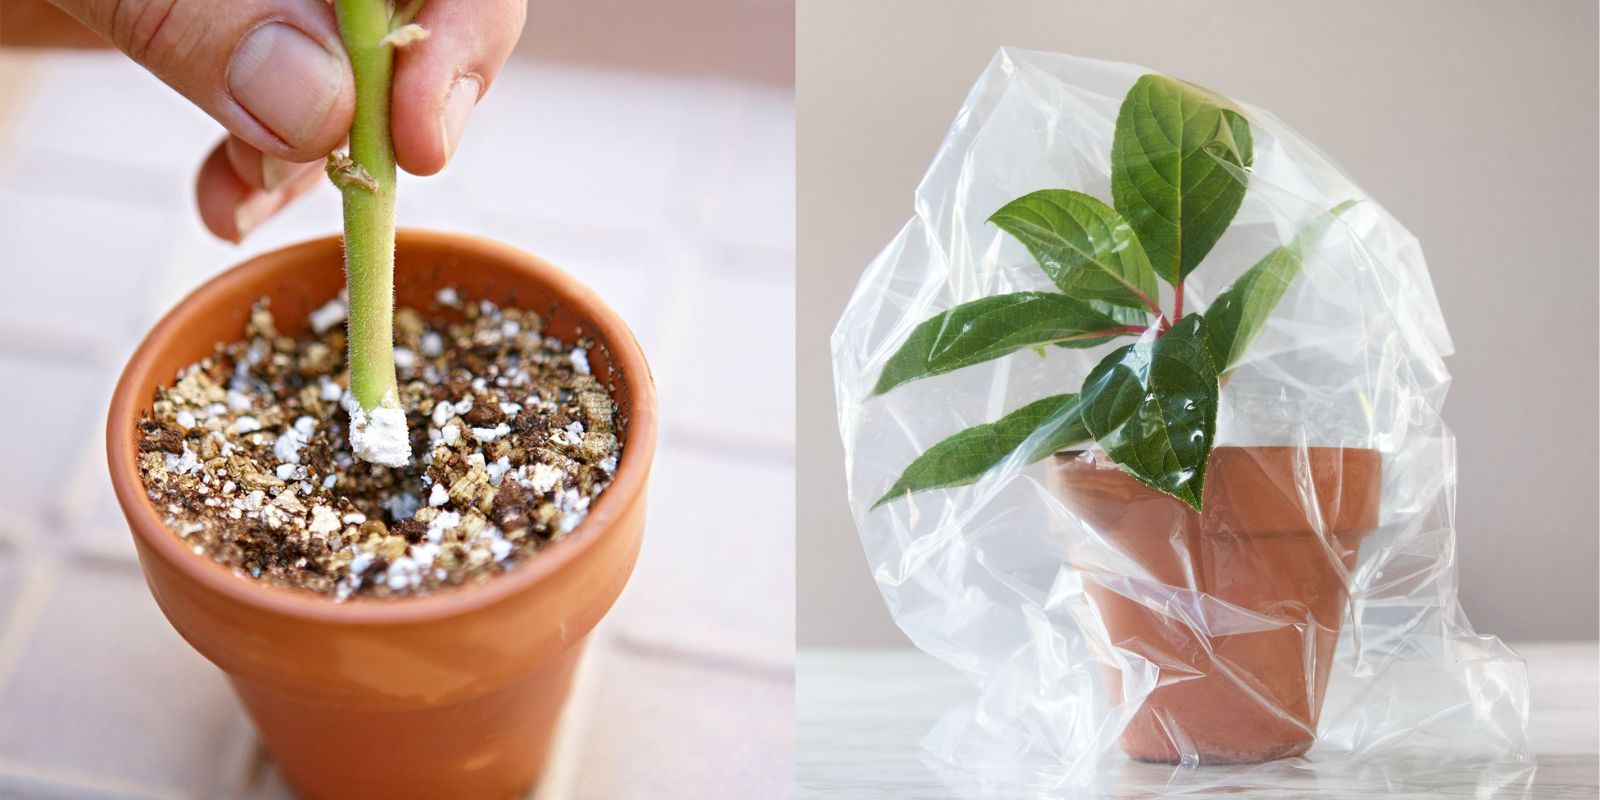
4. Optional: Use Rooting Hormone
While not mandatory, rooting hormone can speed up the rooting process.
- Dip the cut end of the stem into a rooting hormone powder or gel.
- Gently tap off the excess before planting.
5. Choose a Growing Medium
The choice of growing medium depends on the plant type and your preferences:
- Water: Place the cutting in a clean jar filled with water, ensuring that the leaves remain above the water level.
- Soil: Use a well-draining potting mix, such as one with a combination of peat and perlite.
- Coco Peat: Ideal for moisture retention and aeration.
6. Provide the Right Environment
Creating the ideal conditions is crucial for successful propagation.
- Light: Place the cutting in bright, indirect sunlight. Avoid direct sunlight, which can dry out the cutting.
- Humidity: Cover the cutting with a clear plastic bag or place it in a mini greenhouse to maintain humidity.
- Temperature: Most cuttings thrive in temperatures between 65-75°F (18-24°C).
7. Watering and Monitoring
Keep the growing medium moist but not waterlogged.
- For water propagation, change the water every few days to keep it fresh.
- For soil propagation, water only when the top layer feels dry.
8. Wait for Roots to Develop
Patience is key during this stage.
- Root formation typically takes 2-4 weeks, depending on the plant species and conditions.
- Check for resistance when you gently tug on the cutting—this indicates that roots are forming.
9. Transplant the Cutting
Once the roots are about 2-3 inches long, the cutting is ready for transplantation.
- Choose a larger pot or plant directly in the garden with well-draining soil.
- Water thoroughly after transplanting and place in partial shade for a few days to help it acclimate.
Common Mistakes to Avoid
- Overwatering: Excess moisture can lead to rot and fungal issues.
- Skipping Sterilization: Unclean tools can introduce bacteria and diseases to the cutting.
- Improper Light: Too much or too little light can hinder root development.
- Impatience: Disturbing the cutting too frequently to check for roots can damage delicate growth.
Tips for Specific Plants
- Succulents: Allow the cutting to dry for a day or two before planting to prevent rot.
- Herbs (e.g., Basil, Mint): Water propagation works exceptionally well for soft-stemmed herbs.
- Woody Plants (e.g., Roses, Figs): Use hardwood cuttings and rooting hormone for better results.
The Joy of Propagation
Propagating plants from cuttings isn’t just about growing your garden—it’s a journey of discovery and connection with nature. Watching a cutting transform into a thriving plant is incredibly rewarding, making you feel like a true green thumb.
Conclusion
Propagating plants from cuttings is an accessible and enjoyable way to expand your garden, share plants with loved ones, or preserve a cherished plant. By following these simple steps and avoiding common pitfalls, you can master this skill and bring your propagation dreams to life.
Motivation:
Ready to get started? Grab some scissors, take a cutting, and grow your garden! Share your propagation tips and success stories with us—let’s inspire each other! 🌿
#PlantPropagation #GardeningHacks #GreenThumb #GrowYourOwn #PropagationTips #SustainableGardening #GardeningCommunity