
Orchids are among the most captivating and diverse plants, admired for their stunning flowers and unique growth habits. Propagating orchids can be a rewarding experience, allowing gardeners to expand their collection or share the beauty with friends and family. This comprehensive guide will provide you with everything you need to know to successfully propagate orchids, from selecting the right plant to nurturing the new growth.
Understanding Orchid Propagation
Orchid propagation involves creating new plants from existing ones. This process can be accomplished through several methods, including division, keikis, and tissue culture. In this guide, we’ll focus on the most accessible methods for home gardeners: division and keiki propagation.
1. Choose the Right Orchid for Propagation
The first step in orchid propagation is selecting a suitable parent plant. Ideal candidates for propagation are healthy orchids with multiple stems or bulbs. Phalaenopsis (moth orchids) and Dendrobium orchids are excellent choices due to their relatively straightforward propagation processes.
Tips for Selecting a Parent Orchid:
- Health: Choose a plant that is free from pests and diseases.
- Maturity: Ensure the plant is mature enough to produce viable offshoots or keikis.
- Growth: Look for orchids with multiple growth points or stems.
2. Prepare Your Tools and Workspace
Having the right tools and a clean workspace is crucial for successful orchid propagation.
Essential Tools:
- Pruning Shears or Sterilized Knife: For cutting offshoots or keikis.
- Potting Mix: Use a specialized orchid mix, typically composed of bark, perlite, and sphagnum moss.
- Sterilizing Solution: To disinfect your tools and prevent disease.
Preparing Your Workspace:
- Clean and Sterilize: Ensure your tools and work surface are clean and sterilized to prevent contamination.
- Gather Supplies: Have all necessary materials within reach to streamline the process.
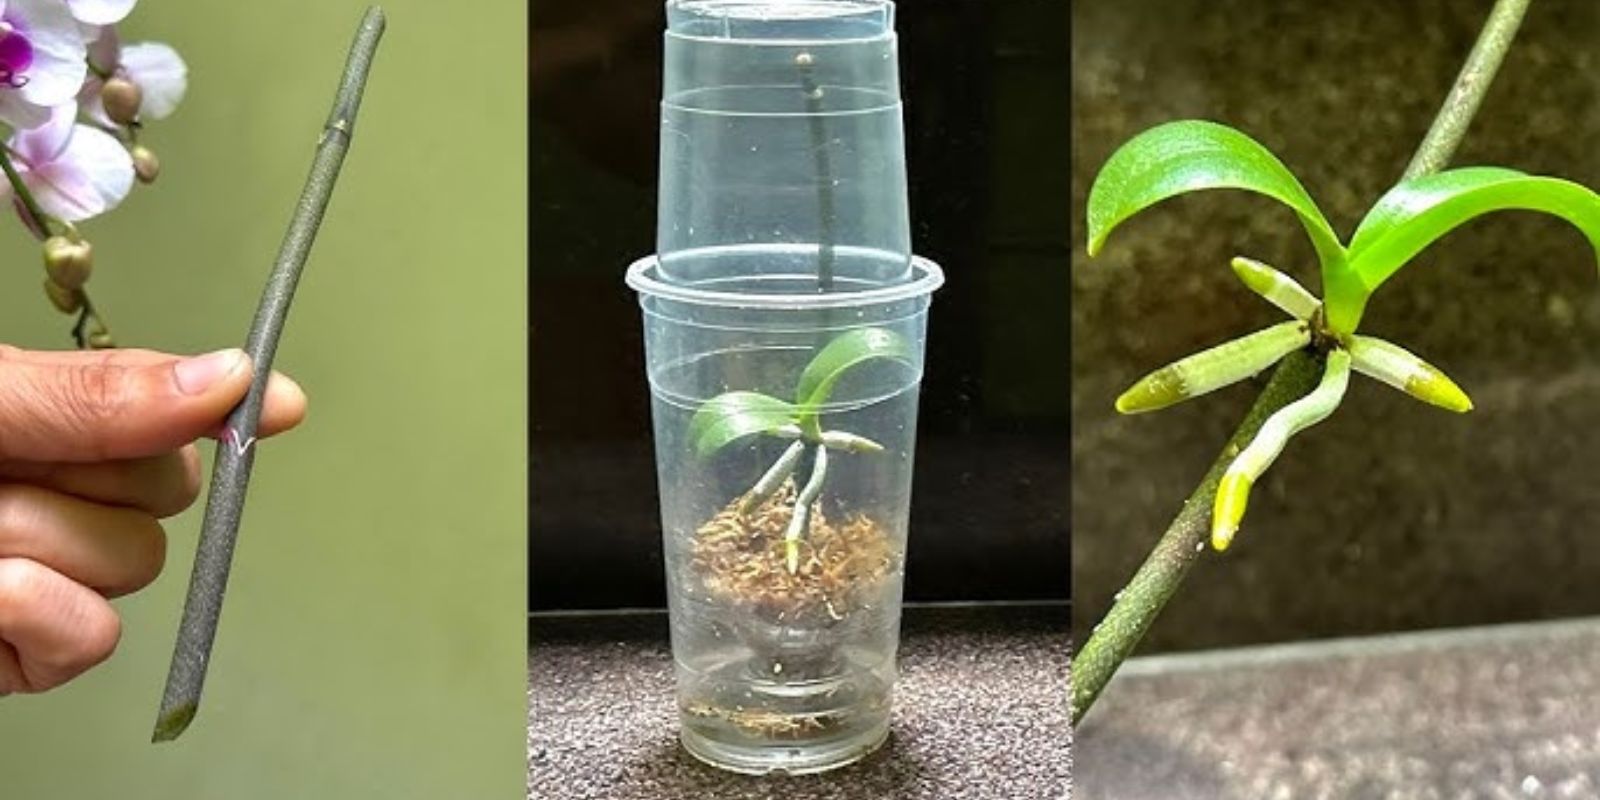
3. Propagation Through Keikis
Keikis, or “babies,” are miniature plants that grow on the parent orchid. This method is particularly effective for Phalaenopsis and Dendrobium orchids.
Steps to Propagate Keikis:
- Identify Keikis: Look for small, healthy offshoots with roots growing from the flower spike or stem.
- Detach Keikis: Using sterilized tools, gently separate the keiki from the parent plant. Ensure it has a few roots attached.
- Pot the Keiki: Place the keiki in a small pot with orchid potting mix. Press the mix gently around the roots to provide stability.
- Care for the Keiki: Water lightly and maintain high humidity around the plant. Provide bright, indirect light and monitor for pests or diseases.
4. Propagation Through Division
Division involves separating the parent plant into multiple sections, each with roots and stems. This method is suitable for orchids like Cymbidium and Oncidium.
Steps to Propagate by Division:
- Remove the Orchid from the Pot: Gently take the plant out of its pot and inspect the root system.
- Separate the Sections: Using a sterilized knife or shears, divide the plant into sections, ensuring each has roots and at least one stem or bulb.
- Pot Each Division: Place each section in a new pot with fresh orchid potting mix. Firm the mix around the roots but avoid compacting it too tightly.
- Water and Care: Water each newly potted section lightly and keep them in a location with bright, indirect light. Increase humidity to help them acclimate.
5. General Care for Newly Propagated Orchids
Proper care is essential for the successful establishment of propagated orchids. Follow these guidelines to ensure healthy growth:
- Watering: Keep the potting mix moist but not soggy. Water when the top inch of soil feels dry.
- Humidity: Maintain high humidity around the plants. You can use a humidity tray or a plastic dome.
- Light: Provide bright, indirect light. Avoid direct sunlight, which can cause leaf burn.
- Fertilizing: Use a balanced orchid fertilizer according to the manufacturer’s instructions. Fertilize every 2-4 weeks during the growing season.
6. Troubleshooting Common Issues
Even with the best care, propagated orchids may encounter issues. Here are solutions to common problems:
- Yellowing Leaves: This can indicate overwatering or nutrient deficiencies. Adjust watering practices and check for proper fertilization.
- Root Rot: Caused by excessive moisture, root rot can be prevented by ensuring proper drainage and avoiding waterlogged conditions.
- Pests: Watch for pests like aphids or spider mites. Use insecticidal soap or neem oil to treat infestations.
7. Patience and Persistence
Orchid propagation requires patience. It can take several months for keikis or divisions to establish and begin showing new growth. Stay attentive to their needs and provide consistent care.
Conclusion
Propagating orchids is a gratifying way to expand your collection or share the beauty of these remarkable plants. By following these steps and providing attentive care, you can successfully grow new orchids from existing ones. Embrace the process, and enjoy the satisfaction of nurturing beautiful new blooms in your garden.
Motivation: Ready to propagate your own orchids and watch them flourish? Dive into the process with this guide, and transform your garden with stunning new blooms! 🌿🌸
Hashtags: #OrchidPropagation #GardenTips #OrchidCare #PlantLovers #GreenThumb #OrchidMagic #GrowYourOwn #FloralBeauty