
Lemon trees are a joy to grow, offering lush green leaves, fragrant blossoms, and the reward of juicy, tangy lemons. While buying a mature lemon tree is an option, propagating one from cuttings is not only cost-effective but also deeply rewarding. And with a tissue paper method that boasts nearly 100% success, even beginners can achieve thriving lemon tree cuttings.
This article takes you step by step through this simple propagation method, ensuring you’ll soon have your very own lemon tree growing happily at home.
Why Propagate Lemon Trees from Cuttings?
Propagation is a technique that allows you to grow a new tree from a branch of an existing one. For lemon trees, this means you can replicate a tree with exceptional fruit quality, saving time compared to growing from seed. Additionally:
- Quicker Results: A propagated tree will bear fruit faster than one grown from seed.
- Cost-Effective: No need to buy a new plant—just use a cutting from an established tree.
- Sustainable Gardening: Propagation is an eco-friendly way to expand your garden.
What You’ll Need
Before diving in, gather the following tools and materials:
- A healthy lemon tree for cuttings.
- Clean, sharp pruning shears or scissors.
- Tissue paper (absorbent type).
- A small plastic bag or container.
- A spray bottle with water.
- Well-draining potting soil for planting later.
- A small pot for transplantation.
Step-by-Step Guide to Propagate Lemon Trees Using Tissue Paper
1. Select the Perfect Cutting
Start by choosing a semi-hardwood branch from a healthy lemon tree. Semi-hardwood is ideal because it’s neither too soft nor too mature, offering the best balance for rooting. Look for a branch that:
- Is about 6–8 inches long.
- Has at least 3–4 healthy leaves.
- Shows no signs of disease or damage.
Using clean pruning shears, make a precise cut at a 45-degree angle to maximize the surface area for rooting.
2. Prepare the Cutting
Preparation is key to ensure your cutting is ready for propagation:
- Remove the leaves from the lower half of the cutting, leaving only the top 2–3 leaves intact.
- If available, dip the base of the cutting into rooting hormone to accelerate root development (optional but helpful).
3. Wrap with Moist Tissue Paper
This is where the tissue paper method comes into play.
- Dampen a piece of tissue paper with water. Ensure it’s moist but not overly wet to avoid suffocating the cutting.
- Wrap the tissue paper securely around the base of the cutting, covering the area where roots are expected to form.
4. Create a Humid Environment
Place the wrapped cutting into a plastic bag or container to retain moisture and humidity.
- Loosely seal the bag or cover the container, allowing some airflow.
- Place the setup in a spot with indirect sunlight, as direct sunlight can cause the cutting to dry out or overheat.
5. Monitor and Maintain
Over the next 3–4 weeks, your cutting will begin to develop roots. Here’s how to care for it during this period:
- Check the tissue paper every few days to ensure it remains moist. Spray with water if it begins to dry out.
- Watch for any signs of mold or decay, which can occur if the environment is too wet.
- Avoid disturbing the cutting too much, as this can disrupt the rooting process.
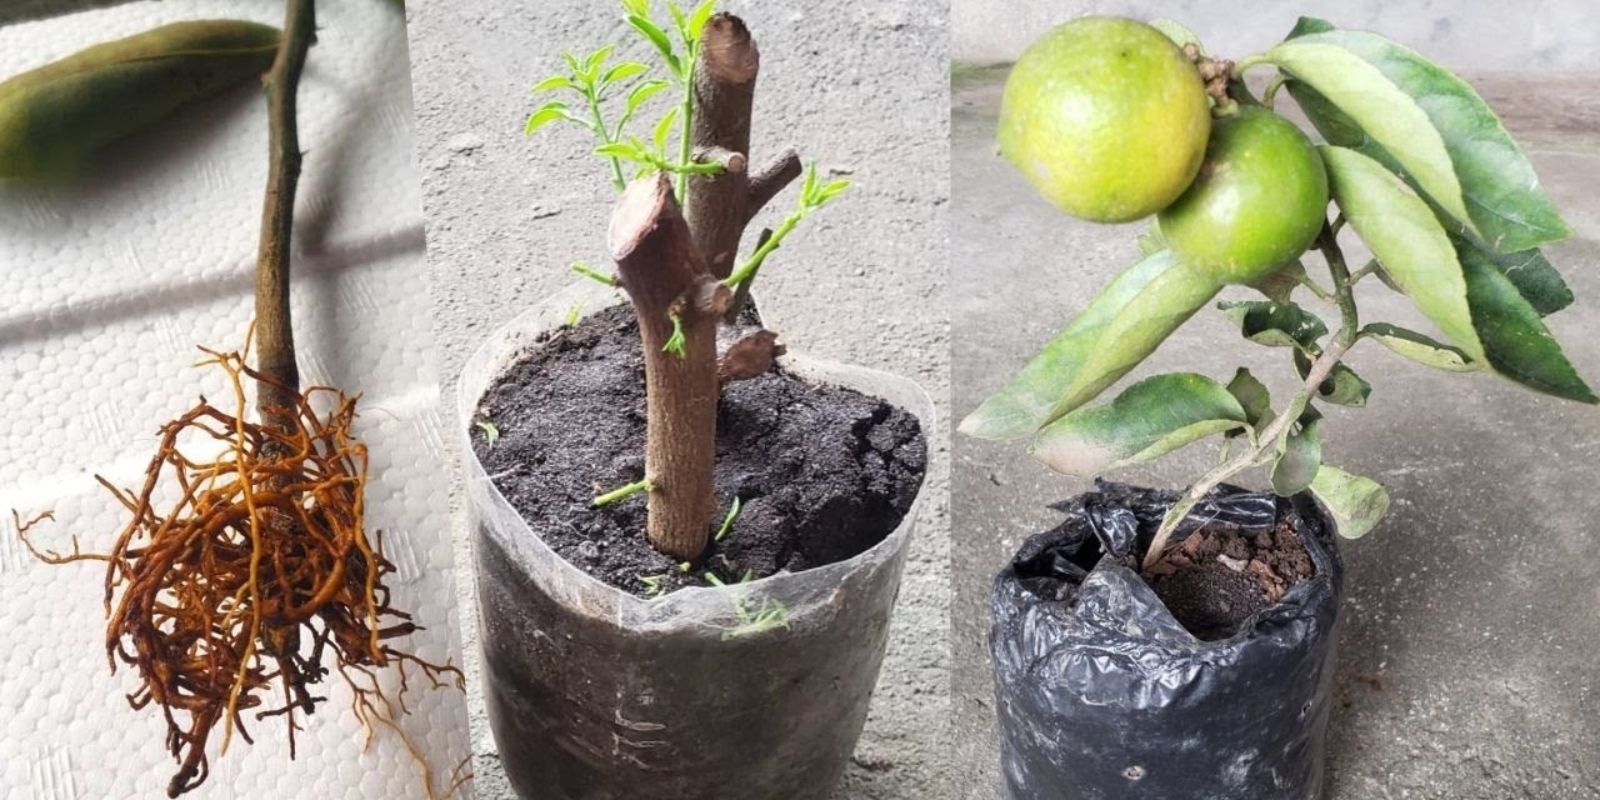
6. Check for Roots
After 3–4 weeks, gently unroll the tissue paper to inspect the base of the cutting. If you see white roots beginning to sprout, congratulations! Your cutting is ready for the next step.
7. Transplant into Soil
Once roots are visible, transfer the cutting to a small pot filled with well-draining soil.
- Dig a small hole in the soil and gently place the cutting inside, ensuring the roots are covered but the leaves remain above the soil.
- Water the soil lightly to settle it around the roots.
8. Care for the Young Tree
To help your new lemon tree grow strong and healthy, follow these care tips:
- Place the pot in a bright location with indirect sunlight.
- Water sparingly but consistently, keeping the soil moist but not soggy.
- Avoid fertilizing until the plant is well established (after about 2–3 months).
Common Challenges and How to Overcome Them
Propagating lemon trees is generally straightforward, but here are some common issues and solutions:
- Tissue Paper Drying Out: Check moisture levels regularly and mist with water as needed.
- Mold Growth: Ensure the tissue paper is moist but not overly wet, and allow some airflow in the plastic bag or container.
- Cutting Fails to Root: Try again with fresh cuttings, ensuring you select healthy, semi-hardwood branches.
Benefits of Tissue Paper Propagation
Why is this method so effective?
- Consistent Moisture: The tissue paper provides a stable environment for rooting without the risk of overwatering.
- Accessible for Beginners: Requires no special equipment or expensive materials.
- High Success Rate: When done correctly, this method significantly increases the chances of successful rooting.
When Will My Lemon Tree Bear Fruit?
A propagated lemon tree typically takes 3–5 years to bear fruit. However, with proper care, you’ll enjoy the benefits of a thriving tree much sooner.
Final Thoughts
Propagating lemon trees from cuttings using tissue paper is a game-changing technique that combines simplicity with high success rates. Whether you’re an experienced gardener or just starting, this method allows you to grow your very own lemon tree and enjoy the satisfaction of nurturing it from a single cutting.
🌟 Have you tried propagating lemon trees? Share your experience in the comments or tag a friend who loves citrus!