
Growing your lemon tree from a cutting is a gratifying and budget-friendly way to enjoy the lush foliage and tangy fruit of citrus plants. Whether you’re a seasoned gardener or a novice, propagating lemon trees can become one of your favorite gardening activities. This article dives deep into the science, benefits, and step-by-step process of propagating lemon trees from cuttings.
Why Propagate Lemon Trees from Cuttings?
- Cost-Effective Gardening:
Buying a mature lemon tree can be expensive. Growing one from a cutting allows you to expand your garden without breaking the bank. - Guaranteed Quality:
Lemon tree cuttings produce plants that are genetically identical to the parent tree. This means if the parent tree produces juicy, flavorful lemons, your propagated tree will too! - Eco-Friendly Practice:
Propagation reduces waste and encourages sustainable gardening. Using existing plant material to grow new plants is a green way to expand your garden. - Faster Growth:
Compared to starting from seed, cuttings develop into mature fruit-bearing trees faster since they skip the juvenile growth stage.
The Ideal Time to Propagate Lemon Trees
The best time to propagate lemon trees is during the spring or early summer. During this period, the tree is actively growing, and cuttings are more likely to root successfully.
What You’ll Need for Propagation
- A healthy, mature lemon tree
- Pruning shears or a sharp knife
- Rooting hormone (optional but recommended)
- Small pots or containers with drainage holes
- Well-draining potting mix
- A clear plastic bag or plastic bottle (for humidity)
- Water spray bottle
Step-by-Step Process to Propagate Lemon Trees from Cuttings
Step 1: Select a Healthy Cutting
Choose a robust branch from a mature lemon tree. Look for semi-hardwood branches that are neither too soft nor too woody. The cutting should be about 6–8 inches long and have at least three nodes (the points where leaves emerge).
Step 2: Prepare the Cutting
- Use sterilized pruning shears or a knife to make a clean cut.
- Remove all leaves from the lower half of the cutting, leaving a few at the top.
- Optional: Dip the cut end into rooting hormone to encourage faster root development.
Step 3: Prepare the Soil
- Fill a small pot with well-draining potting mix. You can use a mixture of sand, perlite, and compost for the best results.
- Water the soil lightly to make it moist but not soggy.
Step 4: Plant the Cutting
- Use your finger or a stick to create a hole in the soil.
- Gently insert the cutting into the hole, ensuring at least 2–3 inches of the cutting is buried.
- Firmly press the soil around the cutting to secure it.
Step 5: Create a Humid Environment
- Cover the cutting with a clear plastic bag or use the top half of a plastic bottle as a makeshift greenhouse. This helps retain humidity, which is essential for rooting.
- Ensure the cover does not touch the cutting to prevent fungal issues.
Step 6: Provide Optimal Conditions
- Place the pot in a warm spot with indirect sunlight. Too much direct sunlight can stress the cutting.
- Maintain a temperature between 68°F and 77°F (20°C–25°C) for the best results.
Step 7: Water Regularly
- Check the soil frequently to ensure it remains moist but not waterlogged.
- Use a spray bottle to mist the soil lightly if it starts to dry out.
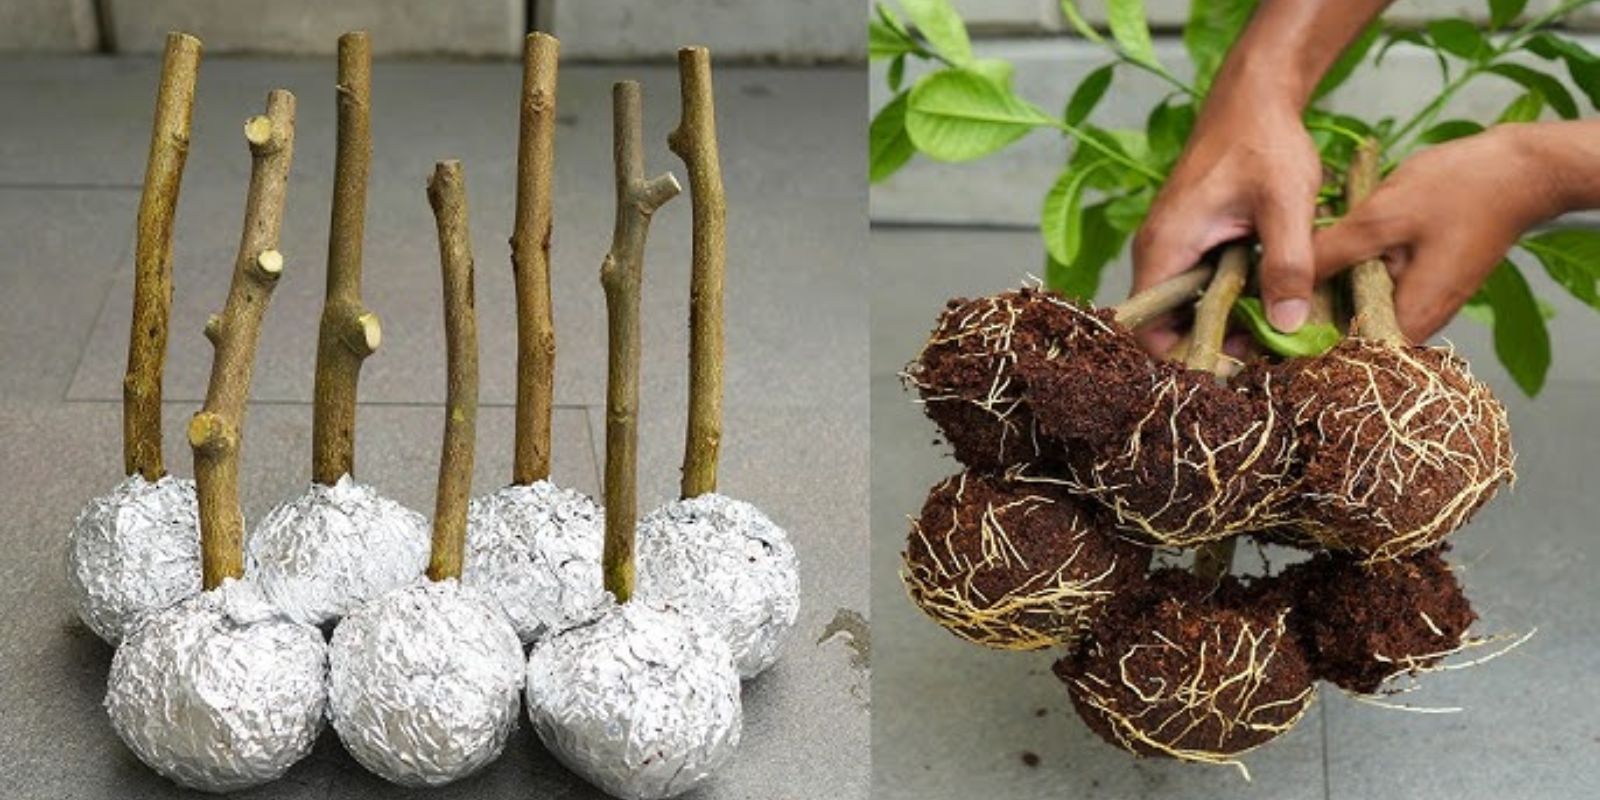
Step 8: Monitor Root Growth
- After 4–6 weeks, gently tug the cutting to check for resistance. If you feel resistance, roots have developed.
Step 9: Transplanting the Cutting
- Once the cutting has established roots, transplant it into a larger pot or your garden.
- Choose a sunny spot with well-draining soil.
- Water the transplanted cutting deeply to help it settle into its new environment.
Tips for Success
- Choose the Right Parent Tree:
Always take cuttings from a healthy, disease-free tree with good fruit production. - Patience is Key:
Rooting can take several weeks. Avoid disturbing the cutting too frequently during this period. - Protect from Pests:
Keep an eye out for pests like aphids or spider mites. Treat infestations promptly to prevent damage. - Fertilize Wisely:
Once the cutting is established, feed it with a balanced citrus fertilizer to support healthy growth. - Avoid Overwatering:
While it’s essential to keep the soil moist, too much water can cause root rot.
Common Mistakes to Avoid
- Using Woody Branches:
Hardwood cuttings have a lower success rate than semi-hardwood cuttings. - Skipping Rooting Hormone:
While optional, rooting hormone significantly increases the chances of success, especially for beginners. - Neglecting Humidity:
Low humidity levels can cause the cutting to dry out before roots form. - Overexposure to Sunlight:
Newly propagated cuttings are delicate and can scorch under direct sunlight.
The Joy of Growing Your Own Lemon Tree
Propagating lemon trees from cuttings is not just a gardening task—it’s a journey. Watching a small cutting transform into a flourishing tree that bears fragrant blooms and zesty lemons is incredibly satisfying. It’s a sustainable practice that contributes to a greener world while giving you access to fresh, homegrown citrus fruits.
Engage with Us!
Have you tried propagating lemon trees before? Share your experiences, tips, or questions in the comments below. Let’s grow together!
#LemonTreePropagation #GardeningHacks #CitrusLovers #SustainableGardening #GrowYourOwnFood #PlantPropagation #GreenThumb #DIYGardening