
Cypress and Thuja trees, often referred to as arborvitae, are iconic evergreens that add elegance and structure to gardens, landscapes, and yards. Their dense foliage and attractive shape make them popular choices for privacy hedges, windbreaks, and aesthetic focal points. What if you could expand your collection of these magnificent trees without purchasing new ones? The answer lies in propagation, a method that allows gardeners to grow new trees from cuttings. In this article, we’ll walk you through the step-by-step process of propagating Cypress and Thuja trees using a simple, effective method that anyone can try at home.
Why Propagate Cypress and Thuja Trees?
Before diving into the propagation technique, let’s understand why Cypress and Thuja trees are so desirable for propagation. These trees have several benefits:
- Evergreen Beauty: Both Cypress and Thuja are evergreen, providing year-round beauty with their vibrant foliage.
- Privacy and Screening: Many gardeners use these trees as natural fences or privacy screens due to their fast-growing and dense growth habit.
- Landscape Aesthetics: Their pleasing conical or pyramid shapes enhance the aesthetics of any garden, whether planted alone or in rows.
- Low Maintenance: Once established, these trees are relatively low maintenance, requiring little care aside from occasional pruning.
By propagating Cypress and Thuja, you can easily create more plants, whether you want to create a privacy hedge or simply expand your garden’s beauty without spending extra money.
The Best Time to Propagate Cypress and Thuja
The timing of propagation plays a crucial role in the success of rooting. The best period to propagate Cypress and Thuja is during late summer or early autumn, when the trees are still actively growing but the growth rate has slowed. This timing strikes a balance between the active growth needed for successful rooting and avoiding the stress of extreme heat or cold.
Why Late Summer or Early Autumn?
- Slower Growth: During this time, the trees’ growth slows, making it easier for the cuttings to form roots without competing with the plant’s rapid growth.
- Ideal Temperature: The moderate temperatures during late summer and early autumn (around 20-25°C or 68-77°F) encourage rooting without the stress of high heat.
- Transition to Dormancy: This period is just before the trees enter dormancy in the colder months, allowing the cuttings to focus on root development before the winter.
Materials Needed for Propagating Cypress and Thuja
To propagate Cypress and Thuja trees successfully, you’ll need a few basic materials. Here’s a list to get you started:
- Healthy Cypress or Thuja Branches: Choose healthy, robust branches from mature trees. Avoid any branches that show signs of disease, damage, or poor growth.
- Sharp Pruning Shears: To ensure clean cuts that won’t damage the cutting, use sharp pruning shears.
- Rooting Hormone (Optional): While rooting hormone is optional, it can greatly enhance the success rate of propagation by stimulating root growth.
- Small Pots or Containers: These will house your cuttings during the rooting process. Make sure they have good drainage to avoid waterlogging.
- Peat and Sand Mixture or Well-Draining Potting Soil: Cypress and Thuja cuttings require well-draining soil to thrive. A mix of peat and sand is ideal.
- Plastic Wrap or Clear Plastic Bags: These help to maintain humidity around the cuttings, mimicking a greenhouse effect.
- Watering Can or Spray Bottle: A gentle watering method is crucial for keeping the soil moist without oversaturating it.
Step-by-Step Guide to Propagating Cypress and Thuja
Now that you have all the materials ready, let’s go through the step-by-step process of propagating Cypress and Thuja trees.
Step 1: Choose the Right Cutting Time
As mentioned earlier, the best time to take cuttings is in late summer or early autumn. When choosing your branches, look for healthy, disease-free growth from the current season. These younger branches tend to root better than older, woody growth.
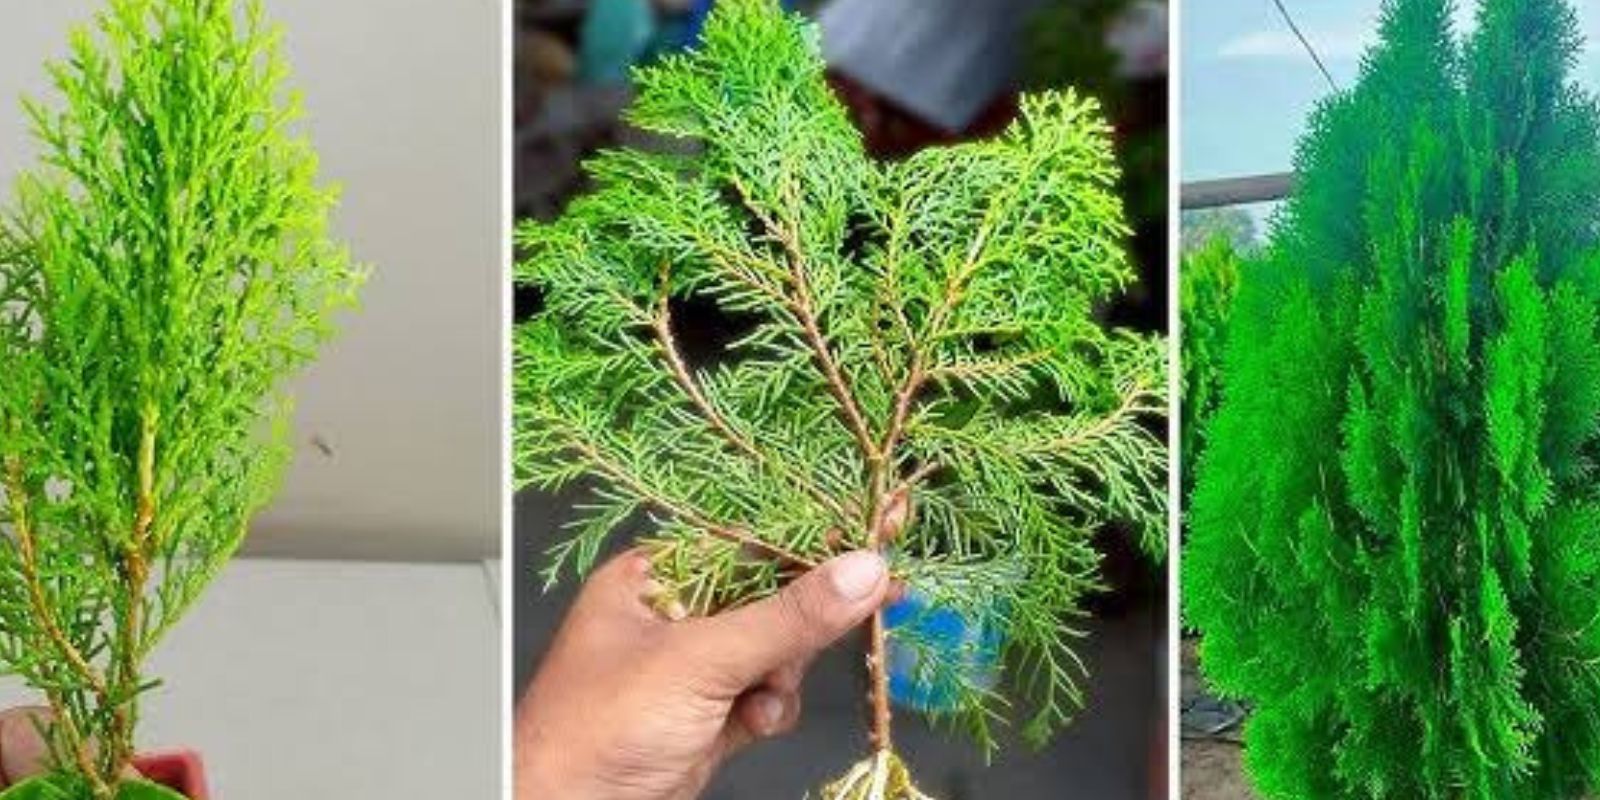
Step 2: Cut Healthy 10-15 cm Long Cuttings
Using sharp pruning shears, cut a 10-15 cm (4-6 inches) long section from a healthy branch. Make the cut just below a leaf node (the point on the branch where leaves or new growth emerge). This is critical as roots will form more easily from this area.
Step 3: Remove Needles from the Lower Half of the Cutting
Next, remove the needles or leaves from the lower half of the cutting. This step is important because it creates space for roots to develop and also reduces moisture loss from the cutting. Make sure to leave the top portion of the cutting with a few healthy leaves or needles.
Step 4: Apply Rooting Hormone (Optional)
If you wish, dip the bottom of the cutting in rooting hormone. This product helps speed up the root development process and can significantly increase the chances of success. Simply dip the cut end into the hormone powder and gently tap off any excess.
Step 5: Prepare the Pots and Soil
Fill your small pots or containers with a well-draining soil mix. A mix of peat and sand is ideal, as it allows for proper drainage and aeration. Make sure the containers have drainage holes to prevent waterlogging.
Step 6: Insert the Cutting into the Soil
Insert the prepared cutting into the soil, burying the lower half (where you removed the needles) about 5 cm (2 inches) deep. Gently press the soil around the cutting to ensure it is secure. This helps keep the cutting stable and prevents it from shifting out of position.
Step 7: Water the Cuttings Gently
Once the cuttings are planted, water them gently to keep the soil moist but not soggy. Overwatering can lead to rotting, so it’s important to maintain a balance. Make sure the water drains well from the pots to prevent standing water.
Step 8: Cover the Cuttings to Maintain Humidity
To encourage root growth, cover the cuttings with a clear plastic bag or plastic wrap. This creates a mini-greenhouse effect that maintains high humidity around the cuttings. However, be sure to leave small holes or openings to allow for some airflow and avoid mold formation.
Step 9: Place the Pots in a Bright, Indirect Light Location
Set the pots in a bright, but indirect light area. Direct sunlight can cause the cuttings to dry out, so a well-lit spot with filtered light is perfect. Also, keep the temperature around 20-25°C (68-77°F), as this range encourages optimal root development.
Step 10: Maintain Moisture and Humidity
Check the cuttings regularly and water them as needed to keep the soil slightly moist. Open the plastic cover for a few minutes each day to provide ventilation and reduce the chance of mold. It’s also important to monitor the humidity, keeping it high to stimulate root formation.
Step 11: Wait for Roots to Develop
It can take several weeks for the cuttings to root. After about 3-4 weeks, you should feel a bit of resistance when gently tugging on the cuttings, which indicates that roots are forming. At this point, gradually remove the plastic cover to acclimate the cuttings to normal air humidity.
Step 12: Transplant the Rooted Cuttings
Once the cuttings have developed strong roots, they are ready to be transplanted into larger pots or directly into the ground. If you’re transplanting them into the ground, make sure the weather is suitable, and the soil is well-prepared for young trees.
Final Thoughts on Cypress and Thuja Propagation
Propagating Cypress and Thuja trees is a rewarding and cost-effective way to expand your garden or create a privacy hedge. By following these simple steps and being patient, you can grow beautiful, healthy trees from cuttings and enjoy the process of watching them thrive.
Whether you’re a seasoned gardener or a beginner, this propagation technique offers a simple method to grow your own evergreens and enhance your landscape. Happy gardening, and may your Cypress and Thuja trees grow strong and tall!
Have you tried propagating Cypress or Thuja? Share your experiences and tips with us in the comments below!