
Basil is more than just a culinary herb; it’s a vibrant, aromatic plant that can elevate your cooking and gardening experience. With its fragrant leaves and versatile uses, having a fresh supply of basil can be a game-changer in your kitchen. One of the simplest ways to increase your basil supply is through propagation from cuttings. In this comprehensive guide, we’ll explore everything you need to know about propagating basil from cuttings, ensuring you have a thriving herb garden in no time!
Understanding Basil
Before we dive into the propagation process, let’s take a moment to understand basil better. This herb belongs to the mint family and is native to tropical regions. It’s renowned for its aromatic leaves, which are a staple in many dishes, particularly in Italian and Mediterranean cuisines. There are various types of basil, including sweet basil, Thai basil, and purple basil, each offering distinct flavors and culinary uses.
Basil is typically grown as an annual plant, meaning it completes its life cycle in one growing season. However, with proper care and propagation techniques, you can cultivate basil year-round, maximizing your yield and enjoyment.
Why Propagate Basil from Cuttings?
- Cost-Effective: Instead of purchasing new plants, you can easily grow new basil plants from existing ones, saving money on gardening expenses.
- Quick Results: Propagation through cuttings is a fast method. With the right conditions, you can see roots developing in just a week or two.
- Control Over Varieties: By propagating your favorite basil varieties, you can maintain control over the flavor and characteristics of your plants.
- Sustainability: Growing your own herbs reduces reliance on store-bought options, leading to less plastic waste and a smaller carbon footprint.
- Fun and Educational: Propagating plants can be a rewarding activity, teaching you about plant biology and the growing process.
How to Propagate Basil from Cuttings: A Step-by-Step Guide
Step 1: Select a Healthy Basil Plant
Choosing the right parent plant is crucial for successful propagation. Look for a robust, healthy basil plant that has not started flowering. Flowering can indicate that the plant is going to seed, which can reduce the flavor of the leaves. Look for young, vigorous stems to take your cuttings from.
Step 2: Prepare Your Tools
Gather the following tools to make the process smooth:
- Sharp Scissors or Pruning Shears: To make clean cuts without damaging the plant.
- A Glass or Jar: To hold the cuttings and water.
- Potting Soil: For transplanting your rooted cuttings later.
- A Small Pot: To house your new basil plant once it has developed roots.
Step 3: Take the Cutting
Using your clean scissors or shears, cut a healthy stem from the parent plant. The cutting should be about 4 to 6 inches long and should ideally include a node, which is where the leaves attach to the stem. Cutting just below a node is best, as this is where roots will begin to develop.
Step 4: Remove Lower Leaves
To prevent rot and promote healthy root development, remove the lower leaves from the cutting. Leave only a few leaves at the top of the stem. This helps focus the plant’s energy on root growth rather than sustaining the leaves.
Step 5: Place the Cutting in Water
Submerge the cut end of the basil stem in a glass of water. Ensure that at least one node is submerged while keeping the leaves above the waterline. This will provide moisture for root development without causing the leaves to rot.
Step 6: Find the Right Spot
Place your glass of water in a warm location with indirect sunlight. Basil prefers warmth and light, so a windowsill that gets plenty of light (but not direct, harsh sunlight) is ideal.
Step 7: Change the Water Regularly
To keep your basil cuttings healthy, change the water every few days. This prevents stagnation and helps avoid bacterial growth, which can lead to rot. Always use clean water to ensure the best environment for root development.
Step 8: Wait for Roots to Develop
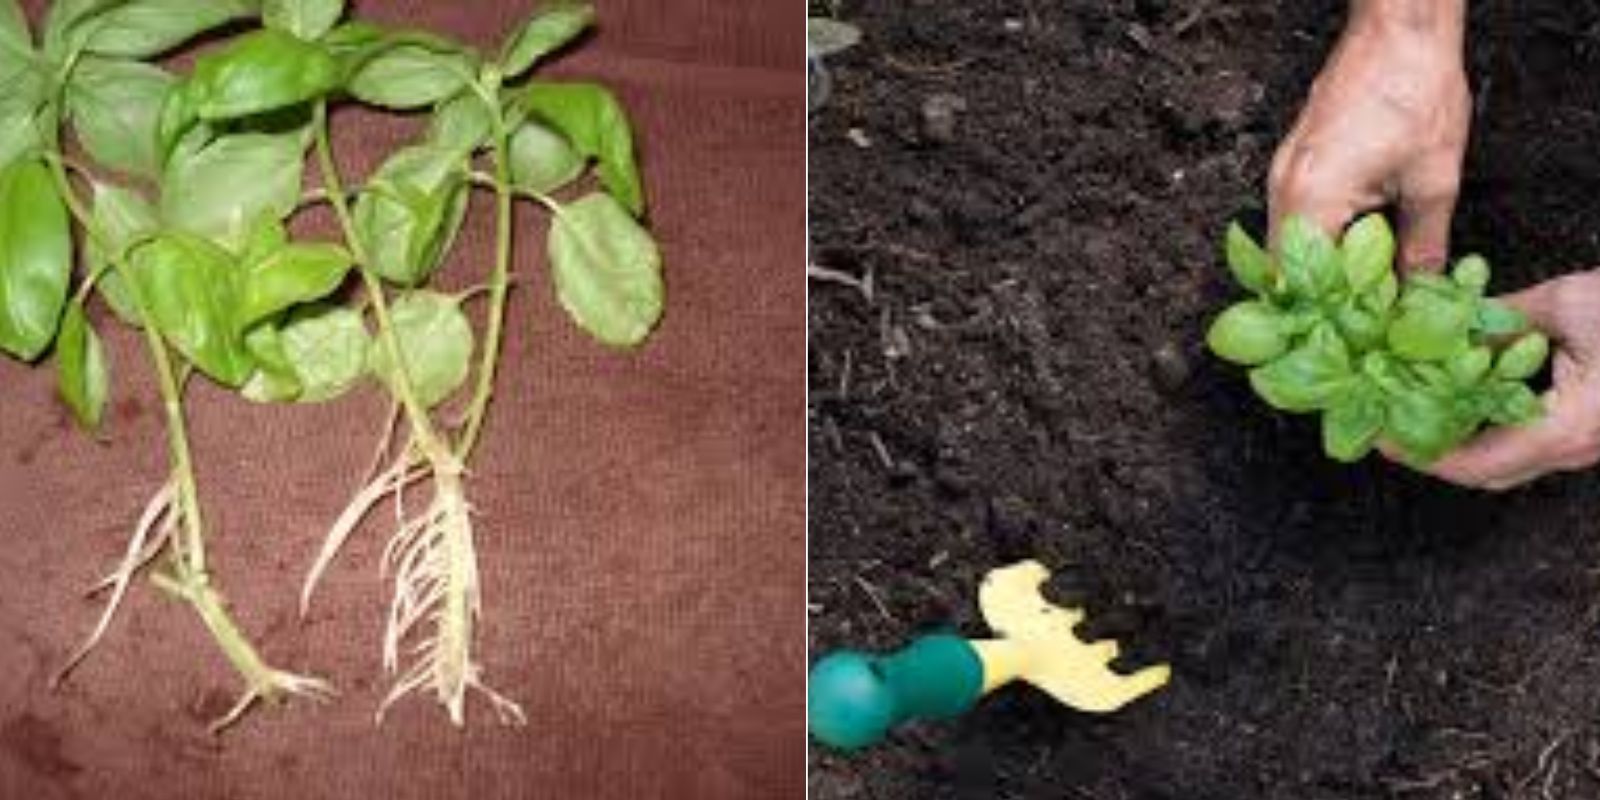
Be patient! In about 1-2 weeks, you should start to see roots developing from the nodes submerged in water. When the roots are at least 2-3 inches long, they are ready to be transplanted into soil.
Step 9: Transplant to Soil
Fill a small pot with well-draining potting soil. Create a hole in the center and gently insert the rooted basil cutting into the soil. Firm the soil around the cutting to provide support.
Step 10: Water and Care for Your New Plant
After transplanting, give your basil a light watering to help settle the soil around the roots. Place your new basil plant in a sunny location. Continue to water regularly, ensuring that the soil remains moist but not waterlogged. As your basil grows, you can begin to feed it with a balanced, organic fertilizer every few weeks.
Tips for Successful Basil Propagation
- Temperature and Humidity: Basil thrives in warm temperatures (around 70°F to 85°F). If you live in a dry climate, consider placing a plastic bag over the cutting (without touching the leaves) to create a mini greenhouse effect, which will help maintain humidity.
- Avoid Direct Sunlight: While basil loves light, young cuttings can scorch in direct sunlight. Provide bright, indirect light until they establish roots and start to grow.
- Monitor for Pests: Keep an eye out for pests such as aphids or spider mites, which can affect young plants. If you notice any pests, treat them promptly with insecticidal soap or neem oil.
Using Your Fresh Basil
Once your basil plants are established, you can start harvesting the leaves. The more you harvest, the bushier the plant will become! Here are some creative ways to use your fresh basil:
- Culinary Uses: Add basil to salads, pasta, pizzas, or homemade pesto for a burst of flavor. You can also use it to infuse oils or vinegars for cooking.
- Herbal Tea: Basil tea can be soothing and aromatic. Simply steep fresh leaves in hot water for a refreshing drink.
- Natural Remedies: Basil has anti-inflammatory and antioxidant properties. It can be used in herbal remedies for various ailments.
Conclusion
Propagating basil from cuttings is an easy and rewarding process that any gardener can master. With just a few simple steps, you can grow your own basil plants at home, ensuring you always have fresh herbs at your fingertips. Not only does this practice enhance your culinary experiences, but it also promotes sustainability and self-sufficiency in your gardening endeavors.
So, gather your supplies, pick a healthy basil plant, and start propagating today! Join the community of gardening enthusiasts and share your success stories online. Your journey in growing basil can inspire others to cultivate their own herb gardens!
Motivational Note: Let’s grow together! Share your basil propagation tips and tricks on social media and inspire fellow gardeners. 🌿✨ #BasilPropagation #HerbGarden #GrowYourOwn #GardeningTips #PlantLovers