
Growing tomatoes from seeds is one of the most rewarding experiences a gardener can have. Not only do you get to enjoy the fruits of your labor, but you also gain the satisfaction of nurturing your plants from their earliest stages. With a little knowledge and some careful planning, anyone can grow vibrant, flavorful tomatoes in their garden. This comprehensive guide will walk you through every step of the process, from selecting seeds to transplanting your seedlings outdoors.
Understanding Tomato Varieties
Before diving into the planting process, it’s essential to understand the various types of tomatoes available. Different varieties offer unique flavors, colors, and sizes, allowing you to choose those that best suit your culinary preferences. Here are a few popular types of tomatoes:
- Cherry Tomatoes: Small, sweet, and perfect for snacking or salads.
- Roma Tomatoes: Plump and oval-shaped, ideal for sauces and canning.
- Beefsteak Tomatoes: Large and juicy, perfect for sandwiches and burgers.
- Heirloom Tomatoes: Varieties passed down through generations, known for their unique flavors and shapes.
When selecting seeds, consider factors like your growing zone, space, and intended use. You can often find seeds at local garden centers or online retailers, where you may discover rare and unique varieties.
Supplies Needed for Planting Tomato Seeds
Gathering the right supplies is crucial for a successful seed-starting venture. Here’s a list of what you’ll need:
- Seeds: Choose your preferred tomato varieties.
- Seed Trays or Pots: Use plastic seed trays, biodegradable pots, or any shallow containers.
- Seed Starting Mix: A lightweight, sterile mix designed for seed germination.
- Labels: To keep track of different varieties.
- Watering Can or Spray Bottle: For gentle watering.
- Plastic Wrap or Humidity Dome: To maintain moisture during germination.
- Grow Lights or a Bright Location: For providing adequate light once seedlings emerge.
Step-by-Step Process for Planting Tomato Seeds
Step 1: Choose Your Seeds
Decide on the tomato varieties you want to grow based on your taste preferences, growing conditions, and available space. Purchase seeds from reputable sources, and look for organic or heirloom options if that aligns with your gardening philosophy.
Step 2: Prepare the Containers
Fill your seed trays or pots with seed starting mix, ensuring to leave about half an inch from the top. The mix should be moistened beforehand to make it easier for the seeds to settle in.
Step 3: Plant the Seeds
Sow the seeds about 1/4 inch deep into the soil. If you’re using a seed tray, you can plant several seeds in each cell. However, make sure to check the seed packet for specific spacing recommendations. Once planted, gently press the soil down to ensure good contact between the seeds and the soil.
Step 4: Water Gently
After planting, moisten the soil thoroughly using a fine spray or a watering can. It’s important to ensure the soil is damp but not waterlogged, as this can lead to seed rot.
Step 5: Provide Warmth
Tomato seeds thrive in warm conditions. Place the trays in a warm location (ideally between 70-80°F or 21-27°C) to encourage germination. If you have a heat mat, use it to help maintain the ideal temperature.
Step 6: Cover and Wait
To retain moisture and warmth, cover the trays with plastic wrap or a humidity dome. This setup helps create a mini-greenhouse effect. Keep an eye on the moisture level, removing the cover once the seedlings appear, which typically takes about 5-10 days.
Step 7: Provide Light
Once your seeds have germinated, they will need plenty of light to grow strong and healthy. If growing indoors, place the seedlings under grow lights or in a south-facing window. Aim for 12-16 hours of light each day. If using grow lights, keep them about 2-4 inches above the seedlings.
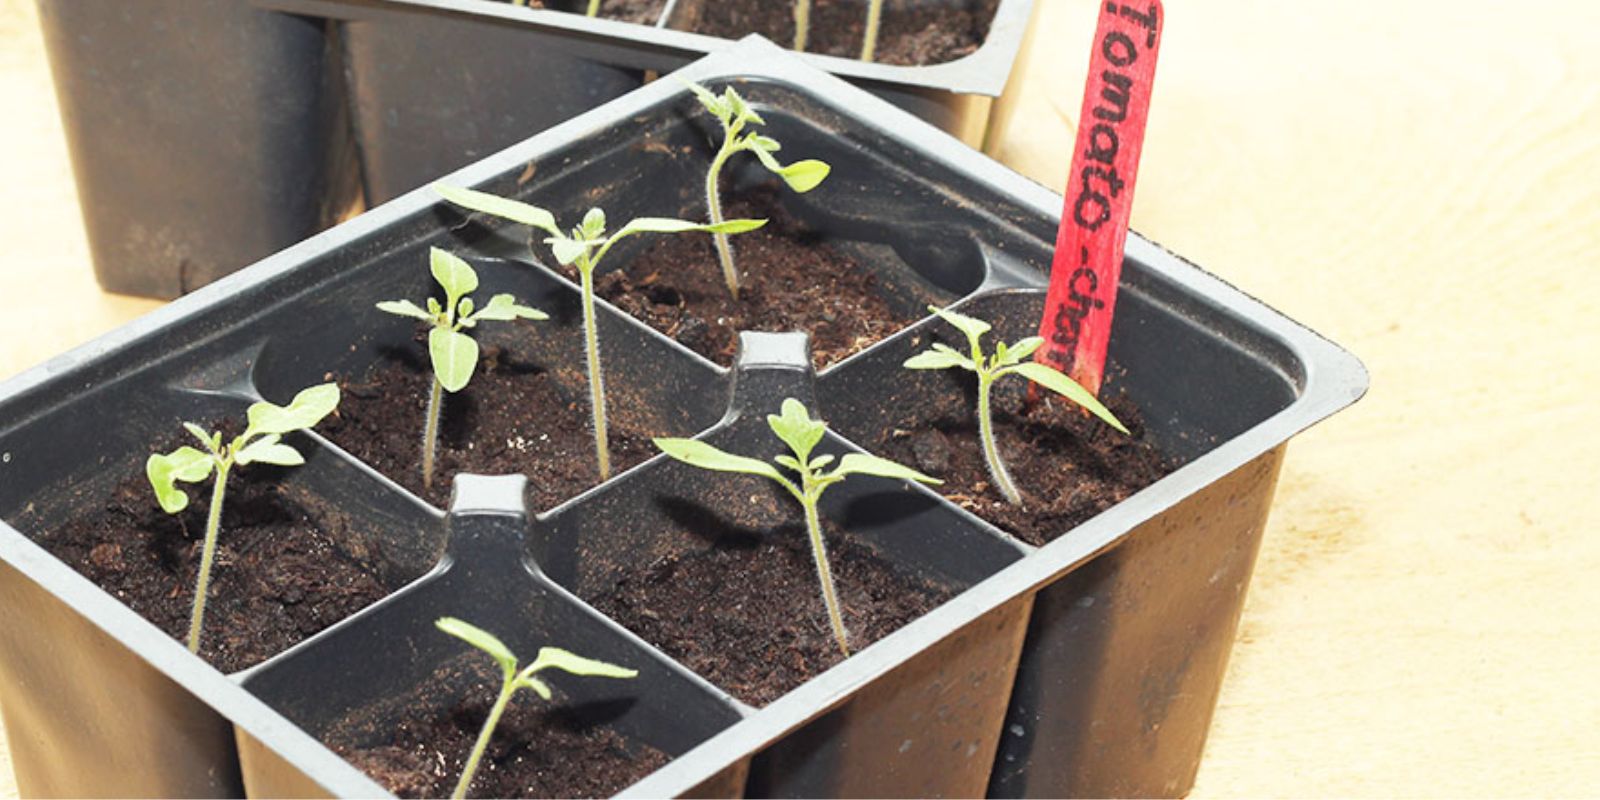
Step 8: Thin the Seedlings
When your seedlings have developed their first set of true leaves, it’s time to thin them out. If multiple seeds have sprouted in one container, select the healthiest-looking plant and snip the others at the soil line with scissors. This step prevents overcrowding and gives your best seedling more room to grow.
Step 9: Transplanting Seedlings
As your seedlings grow, they will eventually need to be transplanted into larger pots to accommodate their growth. When they are about 6-8 inches tall and have a few sets of true leaves, you can transplant them.
- Choose a Container: Use 4-inch pots or larger.
- Prepare the Soil: Fill the pots with high-quality potting mix.
- Transplant: Gently remove the seedlings from their trays, being careful not to disturb the roots. Plant them at the same depth they were growing in the seed tray, and water them well.
Step 10: Harden Off
Before moving your tomato plants outdoors, they need to acclimate to the outdoor environment. This process is known as hardening off and usually takes about 7-10 days.
- Start by placing the pots outside in a shaded area for a few hours each day, gradually increasing their exposure to sunlight and outdoor conditions.
- After about a week, your plants should be ready to move to their permanent location in the garden or larger containers.
Step 11: Prepare the Garden Bed or Containers
If you’re planting in the garden, select a sunny location with well-draining soil. Prepare the soil by tilling and adding organic matter, such as compost or aged manure. Tomatoes prefer slightly acidic soil with a pH of 6.0 to 6.8.
Step 12: Plant the Seedlings
Dig holes in your garden bed or containers, spacing them according to the specific variety’s requirements (usually 18-24 inches apart). Gently remove the seedlings from their pots, and place them in the holes, covering the roots with soil. Water them well to settle the soil around the roots.
Step 13: Care for Your Tomato Plants
Once planted, it’s essential to provide proper care to ensure healthy growth:
- Watering: Keep the soil consistently moist, watering deeply once or twice a week. Avoid overhead watering to prevent fungal diseases.
- Fertilization: After the seedlings are established, use a balanced fertilizer or compost to provide the necessary nutrients. Fertilize every 4-6 weeks throughout the growing season.
- Mulching: Apply a layer of mulch around the base of the plants to retain moisture, suppress weeds, and regulate soil temperature.
Step 14: Support Your Plants
Depending on the variety, tomatoes may require staking or caging to support their growth. Install stakes or cages early in the season to avoid damaging the roots later on. This support keeps the fruits off the ground and helps prevent disease.
Step 15: Monitor for Pests and Diseases
Keep an eye out for common tomato pests, such as aphids, whiteflies, and spider mites. Implement organic pest control methods, such as insecticidal soap or neem oil, if necessary. Additionally, be aware of diseases like blight or blossom end rot, which can affect tomato plants.
Step 16: Harvesting Your Tomatoes
With proper care, your tomato plants will produce fruit in about 60-100 days, depending on the variety. Harvest your tomatoes when they are fully ripe and firm, with vibrant color. For the best flavor, pick them in the morning when temperatures are cooler.
Conclusion
Growing tomatoes from seeds is a fulfilling journey that allows you to cultivate your favorite fruits while connecting with nature. By following this comprehensive guide, you can successfully plant, nurture, and harvest delicious tomatoes right from your backyard. Remember to enjoy the process, share your gardening experiences with others, and savor the flavors of your homegrown produce.
Get Gardening!
Now that you have all the knowledge needed to start your tomato-growing adventure, it’s time to dig in and get started! Happy gardening, and may your tomato plants thrive!