
Introduction
Lavender is a beloved plant known for its soothing fragrance, vibrant purple flowers, and a multitude of uses ranging from culinary to medicinal. Whether you’re looking to create a fragrant border along your fence, fill your garden with its calming aroma, or simply enjoy the beauty of lavender, propagating your own lavender plants is an economical and rewarding way to achieve this. This guide will walk you through the process of propagating lavender from cuttings, ensuring you can enjoy a lush, aromatic garden without the need to spend money on seedlings.
Why Propagate Lavender?
Propagating lavender offers several benefits:
- Cost-Effective: By growing lavender from cuttings, you avoid the expense of buying new plants.
- Control: You have complete control over the growing conditions, ensuring healthy, strong plants.
- Sustainability: Propagation reduces waste and supports a more sustainable gardening practice.
- Endless Supply: Once you’ve mastered propagation, you’ll have an endless supply of lavender for your garden, crafts, and more.
Step-by-Step Guide to Propagating Lavender
1. Select Healthy Lavender Plants
The first step in propagating lavender is to choose the right parent plant. Look for a mature lavender plant that is strong, healthy, and free from disease or pests. The plant should have robust stems and vibrant foliage, which are indicators of good health. Ideally, the plant should be in its active growing season, usually in spring or early summer, when it’s full of energy and vitality.
2. Take Cuttings
Once you’ve identified a suitable lavender plant, it’s time to take cuttings. Use a sharp, clean pair of garden scissors or pruning shears to cut 4-6 inch stems from the plant. Make your cut just below a leaf node, as this is where the roots will most likely form. It’s best to take cuttings early in the day when the plant is well-hydrated.
3. Prepare the Cuttings
After you’ve taken your cuttings, you’ll need to prepare them for rooting. Begin by removing the lower leaves from each stem, leaving a few at the top. This not only prevents the leaves from rotting in the soil but also encourages the plant to focus its energy on root development rather than sustaining foliage.
Next, if you have rooting hormone available, dip the cut end of the stem into the hormone powder. While this step is optional, it can significantly increase the success rate of your cuttings by promoting faster root growth.
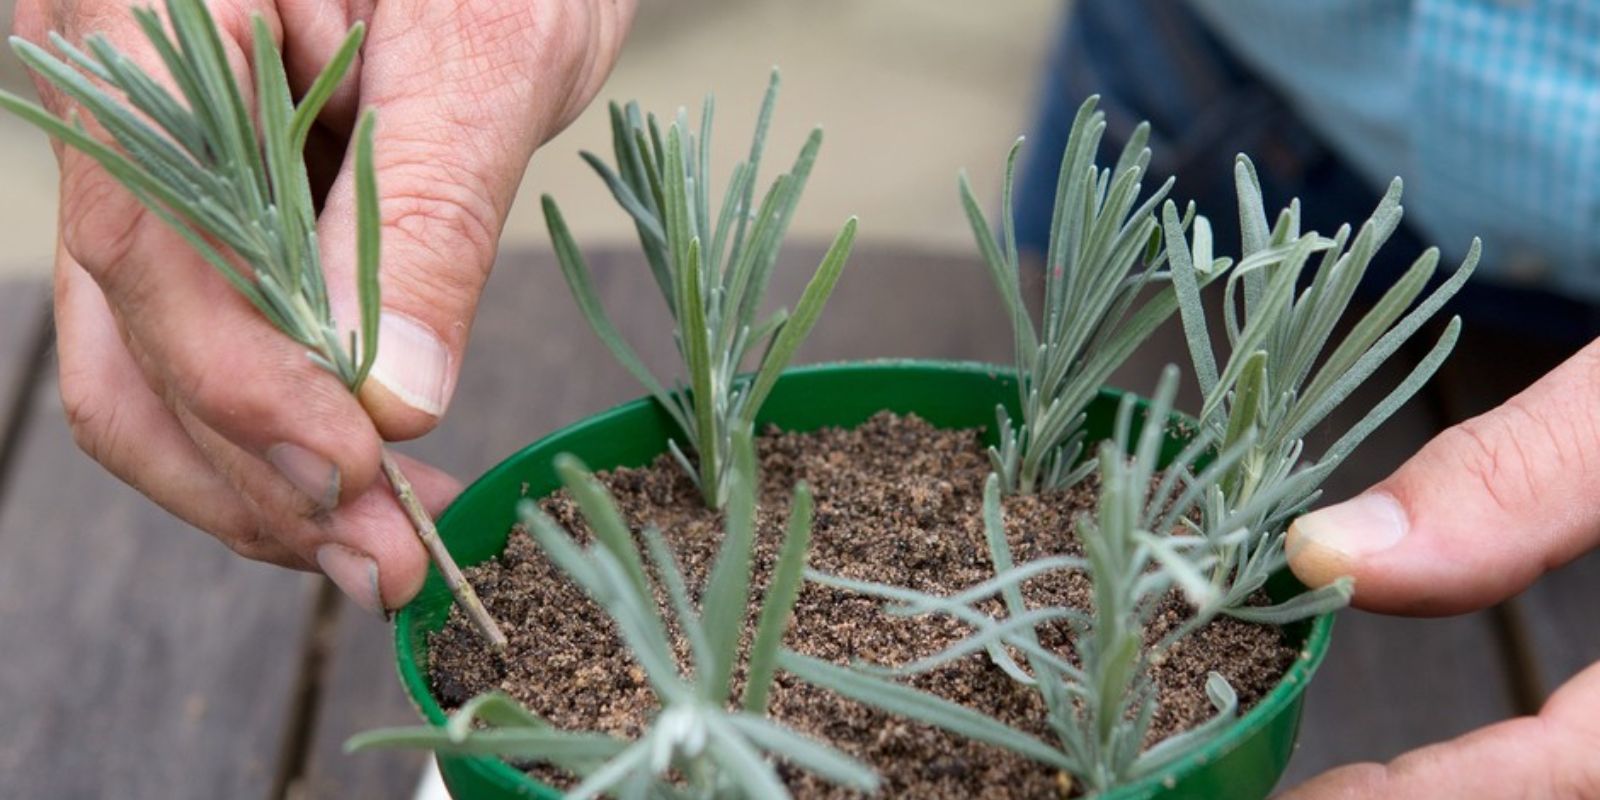
4. Root the Cuttings
Now that your cuttings are prepared, it’s time to plant them. Fill a small pot or seed tray with a well-draining potting mix. Lavender thrives in soil that mimics its natural, Mediterranean environment, so choose a mix that includes sand or perlite to ensure proper drainage.
Insert the prepared cuttings into the soil, making sure that the leaf nodes are buried about 1-2 inches deep. Gently firm the soil around the cuttings to keep them in place.
Water the cuttings lightly, ensuring the soil is moist but not waterlogged. Place the pot or tray in a warm, sunny location, ideally in a spot that receives indirect sunlight. You can also create a mini greenhouse effect by covering the pot with a plastic bag or a clear plastic dome to retain moisture and warmth.
5. Care for the Cuttings
Over the next few weeks, your lavender cuttings will start to develop roots. During this time, it’s crucial to keep the soil consistently moist but not overly wet. Check the cuttings regularly and mist them with water if the soil starts to dry out.
Avoid exposing the cuttings to direct, harsh sunlight, as this can cause them to wilt. Instead, provide them with bright, indirect light and maintain a stable, warm temperature.
After 3-4 weeks, gently tug on the cuttings to check for resistance, which indicates that roots are forming. Once the cuttings have established a healthy root system, they’ll be ready for transplanting.
6. Transplant the Rooted Cuttings
Once your lavender cuttings have rooted, they can be transplanted into their permanent location. Choose a spot in your garden that receives full sun and has well-draining soil. Lavender prefers slightly alkaline soil, so consider adding lime to the soil if necessary.
Dig a hole in the ground that is slightly larger than the root ball of the cutting. Place the rooted cutting into the hole, ensuring that the top of the root ball is level with the soil surface. Fill in the hole with soil and gently firm it around the plant.
Water the newly planted lavender thoroughly, and then continue to water it regularly until it’s established in its new location. After that, lavender is relatively drought-tolerant and requires minimal watering.
Tips for Successful Lavender Propagation
- Timing: The best time to propagate lavender is in the spring or early summer when the plant is actively growing.
- Soil: Ensure that the soil you use for rooting and transplanting is well-draining. Lavender roots can rot in waterlogged soil.
- Sunlight: Provide plenty of light, but protect the cuttings from intense, direct sunlight during the rooting phase.
- Patience: Rooting can take several weeks, so be patient and give your cuttings time to develop strong roots.
Conclusion
Propagating lavender from cuttings is a simple, rewarding process that allows you to expand your garden without the expense of buying new plants. By following these steps, you’ll be able to create a lush, fragrant lavender border along your fence or garden, enjoying the beauty and benefits of lavender for years to come.
Engage with Us!
Ready to try your hand at propagating lavender? Share your experiences and photos with us, and feel free to ask any questions as you embark on your lavender-growing journey!