
Sweet potatoes are a beloved staple in many households, known for their vibrant color, delicious flavor, and nutritional benefits. Not only are they rich in vitamins A and C, but they also provide a good source of fiber and complex carbohydrates. Whether you’re looking to enhance your diet, save on grocery bills, or explore a rewarding gardening project, growing sweet potatoes at home can be a fulfilling experience. This comprehensive guide will walk you through the steps to grow sweet potatoes quickly and efficiently, ensuring a bountiful harvest right in your backyard or balcony.
Why Grow Sweet Potatoes?
Before diving into the how-to, let’s consider the benefits of growing sweet potatoes:
- Nutritional Value: Sweet potatoes are high in antioxidants and essential nutrients, making them a healthier alternative to regular potatoes.
- Versatility: They can be used in a variety of dishes, from savory meals to desserts.
- Low Maintenance: Once established, sweet potatoes require minimal care and are relatively pest-resistant.
- Space Efficient: They can be grown in various settings, including small gardens, raised beds, and containers.
Choosing the Right Variety
The first step in growing sweet potatoes is selecting the right variety for your climate and taste preferences. Here are a few popular varieties to consider:
- Beauregard: Known for its vibrant orange flesh and sweet flavor, it’s one of the most popular varieties.
- Jewel: Another orange-fleshed variety, Jewel is known for its high yield and good disease resistance.
- Garnet: With its deep orange color and sweet taste, Garnet sweet potatoes are excellent for baking.
- Purple Sweet Potatoes: These are gaining popularity due to their unique flavor and antioxidant properties.
Make sure to choose a variety suited to your growing conditions, as some may perform better in certain climates than others.
Preparing the Soil
Sweet potatoes thrive in well-draining, loose soil with a pH between 5.8 and 6.2. Here’s how to prepare your soil for planting:
- Test Your Soil: Use a soil test kit to check for pH and nutrient levels. This will guide you in amending your soil as needed.
- Add Organic Matter: Incorporate compost or well-rotted manure into your garden bed to improve soil structure, fertility, and drainage.
- Tilling: Loosen the soil by tilling it to a depth of about 12 inches. This helps sweet potatoes develop their tubers more easily.
- Create Raised Beds (Optional): If you have heavy clay or poorly draining soil, consider creating raised beds. This can enhance drainage and soil temperature, leading to better growth.
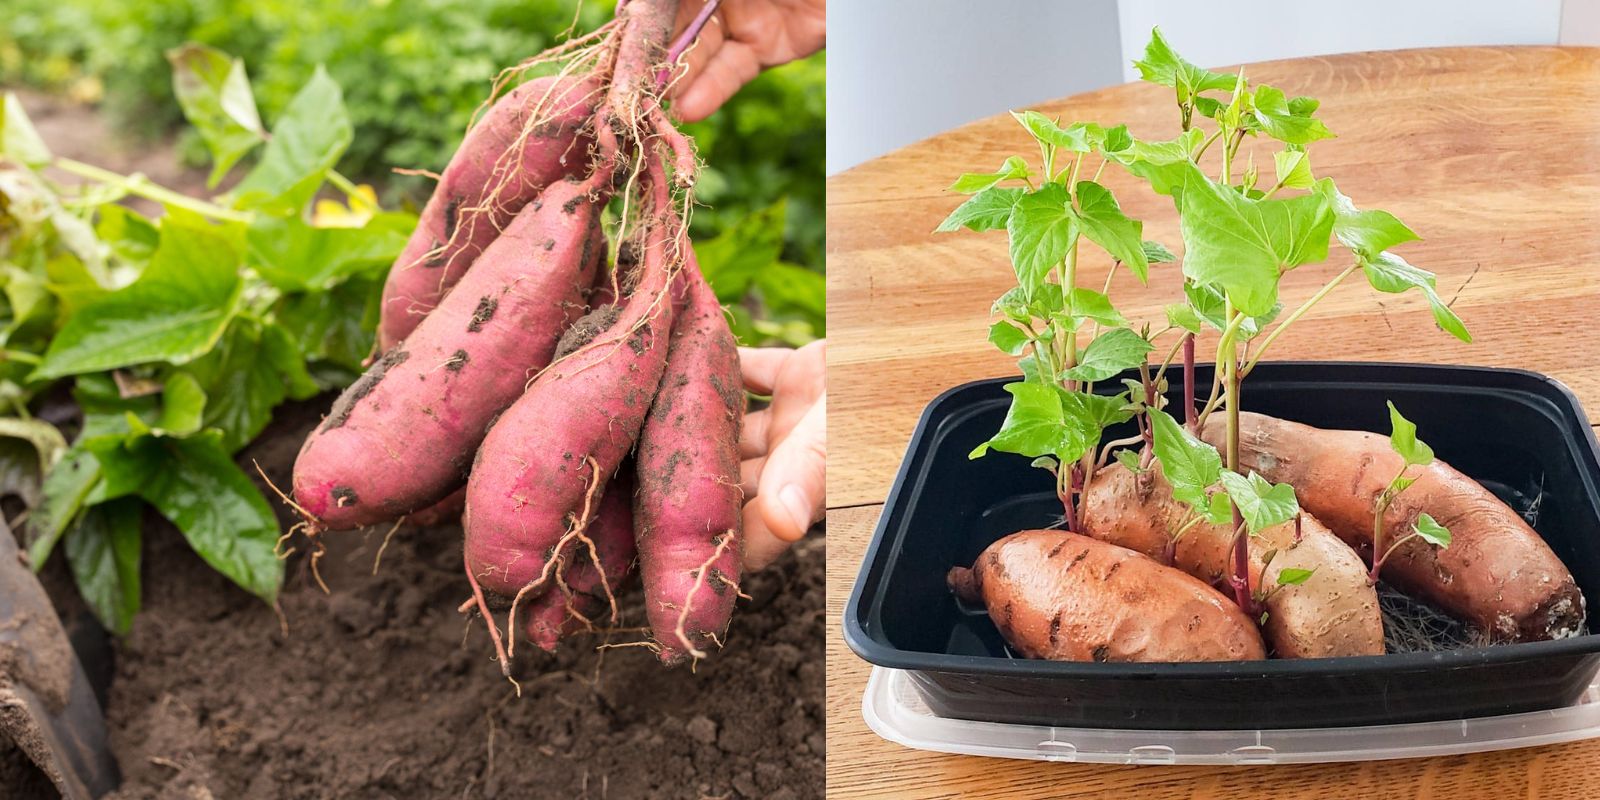
Starting with Slips
Sweet potatoes are typically grown from slips, which are young shoots that sprout from the tubers. You can purchase slips from nurseries or grow your own. Here’s how to start your slips:
- Select a Healthy Sweet Potato: Choose a firm, unblemished sweet potato to sprout your slips.
- Prepare the Potato: Place the sweet potato in a container of water, with the top half above the water line. You can use toothpicks to hold it in place.
- Grow the Slips: Place the container in a warm, sunny location. After a few weeks, you will see shoots and roots developing. Once the slips are about 6 inches long, they are ready to be removed.
- Remove the Slips: Twist the slips off the sweet potato and place them in water for a day or two to encourage further root development.
Planting Your Slips
Once your slips have developed roots, it’s time to plant them. Here’s how to do it effectively:
- Timing: Plant your slips after the last frost date in your area, as sweet potatoes are sensitive to cold.
- Spacing: Dig holes about 12-18 inches apart in rows. This allows the plants to spread and ensures good air circulation.
- Depth: Place each slip into the hole, burying it up to the first leaves. This ensures stability and encourages the development of new roots.
- Watering: After planting, water the slips thoroughly to help them settle into the soil.
Caring for Your Sweet Potatoes
Caring for your sweet potatoes involves regular maintenance to ensure healthy growth. Here are the key aspects:
Watering
Sweet potatoes require consistent moisture, especially in the early stages of growth. Here are some tips:
- Regular Watering: Water your sweet potatoes deeply once or twice a week, depending on rainfall. The goal is to keep the soil consistently moist but not waterlogged.
- Mulching: Apply a layer of mulch around the plants to help retain moisture, suppress weeds, and regulate soil temperature. Straw, grass clippings, or shredded leaves work well.
Fertilizing
While sweet potatoes are not heavy feeders, they can benefit from additional nutrients:
- Pre-Planting Fertilizer: Before planting, incorporate a balanced fertilizer into the soil, following the package instructions.
- Mid-Season Boost: About halfway through the growing season, apply a fertilizer high in potassium, which supports tuber growth.
Pest and Disease Management
Sweet potatoes are generally resistant to pests, but it’s essential to monitor them for any signs of trouble:
- Common Pests: Look out for sweet potato weevils and aphids. Hand-pick pests or use insecticidal soap if infestations occur.
- Diseases: Fungal diseases can affect sweet potatoes. Ensure good air circulation and avoid overhead watering to minimize moisture on leaves.
Harvesting Sweet Potatoes
Knowing when to harvest is crucial for a successful sweet potato crop. Here’s what to look for:
- Timing: Sweet potatoes are typically ready for harvest 90-120 days after planting, depending on the variety. They should be harvested before the first frost.
- Signs of Maturity: Look for yellowing leaves and the plant starting to die back. This indicates that the tubers have reached their optimal size.
- Harvesting Technique: Use a spade or garden fork to gently lift the tubers from the soil, being careful not to damage them. Start digging about 6 inches away from the plant base to avoid bruising.
- Cleaning: Brush off excess soil and avoid washing the sweet potatoes until you are ready to use them.
Curing and Storing Sweet Potatoes
Curing sweet potatoes after harvest helps enhance their flavor and extends their storage life:
- Curing Process: Place your harvested sweet potatoes in a warm, humid environment (about 85°F) for about 7-14 days. A garage or shed can work well if conditions are suitable.
- Storage: After curing, store sweet potatoes in a cool, dark place (55-60°F) with good ventilation. They can last for several months when stored properly.
Conclusion
Growing sweet potatoes at home is a rewarding endeavor that offers delicious and nutritious results. With the right preparation, care, and harvesting techniques, you can enjoy a bountiful harvest of sweet potatoes to incorporate into your meals. Whether you have a large garden or a small balcony, sweet potatoes are adaptable and can thrive in various conditions.
Start your sweet potato gardening journey today and enjoy the fruits of your labor! By sharing your experiences and successes, you can inspire others to grow their own food and embrace the joys of gardening.
Let’s Get Growing!
Ready to dig into the world of sweet potatoes? Follow this guide and share your gardening journey with friends and family! Don’t forget to use the hashtags #SweetPotatoHarvest, #HomeGardening, #GrowYourOwnFood, and #GardeningGoals to connect with fellow gardening enthusiasts and inspire others to start their gardening adventure! Happy gardening! 🌱🥔🌼