
Scarlet runner beans (Phaseolus coccineus) are not only visually stunning with their vibrant red flowers but are also a delightful addition to any garden. Known for their fast growth and versatility, these beans can serve as both an edible crop and a decorative climbing plant. Whether you’re a seasoned gardener or a beginner, this comprehensive guide will walk you through every step of cultivating scarlet runner beans from seed to harvest.
Table of Contents
- Understanding Scarlet Runner Beans
- Choosing the Right Location
- Preparing the Soil
- Sowing the Seeds
- Providing Support
- Watering and Maintenance
- Fertilizing
- Pest Management
- Harvesting
- Saving Seeds for Next Year
- Culinary Uses
- Conclusion
1. Understanding Scarlet Runner Beans
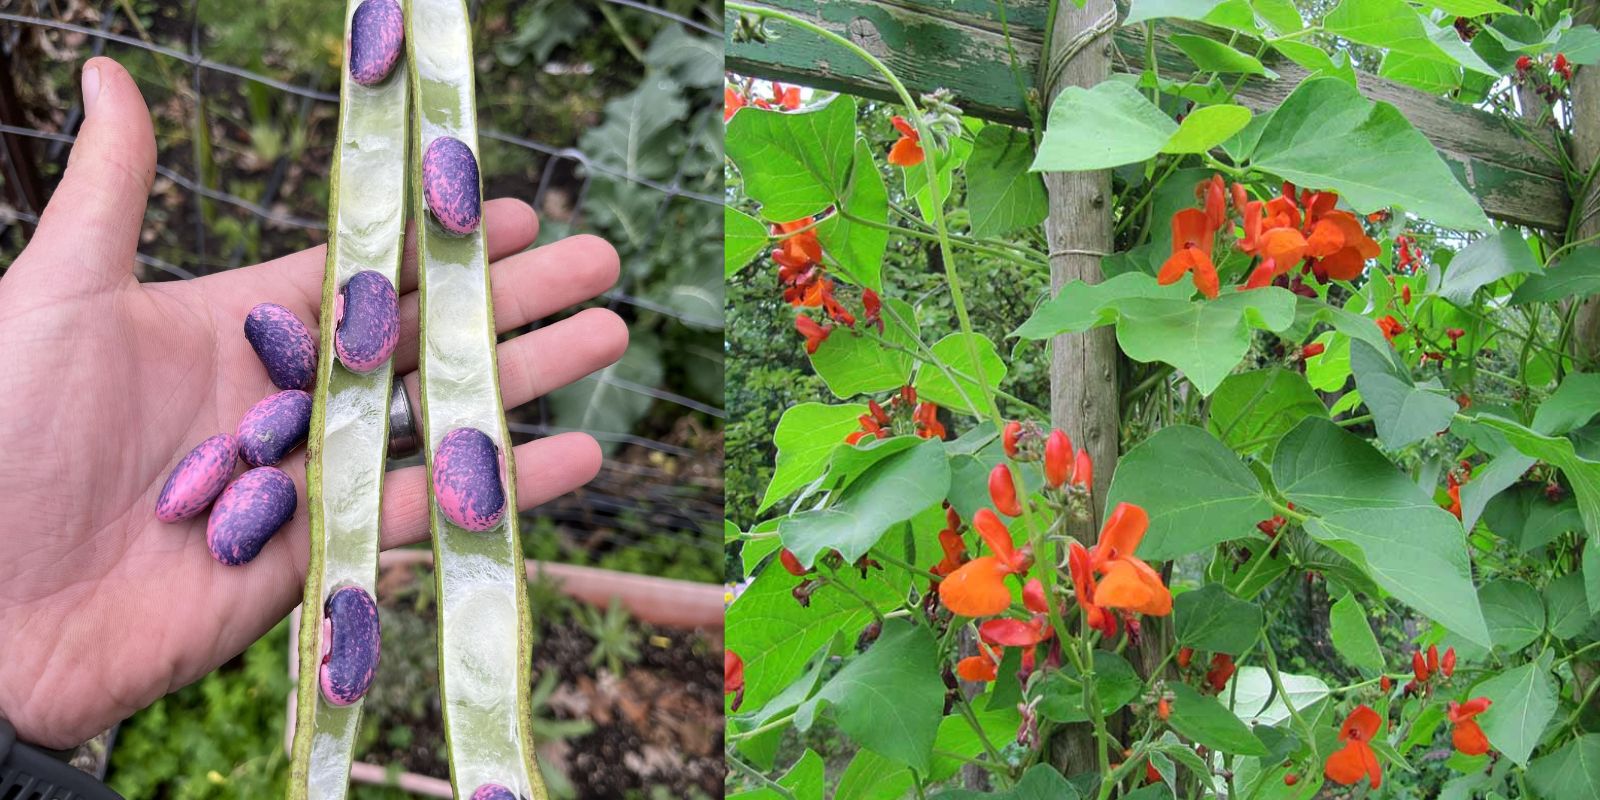
Scarlet runner beans are native to Central and South America and are valued for both their ornamental and edible qualities. The plants grow vigorously, reaching heights of 6 to 10 feet, making them excellent for trellises and fences. The bright red flowers attract pollinators, enhancing the biodiversity of your garden while producing a crop of tender, flavorful beans.
2. Choosing the Right Location
Selecting the right location for your scarlet runner beans is crucial for a successful harvest. Here are some factors to consider:
- Sunlight: These beans thrive in full sunlight, requiring at least 6 to 8 hours of direct sunlight daily.
- Space: Ensure you have enough space for the plants to grow vertically. They need plenty of room to climb and spread.
- Climate: Scarlet runner beans are sensitive to frost. Plant them in areas where the last frost has passed, typically in late spring.
3. Preparing the Soil
The quality of your soil significantly impacts plant growth. Follow these steps to prepare the soil for planting:
- Soil Type: Scarlet runner beans prefer well-draining soil rich in organic matter. Sandy loam or loamy soil is ideal.
- Testing pH: The ideal pH range for scarlet runner beans is between 6.0 and 7.0. You can test your soil pH using a simple home test kit.
- Amending Soil: Before planting, mix in compost or well-rotted manure to improve soil fertility and drainage. Aim for a depth of at least 12 inches.
4. Sowing the Seeds
Once your soil is ready, it’s time to plant the seeds:
- Seed Preparation: Soak the scarlet runner bean seeds in water for 24 hours before planting to enhance germination rates.
- Planting Depth: Plant seeds about 1 inch deep. This depth helps protect the seeds from birds and pests.
- Spacing: Space the seeds 6 inches apart, with rows about 24-36 inches apart. This spacing allows for proper air circulation and growth.
5. Providing Support
As climbing plants, scarlet runner beans need support to thrive:
- Trellises and Poles: Install trellises, stakes, or poles for the beans to climb. Use sturdy materials that can withstand the weight of the plants as they grow.
- Placement: Ensure that your support structure is in place before the plants start to climb, as they can become entangled with other plants or structures.
6. Watering and Maintenance
Proper watering is essential for healthy growth:
- Watering Schedule: Keep the soil consistently moist but not soggy. Water the plants deeply once or twice a week, depending on rainfall.
- Mulching: Apply a layer of mulch around the base of the plants to retain moisture, suppress weeds, and regulate soil temperature.
7. Fertilizing
Providing the right nutrients will promote healthy growth and abundant blooms:
- Organic Fertilizer: Use an organic fertilizer or compost when planting and again when the plants start to flower. A balanced fertilizer with equal parts nitrogen, phosphorus, and potassium is ideal.
- Avoid Over-Fertilization: Be careful not to over-fertilize, as this can lead to excessive foliage growth at the expense of flowers and beans.
8. Pest Management
Monitoring for pests is crucial to protecting your scarlet runner beans:
- Common Pests: Watch out for aphids, spider mites, and bean beetles. These pests can damage the leaves and pods of your plants.
- Natural Remedies: Use insecticidal soap or neem oil as natural pest control methods. Hand-picking larger pests can also be effective.
9. Harvesting
Knowing when and how to harvest your beans is key to enjoying the fruits of your labor:
- Timing: Scarlet runner beans are typically ready to harvest 60 to 70 days after planting. Beans are best harvested when they are young and tender.
- Method: Gently pull the beans from the vine. Avoid twisting or breaking the stems to prevent damage to the plant.
10. Saving Seeds for Next Year
If you want to grow scarlet runner beans again, saving seeds is an easy process:
- Mature Pods: Allow some pods to mature on the plant until they dry out completely.
- Seed Collection: Once dried, remove the seeds from the pods and store them in a cool, dry place. Label them with the date and variety for future reference.
11. Culinary Uses
Scarlet runner beans are versatile in the kitchen:
- Cooking: The young beans can be steamed, boiled, or sautéed. They are excellent in salads, soups, and stir-fries.
- Nutritional Benefits: High in protein, fiber, and essential vitamins, these beans make a nutritious addition to any meal.
12. Conclusion
Growing scarlet runner beans can be a rewarding and enjoyable gardening experience. Their stunning flowers, vigorous growth, and delicious beans make them a fantastic choice for any garden. By following this comprehensive guide, you can cultivate a thriving crop of scarlet runner beans from seed to harvest. So grab your seeds, prepare your garden, and enjoy the journey of growing these beautiful and beneficial plants!
By nurturing your scarlet runner beans, you’ll not only enhance your garden’s beauty but also enjoy the satisfaction of harvesting your own delicious produce. Happy gardening! 🌱 #ScarletRunnerBeans #HomeGardening #VegetableGarden #GrowYourOwnFood #GardenInspiration #OrganicGardening #PlantLove