
Growing your own peppers can be a delightful and rewarding experience. Whether you’re a seasoned gardener or a novice, peppers are a fantastic addition to any home garden. With their vibrant colors, diverse flavors, and numerous culinary uses, peppers can enhance your meals and provide a satisfying gardening journey. This comprehensive guide will walk you through the process of growing peppers quickly and ensuring a bountiful harvest, from seed selection to harvesting.
Why Grow Peppers?
Peppers are not only delicious but also offer numerous health benefits. They are rich in vitamins A and C, and many varieties contain capsaicin, which is known for its anti-inflammatory properties. Growing peppers at home allows you to enjoy fresh produce, control the growing conditions, and experiment with various types, from sweet bell peppers to fiery habaneros.
Selecting the Right Pepper Varieties
Before diving into the growing process, it’s essential to select the right pepper varieties for your garden. Here are a few popular types to consider:
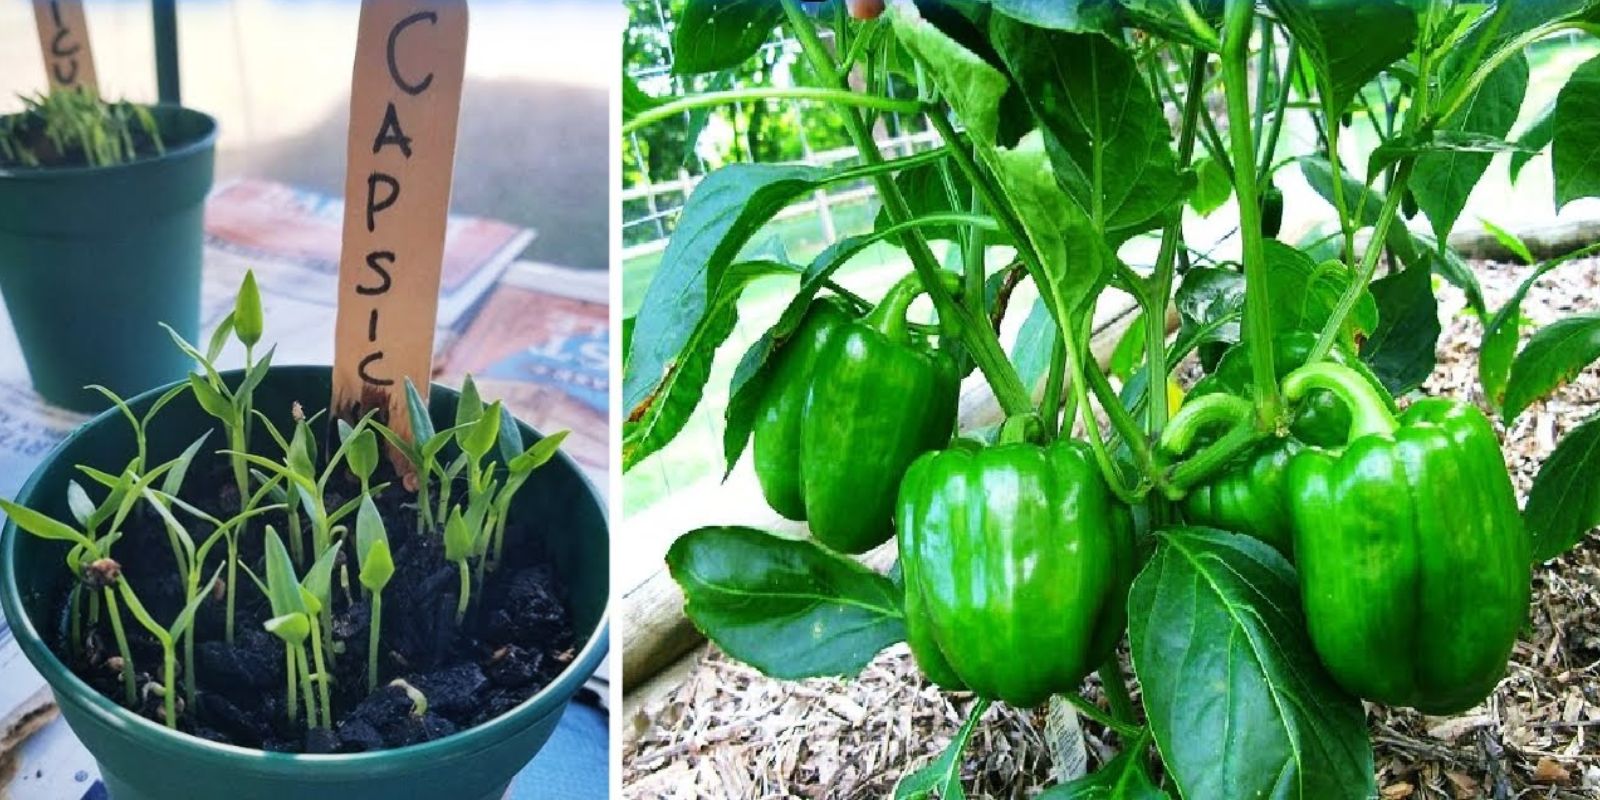
- Bell Peppers: These sweet peppers come in various colors, including green, red, yellow, and orange. They are versatile and great for salads, stir-fries, and stuffing.
- Hot Peppers: If you enjoy a bit of heat, consider varieties like jalapeños, serranos, or habaneros. Each has a unique flavor profile and heat level, measured in Scoville units.
- Sweet Peppers: These are perfect for snacking, salads, and cooking. Varieties like banana peppers and cubanelle are sweet and mild.
- Specialty Peppers: For the adventurous gardener, explore unique varieties like Padrón peppers, shishito peppers, or even ornamental peppers, which are visually appealing.
When selecting seeds, consider your climate, the space available, and your culinary preferences.
Starting Your Peppers Indoors
1. Timing is Key
Peppers thrive in warm conditions, so starting seeds indoors is often the best way to get a jump on the growing season. Begin your seeds indoors about 8-10 weeks before the last expected frost date in your area.
2. Gather Supplies
You’ll need:
- Seed trays or small pots
- Seed-starting mix (lightweight and well-draining)
- Grow lights or a sunny windowsill
- Water and a spray bottle
3. Sow the Seeds
Fill your seed trays or pots with the seed-starting mix, leaving about half an inch from the top. Moisten the soil lightly, then plant the seeds about ¼ inch deep. Cover them lightly with soil and mist the surface to keep the moisture level consistent.
4. Provide the Right Environment
Place your seed trays in a warm area, ideally between 70°F and 80°F (21°C to 27°C). If you’re using grow lights, position them about 2-4 inches above the seedlings and keep them on for 12-16 hours a day. Ensure the seedlings receive adequate light to prevent them from becoming leggy.
5. Maintain Moisture
Keep the soil consistently moist but not soggy. A spray bottle can help maintain the moisture level without overwatering. Once the seeds germinate (usually within 7-14 days), you can reduce the watering frequency slightly.
Transplanting Seedlings
Once your seedlings have developed at least two sets of true leaves (the leaves that come after the initial seed leaves), it’s time to transplant them into larger pots. Here’s how:
1. Prepare Larger Pots
Choose pots that are at least 4-6 inches in diameter. Fill them with a high-quality potting mix, which will provide better drainage and nutrients than seed-starting mix.
2. Handle Seedlings with Care
Gently remove the seedlings from the seed tray. You can do this by carefully squeezing the bottom of the tray or using a small tool to pry them out. Avoid disturbing the roots as much as possible.
3. Transplanting
Make a hole in the center of the new pot with your finger or a stick. Place the seedling in the hole, ensuring that the soil level is the same as it was in the tray. Cover the roots with soil and gently pat it down.
4. Water Thoroughly
After transplanting, water the seedlings thoroughly, allowing excess water to drain out. This helps settle the soil around the roots.
Hardening Off Your Seedlings
Before planting your seedlings outdoors, they need to acclimate to the outdoor environment. This process is called hardening off.
1. Gradual Exposure
Start by placing the seedlings outside in a shaded area for a few hours a day. Gradually increase their exposure to sunlight and outdoor conditions over a week, ensuring they are sheltered from wind and extreme temperatures.
2. Monitor Conditions
Pay attention to the weather. If there are unexpected temperature drops or strong winds, bring the seedlings back inside to protect them.
Choosing the Right Location
Once your seedlings are ready to be planted outdoors, select the right location in your garden.
1. Sunlight Requirements
Peppers love sunlight! Choose a spot that receives at least 6-8 hours of direct sunlight daily. Morning sun is particularly beneficial.
2. Soil Preparation
Peppers thrive in well-draining soil rich in organic matter. If your soil is heavy clay or sandy, consider amending it with compost or well-rotted manure. Aim for a pH level of 6.0 to 6.8.
3. Planting
Dig holes for your seedlings that are about 18-24 inches apart. Place each seedling into the hole and fill it with soil, making sure to cover the roots well. Water them gently after planting.
Watering and Maintaining Peppers
1. Consistent Watering
Peppers prefer consistently moist soil. Water them deeply once a week, or more frequently during hot, dry spells. Avoid overhead watering, as this can promote fungal diseases.
2. Mulching
Apply a layer of mulch around your plants to help retain soil moisture, suppress weeds, and maintain even soil temperatures. Organic mulches like straw or wood chips work well.
3. Fertilizing
Feed your peppers with a balanced fertilizer every 4-6 weeks during the growing season. Look for a fertilizer with a nutrient ratio of around 5-10-10 (high phosphorus and potassium) to encourage flowering and fruiting.
4. Supporting Plants
Some pepper varieties can grow quite tall, so consider using stakes or cages for support. This helps keep the plants upright and improves air circulation.
Pest and Disease Management
Keep an eye out for common pests like aphids, spider mites, and whiteflies. Here are a few management strategies:
- Inspect Regularly: Check the undersides of leaves and the stems for pests. Early detection is crucial.
- Natural Predators: Encourage beneficial insects like ladybugs and lacewings, which prey on aphids.
- Neem Oil: Use neem oil or insecticidal soap to treat pest infestations. Spray in the evening to avoid harming beneficial insects.
Additionally, practice crop rotation and good sanitation to prevent diseases. Remove any diseased plants or debris from the garden to reduce the risk of fungal infections.
Harvesting Your Peppers
Once your peppers are mature, it’s time to enjoy the fruits of your labor! Here’s how to harvest:
1. Timing
Peppers are usually ready to harvest 60-90 days after transplanting, depending on the variety. Look for peppers that are firm, shiny, and have reached their full size.
2. Picking Techniques
Use sharp garden shears or scissors to cut the peppers from the plant, leaving a small portion of the stem attached. This prevents damage to the plant and encourages further fruit production.
3. Storing
Freshly harvested peppers can be stored in the refrigerator for up to a week. For longer storage, consider freezing or pickling your peppers.
Conclusion: Enjoying Your Bountiful Harvest
Growing peppers at home can be an exciting journey filled with flavors and satisfaction. By following these steps, you’ll not only enjoy fresh, homegrown peppers but also gain a deeper appreciation for the gardening process. Whether you’re sharing your harvest with friends or adding a spicy kick to your meals, your homegrown peppers will surely enhance your culinary adventures.
So, roll up your sleeves, get your hands dirty, and start your pepper-growing journey today. Happy gardening!
Hashtags for Engagement
#GrowYourOwn #PepperLovers #HomeGardening #GardeningTips #HarvestSeason #OrganicGardening #PepperPlanting #HomegrownGoodness #GardeningLife