
Black-eyed Susans (Rudbeckia) are iconic summer flowers known for their striking yellow petals and dark central cones. These perennial beauties are native to North America and have become a favorite in gardens, bringing a burst of color and cheerful vibes. Whether you are a novice gardener or an experienced one, Black-eyed Susans are a perfect addition to any garden because they are low-maintenance, resilient, and incredibly rewarding to grow. In this guide, we’ll walk you through everything you need to know about growing and caring for these iconic flowers.
Introduction to Black-Eyed Susans (Rudbeckia)
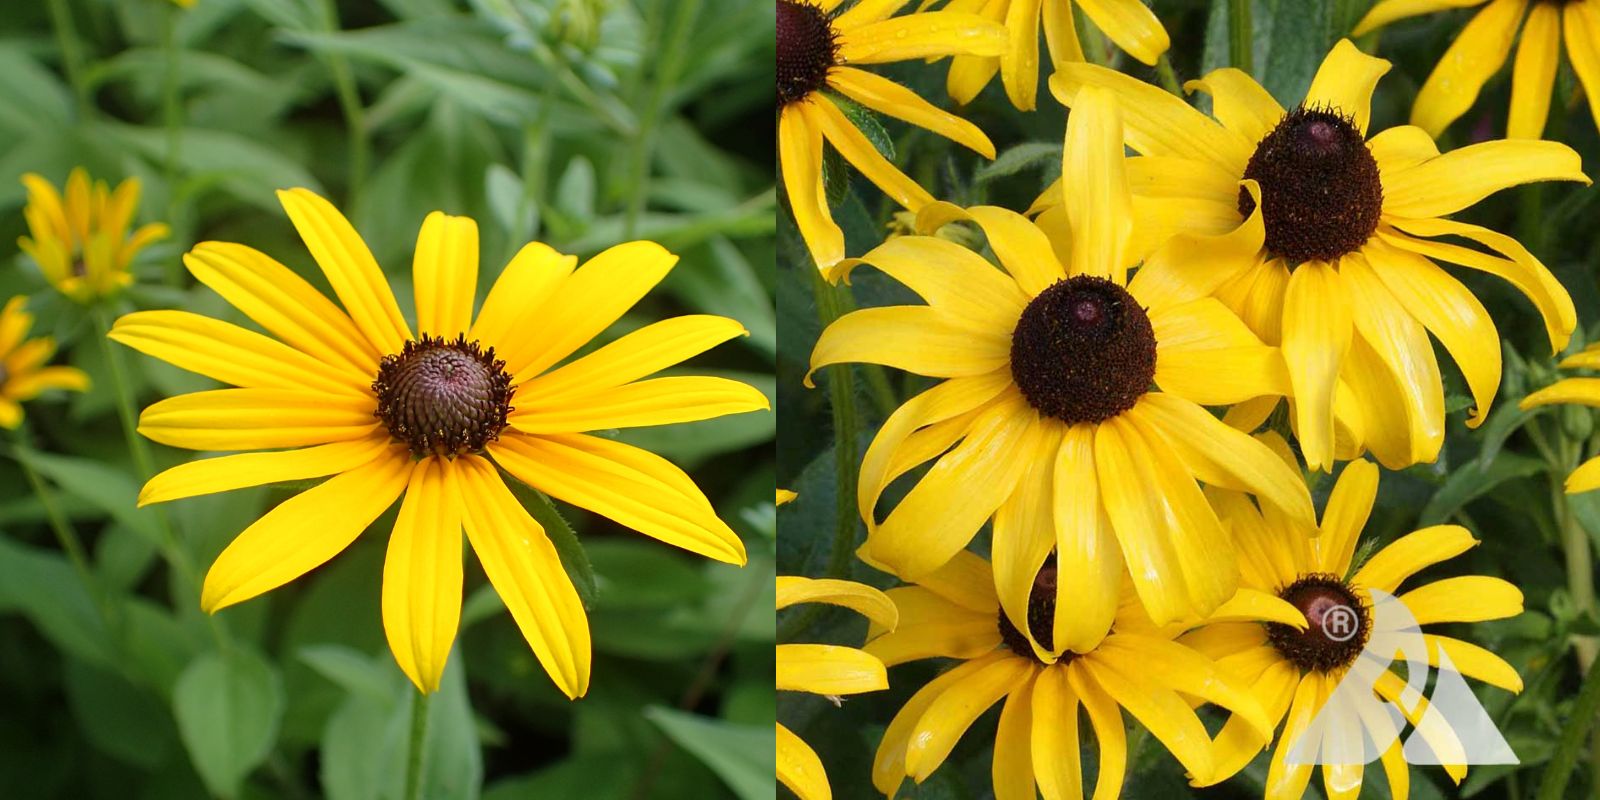
Black-eyed Susans belong to the Rudbeckia genus and are known for their vibrant golden-yellow petals and dark central cone, which gives them the “black-eyed” look. These plants are part of the Asteraceae family, making them close relatives of daisies, sunflowers, and chrysanthemums. Rudbeckia species are hardy, drought-tolerant, and perfect for brightening up both garden borders and wildflower meadows.
Black-eyed Susans typically bloom from mid-summer to fall, and their resilience makes them ideal for areas with poor soil, full sun, and minimal care. Whether you want to grow them in beds, containers, or wildflower gardens, these flowers are versatile and easy to grow.
Choosing the Right Variety
There are several varieties of Black-eyed Susans that differ in color, shape, and size. The most common type, Rudbeckia hirta, is known for its classic golden-yellow petals with a dark, almost black center. However, there are other species and hybrids worth considering:
- Rudbeckia hirta: Known for its cheerful, classic yellow petals.
- Rudbeckia fulgida: A hardier variety with more upright, dense foliage.
- Rudbeckia triloba: This variety produces smaller flowers with multiple stems and blooms.
- Goldsturm: A popular hybrid, prized for its long-lasting blooms and compact size.
Choosing the right variety depends on your aesthetic preferences and the climate in your region. Most varieties thrive in USDA hardiness zones 3-9.
Where to Plant Black-Eyed Susans
Black-eyed Susans thrive in full sun and well-drained soil, making them ideal for areas that receive at least 6 hours of direct sunlight a day. These plants are known for their heat tolerance and drought resistance once established, making them perfect for dry or challenging garden conditions.
Planting Location Tips:
- Full Sun: Choose a location that receives full sun, as this will encourage the healthiest growth and the most vibrant blooms.
- Well-Drained Soil: Black-eyed Susans do not thrive in wet, boggy soil. Ensure your planting site has well-drained, fertile soil. If the soil is heavy or clay-like, consider amending it with compost to improve drainage.
- Space for Growth: These plants spread over time, so give them enough space. Plant them about 18-24 inches apart to allow for their natural growth habit.
How to Plant Black-Eyed Susans
Black-eyed Susans can be grown from seeds, nursery-grown plants, or divisions from established plants. Here’s how to plant them step-by-step:
Planting from Seeds:
- Start Indoors or Direct Sow: You can either start seeds indoors 6-8 weeks before the last frost or direct sow them outdoors after the last frost has passed. If starting indoors, plant seeds in trays or pots and keep them in a warm, sunny spot.
- Seed Depth: Sow the seeds about 1/4 inch deep in the soil. Cover them lightly with soil or seed-starting mix.
- Germination: Seeds should germinate in 7-14 days at temperatures between 65°F-75°F (18°C-24°C). If sowing directly outside, wait until the soil is warm and frost-free.
- Transplant: Once the seedlings are large enough to handle and after the danger of frost has passed, transplant them outdoors. Space them about 18-24 inches apart to allow room for growth.
Planting Nursery-Grown Plants or Divisions:
- Prepare the Soil: Before planting, loosen the soil and add compost to improve fertility and drainage.
- Dig the Hole: Make the hole large enough to accommodate the plant’s root ball without crowding.
- Planting: Place the plant in the hole and backfill with soil, pressing gently to remove air pockets. Water thoroughly after planting.
Caring for Black-Eyed Susans
Black-eyed Susans are relatively low-maintenance once they’re established. However, to ensure healthy growth and a vibrant display of blooms, a little care can go a long way. Here’s how to care for your Black-eyed Susans:
Watering
- Regular Watering: While Black-eyed Susans are drought-tolerant once established, they will perform better with consistent moisture. Water them thoroughly but avoid waterlogging the roots.
- Deep Watering: Water deeply to encourage strong root growth. A deep watering once a week is typically sufficient, especially during dry spells.
Fertilizing
- Minimal Fertilization: Black-eyed Susans don’t need a lot of fertilizer. In fact, too much fertilizer can cause them to become leggy. Use a balanced fertilizer (10-10-10) once in early spring as the plant begins to grow.
- Compost: Adding compost to the soil will provide natural nutrients and improve soil health.
Deadheading and Pruning
- Deadheading: Remove spent flowers to encourage the plant to produce more blooms and extend the flowering period. Regular deadheading will also help maintain the plant’s tidy appearance.
- Pruning: At the end of the growing season, cut back the plants to the ground. This helps prevent disease and encourages new growth in the spring.
Mulching
- Mulch Around the Base: Apply a layer of mulch around the base of the plants in early spring to retain moisture and prevent weed growth. However, be careful not to pile mulch directly against the stems, as this can cause rot.
Common Problems and Solutions
While Black-eyed Susans are generally pest and disease-resistant, they can still face some issues. Here are a few common problems and their solutions:
- Powdery Mildew: If you notice a white, powdery coating on the leaves, it could be powdery mildew. To prevent this, avoid overhead watering and ensure proper spacing between plants for air circulation.
- Aphids: These small pests can be controlled by spraying the plant with a strong jet of water or by using an insecticidal soap.
- Root Rot: This issue is often caused by overwatering. Ensure the soil is well-drained, and avoid watering too frequently.
How to Propagate Black-Eyed Susans
Black-eyed Susans can be propagated through seeds, divisions, or cuttings.
- From Seed: If you’ve grown them from seeds, allow some flowers to go to seed in the fall. Collect the seeds and store them in a cool, dry place for the next growing season.
- From Division: Divide mature plants in early spring or fall to propagate them. Dig up the plant, separate the root ball into smaller sections, and replant each division.
- From Cuttings: Take 4-6 inch cuttings from healthy stems, remove the lower leaves, and root them in water or moist soil.
Conclusion: Why Grow Black-Eyed Susans
Black-eyed Susans are a fantastic addition to any garden. They bring bright, cheery colors to garden beds, borders, and even containers. With their minimal care requirements, drought tolerance, and vibrant blooms, these flowers are perfect for beginners and seasoned gardeners alike. They attract pollinators like bees and butterflies, making them a great choice for an eco-friendly garden. Whether you’re looking to fill up an empty garden bed or create a wildflower meadow, Black-eyed Susans will surely delight.
Tips for Engaging with the Gardening Community
Growing Black-eyed Susans can be a fun and rewarding journey, but it’s even more exciting when shared with others. Join gardening groups, share your successes, or ask for advice on social media to connect with fellow garden enthusiasts. Use hashtags like #BlackEyedSusans, #Rudbeckia, #FlowerGardens, and #GardenInspiration to showcase your beautiful blooms and inspire others to plant these radiant flowers.
Happy gardening! 🌻