
Acorn squash is one of the most beloved winter squashes, celebrated for its sweet, nutty flavor and rich texture. It’s versatile in the kitchen and relatively easy to grow in the garden. Whether you’re a seasoned gardener or just starting out, growing acorn squash offers a rewarding experience and a bountiful harvest to enjoy in the fall. In this comprehensive guide, we’ll walk you through everything you need to know to successfully grow acorn squash, from selecting seeds to harvesting and storing your produce.
Understanding Acorn Squash: A Brief Overview
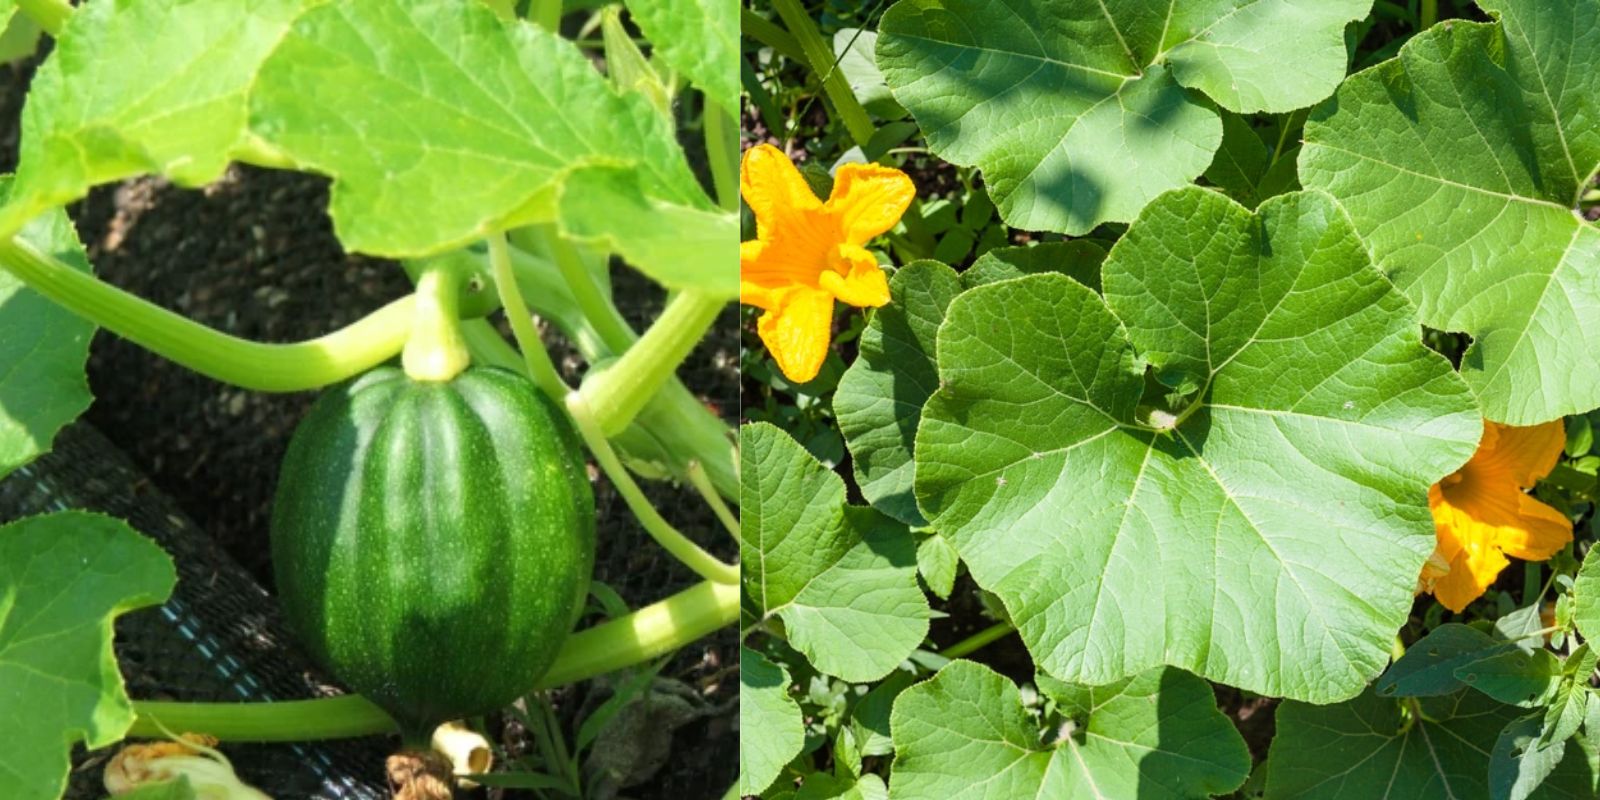
Acorn squash (Cucurbita pepo) is a winter squash that gets its name from its shape, which resembles a large acorn. It has dark green, ribbed skin and sweet, yellow-orange flesh. Although acorn squash is classified as a winter squash, it grows during the warm months of summer and is harvested in the fall, just before the first frost. The fruit stores well and can be kept for several months in cool, dry conditions, making it a staple for winter meals.
Choosing the Right Variety
There are several different varieties of acorn squash to choose from, and each has its own unique characteristics. Some of the most popular varieties include:
- Table Queen: A classic variety with deep green skin and sweet, nutty flesh.
- Jersey Golden: Known for its bright orange skin and sweet flavor.
- Thelma Sanders: A unique heirloom variety with pale cream-colored skin and exceptional taste.
- Honey Bear: A smaller, compact variety ideal for container gardening or small spaces.
Before planting, consider which variety best suits your climate and gardening space.
Step 1: Preparing the Soil
Acorn squash requires rich, well-drained soil to thrive. The key to a successful crop starts with preparing the soil properly. Follow these steps to ensure your soil is ready for planting:
- Test Your Soil: Acorn squash prefers soil with a pH between 6.0 and 6.8. You can use a soil testing kit to determine the pH of your garden soil.
- Amend the Soil: If your soil is too acidic or lacks nutrients, amend it with organic matter such as compost or well-rotted manure. Acorn squash is a heavy feeder, so adding nutrient-rich compost will help support vigorous growth.
- Ensure Good Drainage: Acorn squash doesn’t like waterlogged roots, so it’s important to ensure your soil has good drainage. If your garden soil is too heavy or clay-like, consider planting your squash in raised beds to improve drainage.
- Add Mulch: Adding a layer of organic mulch, such as straw or wood chips, helps retain soil moisture, suppresses weeds, and keeps the soil temperature stable.
Step 2: Planting Acorn Squash Seeds or Transplants
Acorn squash can be grown from seeds or transplants, depending on your preference and growing season. Here’s how to plant them:
Direct Sowing Seeds
- When to Plant: Acorn squash is sensitive to frost, so it’s best to wait until after the last frost date in your region before planting seeds directly in the garden. The soil should be warm, ideally around 65-70°F.
- How to Plant: Sow seeds 1 inch deep in the soil, spacing them 3-4 feet apart to allow room for the vines to spread. You can plant in rows or in hills (small mounds) for better drainage.
- Thinning: Once seedlings emerge and grow to about 3 inches tall, thin them to one strong plant per hill or space them 3-4 feet apart.
Starting Indoors
- When to Start: If you want to get a head start on the growing season, start seeds indoors 3-4 weeks before the last frost date. Use biodegradable pots, as acorn squash doesn’t like having its roots disturbed during transplanting.
- Transplanting: Once the seedlings have 2-3 true leaves and the weather is warm enough, transplant them into the garden. Be sure to harden off the seedlings by gradually exposing them to outdoor conditions before planting.
Step 3: Caring for Acorn Squash Plants
Once your acorn squash plants are established, they require regular care to ensure a healthy and productive harvest. Follow these tips for proper plant care:
Watering
- Acorn squash plants need consistent moisture, especially during the flowering and fruiting stages. Water the plants deeply once or twice a week, providing 1-2 inches of water per week.
- Water the soil directly at the base of the plants rather than wetting the leaves to prevent fungal diseases like powdery mildew.
Fertilizing
- As heavy feeders, acorn squash plants benefit from regular fertilization. Use a balanced organic fertilizer or compost tea every 3-4 weeks throughout the growing season.
- Once the plants start to flower, switch to a high-phosphorus fertilizer to encourage fruit development.
Mulching and Weed Control
- Apply a layer of organic mulch around the base of the plants to retain soil moisture and prevent weeds from competing for nutrients. Mulching also helps regulate soil temperature during hot summer days.
Step 4: Supporting the Vines
Acorn squash plants have long vines that can spread several feet across your garden. There are two options for managing vine growth:
- Ground Sprawling: Allow the vines to sprawl on the ground naturally, ensuring there’s enough space for them to spread without crowding other plants.
- Trellising: You can train the vines to grow vertically using a trellis or sturdy support structure. This saves space and improves air circulation around the plant, reducing the risk of disease.
Step 5: Pollination and Fruit Development
Acorn squash plants produce both male and female flowers. For fruit to develop, the female flowers must be pollinated by the male flowers. Pollination is usually done by bees, but if pollinators are scarce, you can hand-pollinate the flowers using a small paintbrush.
To hand-pollinate:
- Gently transfer pollen from a male flower (the one without a small fruit at its base) to the center of a female flower (the one with a tiny acorn squash at its base).
Step 6: Managing Pests and Diseases
Like other squash varieties, acorn squash plants are susceptible to certain pests and diseases. Some common problems include:
- Squash Bugs: These insects suck sap from the leaves, causing wilting. Handpick them off the plants or use organic insecticidal soap to control infestations.
- Powdery Mildew: A fungal disease that causes white, powdery spots on leaves. To prevent it, avoid overhead watering and ensure good air circulation by spacing plants properly.
- Vine Borers: These pests tunnel into the vines, causing sudden wilting. Preventative measures include applying row covers early in the season and checking for signs of borer activity.
Step 7: Harvesting Acorn Squash
Acorn squash is ready for harvest 70-100 days after planting, once the fruit has fully matured. Here’s how to tell when your acorn squash is ready to pick:
- Color: The skin should be dark green, with no shiny or glossy appearance. Some varieties may have an orange or golden tint.
- Size: Acorn squash typically weighs 1-2 pounds at maturity.
- Stem: The stem attached to the fruit will turn dry and woody.
When harvesting, use sharp pruning shears to cut the squash from the vine, leaving a small portion of the stem attached. This helps prevent rot during storage.
Step 8: Storing Acorn Squash
Once harvested, acorn squash can be stored in a cool, dry place for several months. Cure the squash in a warm, dry location for 10-14 days to harden the skin before moving them to long-term storage. Ideally, store acorn squash at 50-55°F with good ventilation.
Conclusion
Growing acorn squash is a rewarding experience for any gardener, providing a delicious, nutrient-rich harvest for the fall and winter months. By following these steps — from preparing your soil and planting your seeds to caring for your plants and harvesting your squash — you’ll enjoy a bountiful crop of acorn squash that can be enjoyed in a variety of dishes. Happy gardening!