
Introduction
As the gardening season peaks and your garlic plants begin to sprout their delicious green scapes, it’s the perfect time to explore creative ways to preserve and enjoy them. Garlic scapes, the curly, tender green tops of garlic plants, are often overlooked, but they offer a unique, mild garlic flavor that can be preserved beautifully through pickling. Pickled garlic scapes are a crunchy, tangy treat that can elevate salads, sandwiches, and charcuterie boards. This article will guide you through the process of pickling garlic scapes, providing you with all the information you need to enjoy this garden delight throughout the year.
What Are Garlic Scapes?
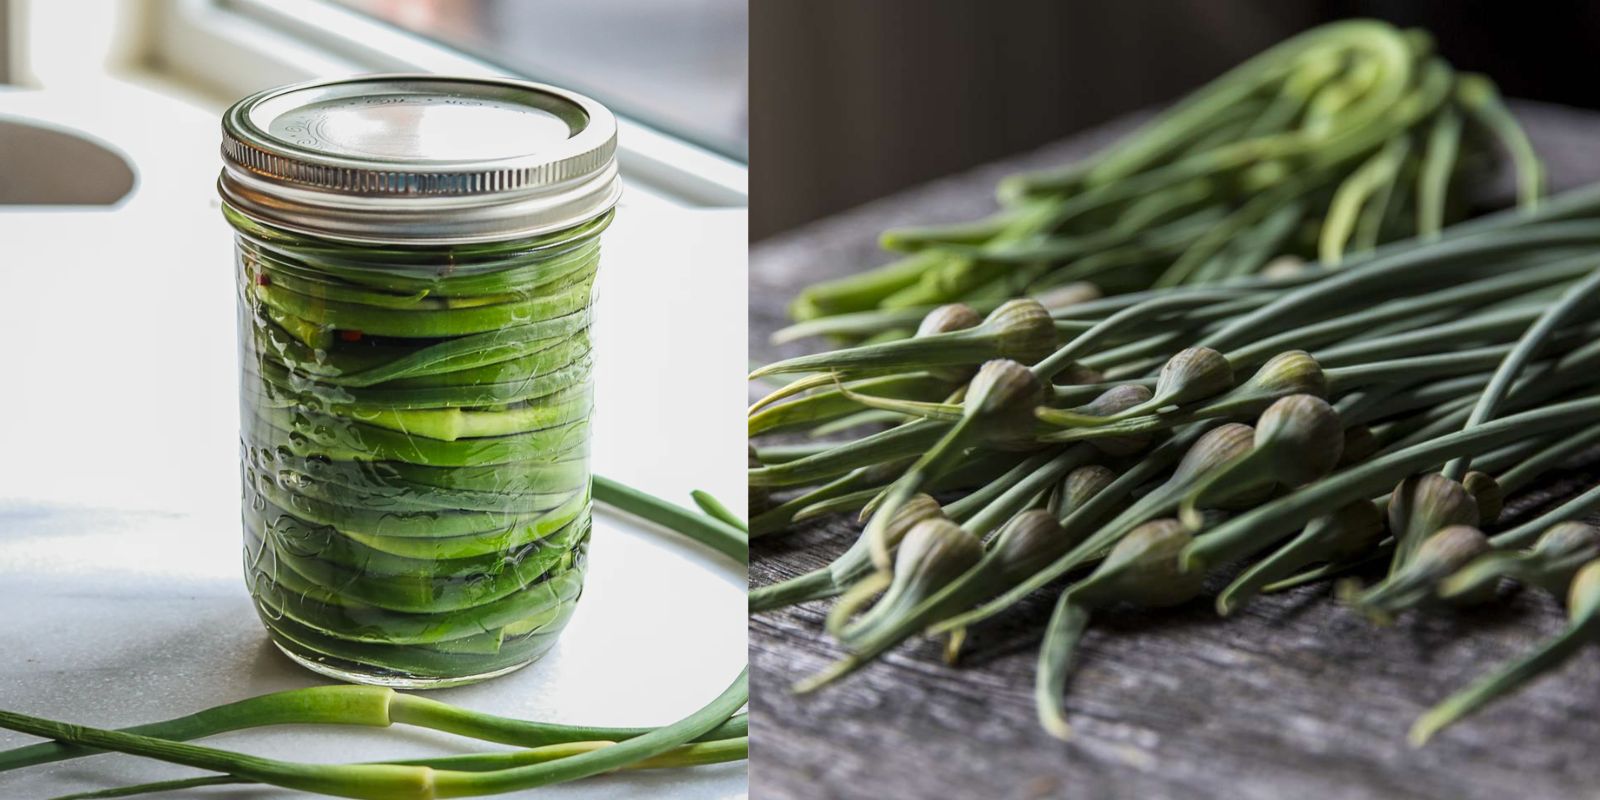
Garlic scapes are the flower stalks of garlic plants. They typically emerge in late spring or early summer, long before the garlic bulbs are ready for harvest. These scapes are tender and have a milder garlic flavor compared to the bulbs. Harvesting garlic scapes not only enhances the flavor of your garden but also promotes better bulb growth.
Why Pickle Garlic Scapes?
Pickling garlic scapes is a fantastic way to extend their shelf life and enjoy their unique flavor beyond the growing season. The pickling process infuses the scapes with a tangy brine, which complements their natural garlic flavor. Pickled garlic scapes are versatile and can be used in a variety of dishes or enjoyed straight from the jar.
Ingredients and Equipment
Ingredients:
- Fresh garlic scapes (about 1 pound)
- 1 cup white vinegar
- 1 cup water
- 2 tablespoons kosher salt
- 2 tablespoons granulated sugar
- 1 teaspoon black peppercorns
- 1 teaspoon mustard seeds (optional)
- Fresh dill (optional)
Equipment:
- Sterilized canning jars with lids
- A large pot for boiling brine
- Tongs or a jar lifter
- A ladle
Preparation:
- Harvest and Prepare Scapes:
- Select tender, fresh garlic scapes from your garden. Trim off any tough or woody ends, and cut the scapes into manageable lengths that will fit into your jars.
- Sterilize Jars:
- Sterilize your canning jars and lids by placing them in a boiling water bath for 10 minutes. This step ensures that your jars are free from any contaminants that could spoil the pickles.
- Prepare Brine:
- In a large pot, combine the vinegar, water, kosher salt, and granulated sugar. Bring this mixture to a boil, stirring until the salt and sugar are fully dissolved. Once dissolved, remove the pot from heat and let the brine cool slightly.
- Pack Jars:
- Place the garlic scapes into the sterilized jars. You can add additional flavorings to the jars, such as black peppercorns, mustard seeds, or fresh dill, according to your preference.
- Add Brine:
- Using a ladle, carefully pour the hot brine over the scapes in each jar, making sure to cover them completely. Leave about 1/2 inch of headspace at the top of each jar.
- Seal and Cool:
- Wipe the rims of the jars with a clean cloth to ensure a good seal. Place the lids on the jars and screw on the bands until they are fingertip-tight. Allow the jars to cool to room temperature. As they cool, you may hear the satisfying “pop” of the lids sealing.
- Refrigerate:
- Once cooled, store the jars in the refrigerator. Allow the scapes to pickle for at least 24 hours before tasting, though they will develop a more robust flavor if left to pickle for 1-2 weeks.
How to Enjoy Pickled Garlic Scapes
Pickled garlic scapes are incredibly versatile. Here are a few ideas to get you started:
- Salads:
- Add pickled garlic scapes to salads for a crunchy, tangy twist. They pair well with both green salads and grain-based salads like quinoa or couscous.
- Sandwiches and Wraps:
- Use pickled garlic scapes as a flavorful addition to sandwiches, wraps, and burgers. Their tangy taste complements meats, cheeses, and fresh vegetables.
- Charcuterie Boards:
- Incorporate pickled garlic scapes into your charcuterie board. They add a unique flavor profile and a pop of color to the assortment.
- Snacks:
- Enjoy pickled garlic scapes straight from the jar as a crunchy, tangy snack.
- Cooking:
- Chop pickled garlic scapes and add them to cooked dishes for an extra burst of flavor. They work well in stir-fries, pasta dishes, and grain bowls.
Tips for Successful Pickling
- Use Fresh Scapes:
- For the best results, use fresh, tender garlic scapes. Avoid scapes that are wilted or have begun to turn yellow.
- Adjust Flavorings:
- Feel free to experiment with additional spices and herbs to customize the flavor of your pickled scapes. Popular additions include chili flakes for heat, bay leaves for depth, and coriander seeds for a citrusy note.
- Store Properly:
- While pickled garlic scapes can be stored in the refrigerator for several months, they are best enjoyed within 2-3 months for optimal flavor and crunch.
- Safety First:
- Always follow proper canning and pickling procedures to ensure the safety and longevity of your pickled goods. If you notice any signs of spoilage, such as off smells or bulging lids, discard the jar immediately.
Conclusion
Pickling garlic scapes is a rewarding and flavorful way to preserve this often-overlooked garden treasure. By following these simple steps, you can enjoy the unique taste of garlic scapes long after the growing season has ended. Whether you use them in salads, sandwiches, or as a snack, pickled garlic scapes add a tangy, garlicky kick to your culinary creations. So, gather your scapes, prepare your brine, and enjoy the delicious results of your pickling efforts!
Motivation Sentence:
Don’t let your garden’s bounty go to waste—pickle those garlic scapes and savor their tangy crunch all year round! 🌱🧄 #GardeningTips #PickledGarlic #HomePreserving #GardenHarvest #DIYPickles #Foodie #SustainableLiving #KitchenGarden