
Aloe vera, renowned for its soothing gel and hardy nature, is a staple in many homes and gardens. If you’ve ever wondered how to propagate this versatile plant, you’re in the right place. Propagation is not only a cost-effective way to expand your collection, but it’s also deeply rewarding for plant lovers. Whether you’re propagating for yourself or to gift to others, this guide will provide all the insights you need.
Why Propagate Aloe Vera?
Aloe vera is a low-maintenance plant with incredible benefits. From skincare remedies to air purification, this plant is truly a gardener’s delight. Propagating aloe vera allows you to:
- Expand your aloe collection.
- Share plants with friends and family.
- Revive overcrowded plants for better growth.
The best part? Aloe vera propagation is straightforward and beginner-friendly.
Understanding Aloe Vera’s Growth Habits
Before diving into propagation, it’s essential to understand how aloe vera grows. Aloe vera plants produce “pups” or offshoots at the base of the mother plant. These pups are the key to successful propagation. Over time, the mother plant may become overcrowded, making propagation a great way to give it space and ensure healthy growth.
Step-by-Step Guide to Aloe Vera Propagation
1. Choose a Healthy Mother Plant
Start with a robust and healthy aloe vera plant. Look for pups at the base of the plant. These small offshoots should have their own roots, as they will become independent plants.
2. Remove the Pups
Once you’ve identified the pups, carefully remove them from the mother plant. Follow these tips for the best results:
- Use a clean, sharp knife or pruning shears to cut the pup away if it doesn’t detach easily.
- Ensure you don’t damage the roots of the pup or the mother plant during this process.
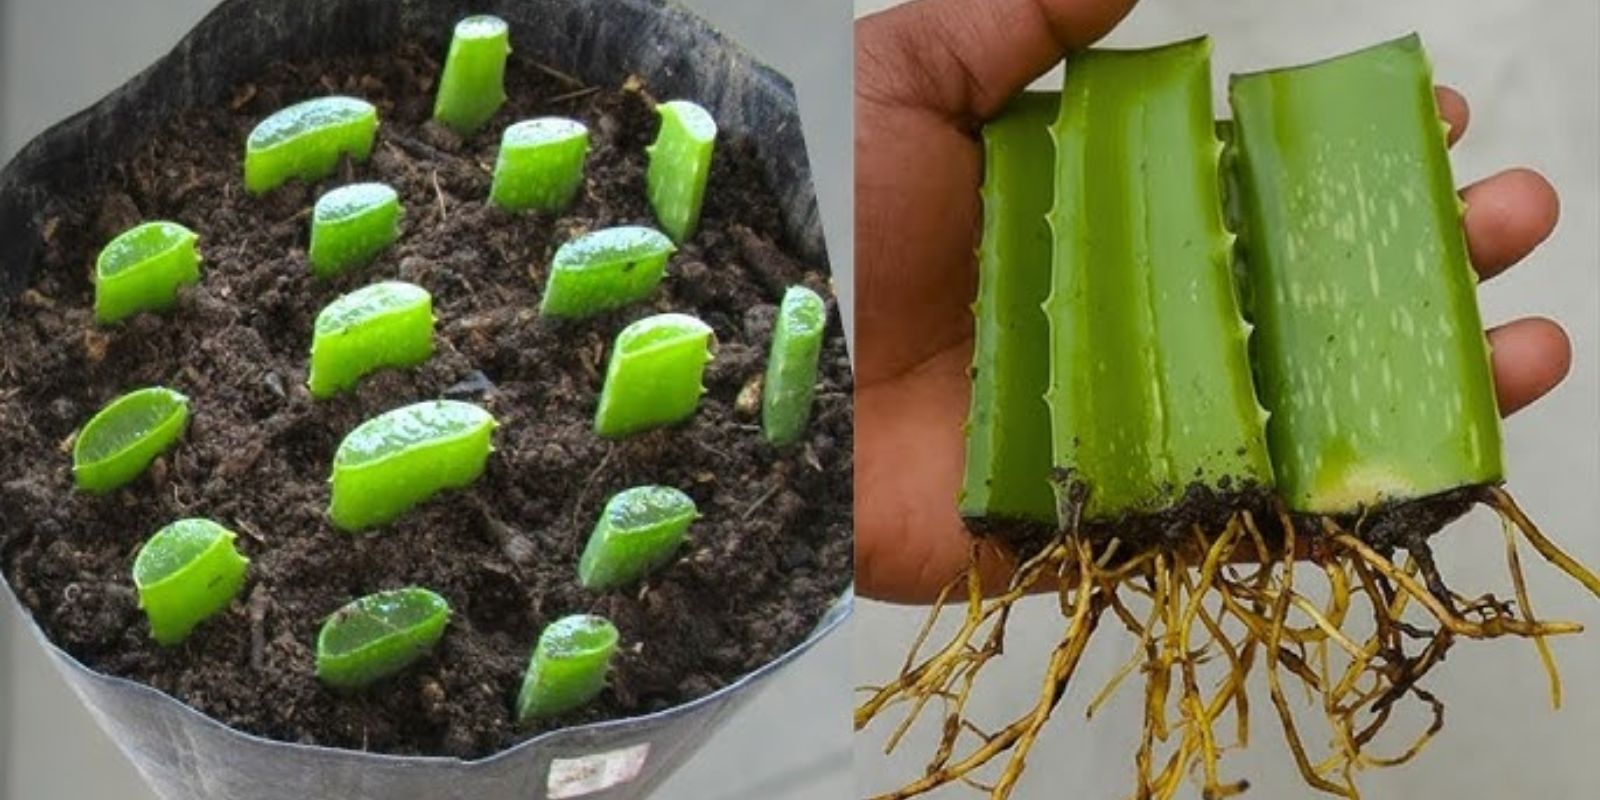
3. Dry the Pups
After separating the pups, allow them to air dry for 1-2 days. This step is crucial as it allows the cut areas to form a callus. Skipping this step can lead to root rot when the pups are planted.
4. Prepare the Soil
Aloe vera thrives in well-draining soil. Use a cactus mix or create your own by combining:
- 2 parts sand or perlite.
- 1 part potting soil.
The soil should mimic the plant’s natural desert environment to prevent water retention.
5. Plant the Pups
Fill a pot with prepared soil and plant each pup with its roots fully covered. Avoid burying the base of the pup to prevent rot. For best results, use pots with drainage holes.
6. Water Sparingly
Aloe vera is a succulent, and overwatering can be its biggest enemy. Follow these watering tips:
- Water the soil lightly after planting.
- Allow the soil to dry out completely between waterings.
- Avoid letting water pool at the base of the plant.
7. Provide the Right Light
Place the pots in a location with bright, indirect sunlight. Aloe vera thrives in warm, sunny conditions but can scorch if exposed to direct sunlight for extended periods.
Additional Tips for Successful Aloe Vera Propagation
- Repot Overcrowded Plants: If the mother plant is producing too many pups, it’s a sign that it needs more space. Repotting the mother plant after propagation ensures its continued growth.
- Use Clay Pots: Clay pots are ideal for aloe vera because they allow the soil to dry out faster, reducing the risk of overwatering.
- Watch for Pests: Aloe vera is generally pest-resistant, but overwatering can attract gnats or cause fungal issues. Keep an eye on your plants and act quickly if problems arise.
- Feed Sparingly: Aloe vera doesn’t require heavy fertilization. A diluted succulent fertilizer used once or twice during the growing season is sufficient.
Common Mistakes to Avoid
- Overwatering: This is the most common mistake. Succulents like aloe vera prefer drier conditions, so always err on the side of underwatering.
- Skipping the Drying Step: Planting pups immediately after removal increases the risk of rot. Letting them dry ensures successful rooting.
- Using the Wrong Soil: Regular garden soil retains too much moisture and can lead to root rot. Always use well-draining soil.
- Excessive Sun Exposure: While aloe vera loves sunlight, too much direct exposure can cause the leaves to turn brown or red.
Benefits of Aloe Vera Propagation
Propagating aloe vera is more than just a gardening activity—it’s a sustainable and rewarding way to grow your green collection. Here are some of the benefits:
- Cost-Effective: Why buy new plants when you can grow them yourself?
- Eco-Friendly: Propagation reduces the demand for commercially grown plants, which often come in plastic pots.
- Therapeutic: Gardening is a relaxing activity that connects you with nature.
Creative Uses for Your Aloe Vera Plants
Once you’ve successfully propagated aloe vera, there are plenty of ways to use your plants:
- Skincare: Harvest the gel for burns, cuts, or as a moisturizer.
- Home Décor: Aloe vera makes an excellent addition to indoor and outdoor spaces.
- Air Purification: Like many houseplants, aloe vera helps improve air quality.
- Gifts: Potted aloe vera plants make thoughtful and eco-friendly gifts.
Grow Your Aloe Vera Army Today!
With this guide, you’re well-equipped to propagate aloe vera and enjoy the satisfaction of growing your own plants. Remember, propagation is not just about multiplying your plants—it’s about nurturing life and sharing nature’s beauty with others.
Have you tried propagating aloe vera? Share your experiences and tips in the comments below. Let’s grow together! 🌱
#AloeVeraPropagation #SucculentCare #GardeningTips #EasyPropagation #GreenThumb #IndoorPlants #GrowYourOwn #PlantLoversUnite