
Growing your own pear tree from a simple pear fruit is a fun and rewarding experience. Whether you’re a seasoned gardener or a complete beginner, this process allows you to witness the incredible transformation of a small seed into a thriving tree. Not only is it a cost-effective and eco-friendly way to grow fruit trees, but it also connects you to the natural lifecycle of plants. This guide will take you through each step, making it easy to grow your pear tree from a fruit you already enjoy.
Why Grow a Pear Tree from Fruit?
Before diving into the steps, let’s explore why growing a pear tree from a fruit is a fantastic idea:
- Eco-Friendly Gardening: Instead of discarding seeds, you’re reusing them to create something sustainable.
- Cost Savings: You don’t need to purchase saplings or seeds separately—just use the seeds from a store-bought pear.
- Personal Satisfaction: Watching a tree grow from a seed is deeply fulfilling.
- Healthy Harvest: Fresh, homegrown pears are delicious, nutritious, and free of chemicals.
- Garden Beauty: Pear trees are not only productive but also offer stunning blossoms in spring.
Step-by-Step Guide to Growing Pear Trees from Pear Fruit
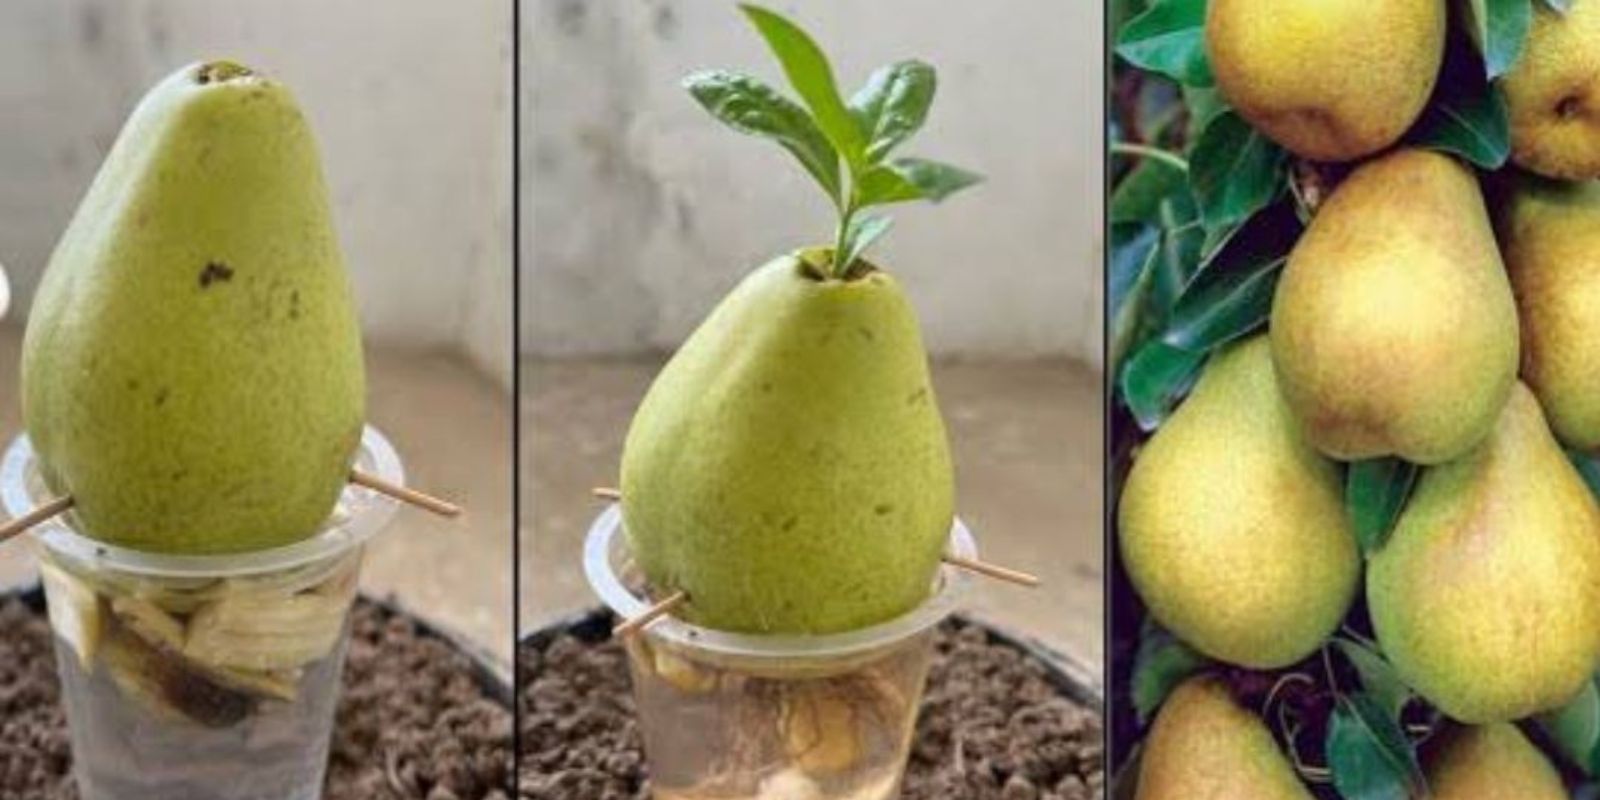
Step 1: Collecting the Seeds
Start with a ripe pear, preferably organic, to ensure the seeds are viable.
- Cut the pear open and carefully remove the seeds.
- Rinse the seeds under water to remove any sticky fruit residue.
- Pat them dry with a paper towel to prevent mold during storage.
Step 2: Stratification Process
Pear seeds need a period of cold stratification to break their dormancy and stimulate germination. This simulates winter conditions.
- Place the cleaned seeds in a damp paper towel.
- Put the paper towel into a resealable plastic bag.
- Label the bag with the date and variety of the pear.
- Refrigerate the bag for 8–12 weeks, ensuring the paper towel remains damp but not soaking.
During this time, the seeds prepare for germination.
Step 3: Preparing the Soil and Pots
Once the seeds have completed stratification, it’s time to plant them.
- Choose small pots with drainage holes.
- Fill the pots with a well-draining soil mix, such as a combination of potting soil and compost.
- Moisten the soil slightly before planting.
Step 4: Planting the Seeds
- Remove the seeds from the refrigerator and let them adjust to room temperature for a few hours.
- Plant the seeds about ½ inch deep in the prepared soil.
- Cover lightly with soil and press gently.
Step 5: Providing Ideal Growing Conditions
Place the pots in a warm location with plenty of indirect sunlight.
- Keep the soil moist but avoid overwatering.
- Use a plastic cover or a mini greenhouse setup to maintain humidity.
Germination can take several weeks, so be patient!
Step 6: Transplanting Seedlings
Once the seedlings reach 4–6 inches tall and develop a few sets of leaves, they are ready to be transplanted.
- Choose a larger pot or a spot in your garden with good sunlight and well-draining soil.
- Dig a hole deep enough to accommodate the seedling’s root system.
- Carefully transfer the seedling and cover the roots with soil.
Step 7: Caring for Your Pear Tree
Caring for a young pear tree is essential to ensure its healthy growth.
- Watering: Water regularly, especially during dry periods, but avoid waterlogging.
- Fertilizing: Apply a balanced fertilizer during the growing season for strong development.
- Pruning: Prune the tree annually to remove dead or weak branches and shape the tree.
- Protection: Protect the tree from pests and extreme weather conditions with mulch or netting.
Step 8: Patience and Long-Term Care
Pear trees grown from seeds take time to mature and bear fruit. On average, it can take 4–8 years for a tree to produce pears. During this time:
- Monitor the tree’s growth and health.
- Ensure proper cross-pollination by planting another pear tree nearby, as most varieties are not self-pollinating.
Challenges and Solutions
While growing a pear tree from seed is rewarding, it comes with a few challenges:
- Fruit Variability:
Trees grown from seeds may not produce fruit identical to the parent pear.
- Solution: Embrace the uniqueness, or graft the tree with a desired variety for consistent fruit.
- Germination Rate:
Not all seeds will germinate successfully.
- Solution: Plant multiple seeds to increase your chances of success.
- Time Commitment:
The process is lengthy, and patience is crucial.
- Solution: Enjoy the journey and focus on the long-term rewards.
Benefits of Growing Your Own Pear Tree
The effort of growing a pear tree from seed pays off in multiple ways:
- Environmental Impact: Trees contribute to cleaner air and support local ecosystems.
- Aesthetic Appeal: Pear trees offer shade, beauty, and a focal point in your garden.
- Healthy Food Source: Homegrown pears are free of chemicals and bursting with flavor.
- Skill Development: You’ll learn valuable gardening skills and techniques.
Expert Tips for Success
- Choose the Right Pear: Start with an organic pear to ensure viable seeds.
- Multiple Seeds: Plant several seeds to improve the odds of successful germination.
- Start Indoors: Begin the process in pots before transferring seedlings outdoors.
- Monitor Pests: Protect young trees from pests like aphids and caterpillars.
- Cross-Pollination: If possible, plant multiple pear varieties to ensure a good harvest.
Conclusion
Growing a pear tree from a pear fruit is more than just a gardening project—it’s a fulfilling journey that allows you to connect with nature and witness the beauty of plant life firsthand. While it requires time and care, the rewards of having your very own pear tree are immense. From its first tiny leaves to the delicious fruit it will one day bear, your pear tree will be a source of pride, beauty, and nourishment.
Are you ready to embark on this gardening adventure? Start today, and let us know how your pear-growing journey unfolds!
🍐🌳 #GrowYourOwn #PearTreeJourney #GardeningMadeEasy #SustainableGardening #FruitGardening #HomegrownHarvest #GardenInspiration