
Introduction
Orchids are among the most captivating plants, known for their elegant and exotic blooms. However, growing orchids can be challenging, particularly when it comes to managing root health and preventing common issues like root rot. A unique and innovative method has emerged that involves growing orchids in water bottles. This technique not only promotes abundant flowering but also ensures healthy roots by minimizing the risk of rot. In this article, we will explore the steps to successfully grow orchids in water bottles, the benefits of this method, and practical tips for maintaining a thriving orchid collection.
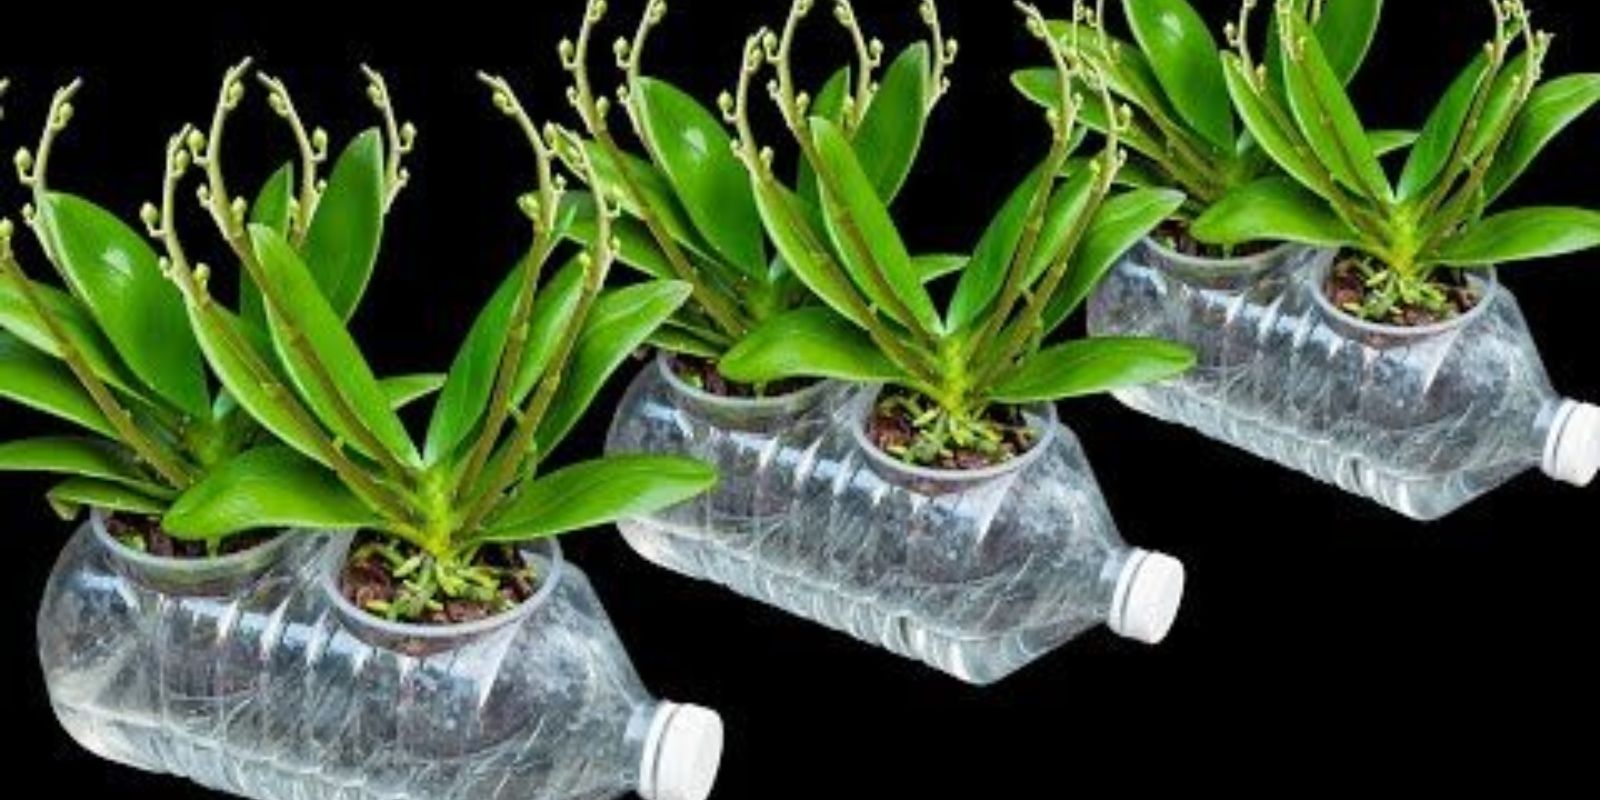
The Benefits of Growing Orchids in Water Bottles
Growing orchids in water bottles offers several advantages that make it an appealing method for both beginners and experienced gardeners:
1. Prevention of Root Rot
Root rot is a common problem in orchid cultivation, often caused by overwatering or poor drainage. Water bottles, when prepared correctly, provide excellent drainage and airflow around the roots, significantly reducing the risk of rot.
2. Enhanced Aesthetic Appeal
The transparent nature of water bottles allows you to observe the root system and the overall health of the orchid. This visibility can be both educational and aesthetically pleasing, as you can watch the roots grow and develop.
3. Space-Saving and Portable
Water bottles are compact and lightweight, making them ideal for small spaces or urban gardening. They are also easy to move, allowing you to place your orchids in optimal lighting conditions throughout the day.
4. Cost-Effective
This method is budget-friendly, as it utilizes common household items and requires minimal investment in specialized pots or equipment. It also reduces the need for frequent repotting and expensive substrates.
Steps to Grow Orchids in Water Bottles
1. Preparing the Water Bottle
Start by selecting a clean plastic water bottle. The size of the bottle should be appropriate for the orchid you are planting. For smaller orchids, a standard 16-ounce bottle works well, while larger orchids may require a 1-liter or 2-liter bottle.
- Cut the Bottle: Using a sharp knife or scissors, carefully cut off the top portion of the bottle, leaving enough height for the orchid’s roots and leaves. You can also cut the bottle horizontally in the middle and then use the top part as a removable lid for easy access to the plant.
- Create Drainage Holes: Drill or poke several small holes in the bottom of the bottle to allow excess water to drain out. Proper drainage is crucial to prevent waterlogging and root rot.
2. Choosing the Right Media
Orchids require a well-draining medium that provides good airflow to the roots. For water bottle cultivation, consider using:
- Orchid Bark: A classic choice, orchid bark provides excellent drainage and mimics the natural habitat of epiphytic orchids.
- Clay Pellets: Lightweight and porous, clay pellets (also known as LECA) are another great option for providing aeration and moisture control.
- Sphagnum Moss: For orchids that require more moisture, sphagnum moss can be used. However, be cautious with watering to avoid over-saturation.
3. Planting the Orchid
- Prepare the Orchid: Gently remove the orchid from its current pot and shake off any old substrate from the roots. Trim any dead or damaged roots with sterilized scissors.
- Position the Orchid: Place a small layer of the chosen media at the bottom of the bottle. Carefully position the orchid in the bottle, spreading the roots evenly. Add more media around the roots to secure the plant in place.
- Top Layer: Leave some space at the top of the bottle for watering. The orchid’s crown should remain above the media to prevent rot.
4. Watering and Care
- Watering: Water the orchid lightly, allowing the water to drain through the holes at the bottom. The frequency of watering depends on the type of media used and the orchid species. Generally, water when the media feels dry to the touch.
- Lighting: Place the water bottle in a bright location with indirect sunlight. Orchids thrive in filtered light; direct sunlight can scorch the leaves.
- Humidity: Orchids enjoy high humidity. To maintain adequate moisture levels, mist the plant occasionally or place a humidity tray nearby.
- Fertilization: Use a balanced orchid fertilizer diluted to half strength. Apply it every two weeks during the growing season and reduce the frequency during the dormant period.
5. Monitoring and Maintenance
- Check for Pests: Regularly inspect the orchid for pests such as aphids, spider mites, or scale insects. If found, treat the plant promptly with appropriate methods.
- Pruning: Remove any dead or yellowing leaves to promote healthy growth. Also, trim any old or decaying roots to prevent infection.
- Repotting: Over time, the orchid may outgrow the water bottle or the media may break down. Repot the orchid every 1-2 years, or when you notice the roots becoming too crowded.
Tips for Success
1. Choose the Right Orchid Species
While this method can work for various orchid species, some, like Phalaenopsis and Dendrobium, are particularly well-suited for water bottle cultivation. Research the specific needs of your orchid species to ensure proper care.
2. Monitor Water Levels
Orchids do not like to sit in water, so ensure that the water bottle’s drainage system is functioning correctly. The roots should not be constantly submerged.
3. Maintain Cleanliness
Keep the water bottle and surrounding area clean to prevent mold and algae growth. If algae form inside the bottle, clean it out and replace the media if necessary.
Conclusion
Growing orchids in water bottles is an innovative and practical method that offers numerous benefits, including preventing root rot, enhancing aesthetic appeal, and saving space. With the right preparation, care, and attention to detail, you can enjoy vibrant, healthy orchids with profuse blooms. This technique is not only cost-effective but also accessible to gardeners of all experience levels. Whether you’re a novice looking for a low-maintenance way to grow orchids or an experienced gardener seeking new challenges, the water bottle method is worth exploring. Try it out and experience the joy of watching your orchids thrive in this unique setup. Happy gardening!