
Lashing is a skill as old as civilization itself. Before screws, nails, and bolts became the go-to for building and binding, people relied on ropes and the clever use of knots to create sturdy, functional structures. From building shelters and furniture to crafting tools and trellises, lashing has been an integral part of humanity’s resourcefulness. Today, this timeless skill is making a comeback, not just as a practical method of construction but also as an eco-friendly and creative approach to DIY projects. Whether you’re a gardener, outdoor enthusiast, or DIY hobbyist, learning the art of lashing can open up a world of possibilities.
In this article, we’ll explore the fundamentals of lashing, the materials you need, and how to apply this skill in your projects. By the end, you’ll be ready to try your hand at this versatile craft and maybe even inspire others to embrace it.
What is Lashing?
Lashing refers to the technique of binding two or more objects together using rope, twine, or cord. It is widely used in outdoor settings, especially in camping, gardening, and survival scenarios. Scouts often learn lashing as part of their basic skills, and it has been a critical technique in building functional structures like tripods, shelters, and bridges without the need for metal fasteners.
Unlike modern construction, lashing relies on simple tools and natural materials, making it an eco-friendly alternative. It’s also surprisingly strong when done correctly, offering stability and durability for a variety of applications.
Why Should You Learn Lashing?
- Eco-Friendly Building: Lashing uses biodegradable materials like natural fiber ropes, making it a sustainable choice for crafting and construction.
- Versatility: From garden trellises and plant supports to outdoor furniture and camping gear, lashing can be applied to a wide range of projects.
- Cost-Effective: Lashing requires minimal tools and materials, which can often be sourced for free or at a low cost.
- Skill Preservation: By learning and practicing lashing, you’re helping to preserve a traditional skill that is at risk of being forgotten.
- Creative Potential: The simple act of tying ropes can lead to beautifully crafted, one-of-a-kind pieces.
Materials You Need
- Rope or Cord: Use natural fibers like sisal, jute, or hemp for a traditional look, or opt for synthetic ropes for more durability in outdoor settings.
- Poles or Sticks: Bamboo, wooden dowels, tree branches, or other sturdy materials.
- Knife or Scissors: To cut the rope to the desired length.
- Gloves (Optional): To protect your hands while pulling the rope tight.
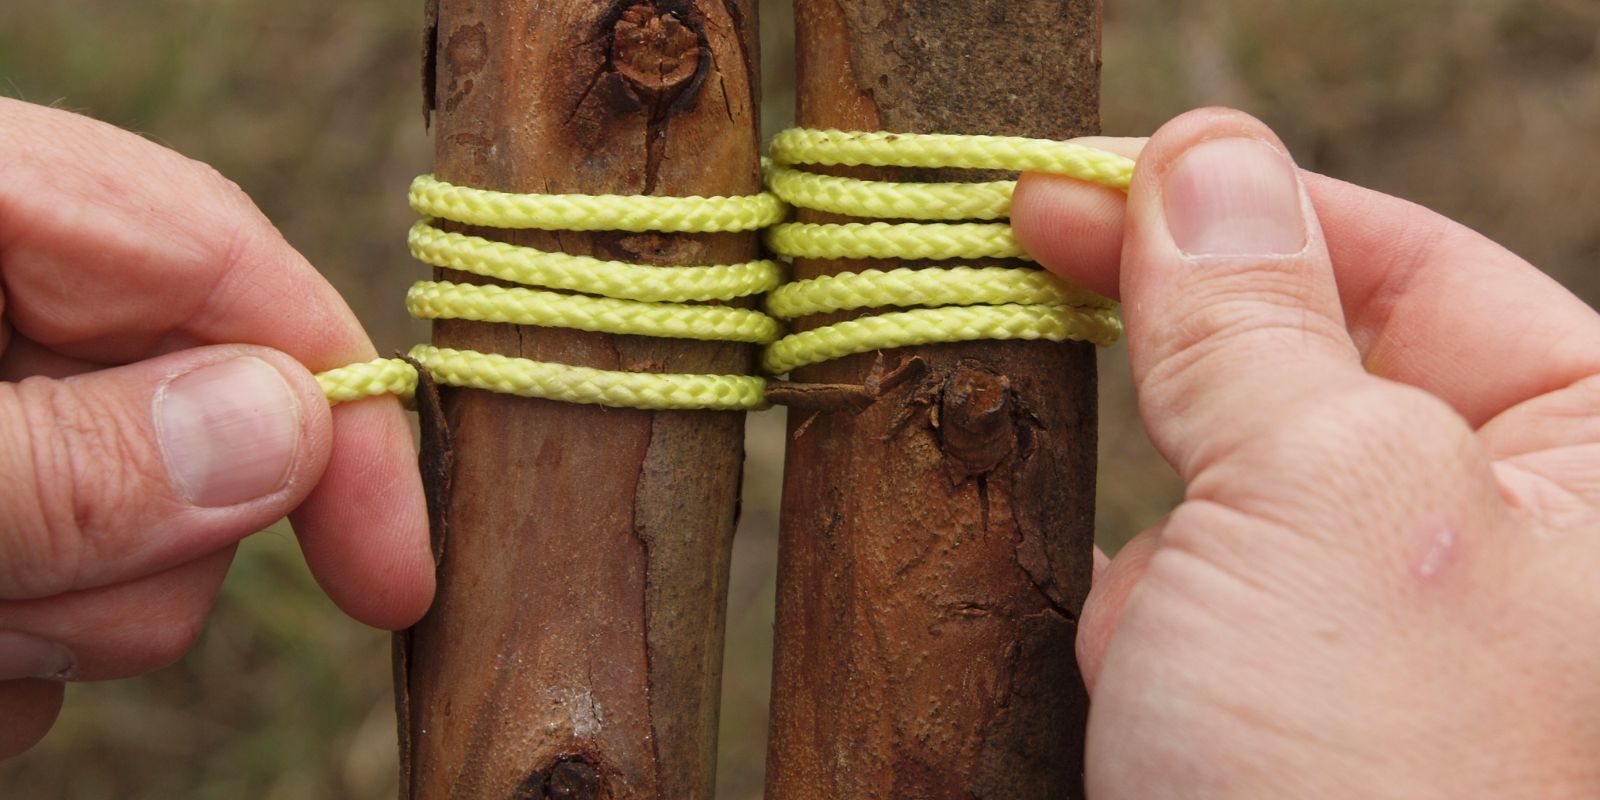
Types of Lashing Techniques
1. Square Lashing
Square lashing is ideal for connecting two poles at a 90-degree angle. This is commonly used to build frames, trellises, or simple garden structures.
Steps:
- Lay the poles in a cross shape.
- Wrap the rope around the intersection several times in a square pattern.
- Add a few frapping turns (tight loops around the rope itself) to secure it.
- Tie off the rope with a secure knot.
2. Diagonal Lashing
Diagonal lashing is used when poles intersect at an angle other than 90 degrees, such as in an “X” shape. It’s great for reinforcing structures and preventing wobbling.
Steps:
- Cross the poles and start by making an “X” with the rope over the intersection.
- Wrap the rope diagonally around the poles in both directions.
- Finish with a few frapping turns and tie it off securely.
3. Sheer Lashing
Sheer lashing is used to bind two poles parallel to each other. It’s often used to make ladders, flagpoles, or tripods.
Steps:
- Place the poles side by side.
- Wrap the rope around both poles several times, pulling tightly.
- Add frapping turns between the poles to tighten the binding.
- Secure with a knot.
How to Practice Lashing
To master the art of lashing, start with small, simple projects. Practice tying different lashing techniques and focus on making them as tight and secure as possible. Test your structures by putting weight on them or gently shaking them to check for stability. Over time, you’ll develop the confidence to tackle more complex projects.
DIY Projects Using Lashing
1. Garden Trellis
Create a sturdy trellis for climbing plants like beans or tomatoes. Use bamboo poles and jute rope to construct a simple A-frame structure, lashing the intersections with square lashing.
2. Tripod Planter Stand
Build a tripod stand for hanging planters or outdoor lanterns. Use three long poles and sheer lashing at the top to bind them together, spreading the legs out for stability.
3. Outdoor Furniture
Craft a rustic bench or stool using lashing techniques. Bind wooden planks or logs together to create the seat and legs.
4. Camping Structures
Use lashing to build a quick shelter, a cooking stand, or even a simple bridge during outdoor adventures.
Tips for Successful Lashing
- Choose the Right Rope: Natural fibers work well for indoor or temporary projects, while synthetic ropes are better for outdoor use.
- Pull Tight: The strength of lashing comes from how tightly you wrap and frap the rope. Use gloves if needed to avoid rope burn.
- Use the Right Knot: Learn basic knots like the clove hitch, square knot, and timber hitch for starting and finishing your lashings.
- Check for Stability: Always test your finished project to ensure it’s secure and stable.
- Maintain Your Ropes: Store your ropes properly and inspect them for wear and tear before each use.
Reviving the Lost Art
Lashing is more than just a practical skill; it’s a connection to our ancestors and a way to bring craftsmanship and creativity into modern life. By learning this art, you’re not just building structures but also preserving a part of human history. Imagine the satisfaction of creating something functional and beautiful with your own hands, using nothing but rope and natural materials.
Share your lashing projects, and let’s inspire a new generation of crafters and builders! What will you create today?
#DIYProjects #LashingSkills #SustainableLiving #GardeningTips #OutdoorCrafts #HandmadeCreations