
Okra, also known as “lady’s finger,” is a popular vegetable in many cuisines around the world. Its unique flavor, versatile use in dishes, and numerous health benefits make it a garden favorite. Growing okra can be an enjoyable experience, especially if you employ the right techniques. In this article, we’ll explore the fastest way to grow okra, focusing on a method that not many gardeners talk about: pre-sprouting seeds. This technique not only speeds up germination but also ensures that you have robust plants ready to produce delicious pods sooner.
Understanding Okra: A Quick Overview
Before diving into the growing process, let’s understand what makes okra such a beloved plant.
Nutritional Benefits
Okra is packed with essential nutrients, including vitamins A, C, and K, as well as folate and fiber. It is low in calories and high in antioxidants, making it a healthy addition to any diet. Additionally, okra has been shown to help regulate blood sugar levels, making it particularly beneficial for individuals with diabetes.
Varieties of Okra
There are several varieties of okra, with the most popular being:
- Clemson Spineless: This variety is known for its tender pods and ease of harvesting.
- Emerald: A high-yielding variety with a vibrant green color.
- Red Burgundy: This variety has striking red pods and is often grown for ornamental purposes as well.
Growing Conditions
Okra thrives in warm climates and well-drained soil. It prefers full sun and is relatively drought-tolerant once established. The ideal soil temperature for planting okra seeds is between 70°F and 95°F.
Step-by-Step Guide to Growing Okra Faster
Now, let’s delve into the steps you can take to grow okra quickly using the pre-sprouting method.
Step 1: Choose Quality Seeds
Start by selecting high-quality okra seeds from a reliable source. Fresh seeds have a better germination rate and will lead to healthier plants. You can often find seeds at local garden centers, nurseries, or online.
Step 2: Soak the Seeds
To prepare your okra seeds for faster germination, soak them in water for 24 hours. This process softens the seed coat and helps activate the germination process.
- Fill a bowl with warm water.
- Place the seeds in the water, ensuring they are fully submerged.
- Let them soak for 24 hours to allow the seeds to absorb moisture.
Step 3: Pre-Sprout the Seeds
After soaking, it’s time to pre-sprout your seeds. This technique significantly increases the likelihood of successful germination.
- Dampen a paper towel: Take a clean paper towel and moisten it with water. It should be damp but not dripping wet.
- Place the seeds on the towel: Lay the soaked seeds evenly spaced on one half of the paper towel.
- Fold the towel: Fold the other half of the towel over the seeds to cover them completely.
- Seal in a plastic bag: Place the towel inside a resealable plastic bag or container. This will create a humid environment that encourages germination.
- Store in a warm, dark place: Keep the bag in a warm area, such as on top of your refrigerator or in a cupboard, for about 2-3 days.
- Check for sprouting: After a few days, check the seeds for tiny roots emerging. This indicates they are ready to be planted.
Step 4: Prepare Your Garden Bed or Containers
While your seeds are sprouting, prepare the planting area.
- Select a sunny location: Choose a spot in your garden or use containers that will receive full sunlight for at least 6-8 hours daily.
- Soil preparation: Okra thrives in well-draining soil enriched with organic matter. You can create a suitable mix by combining:
- 50% garden soil
- 30% compost
- 20% perlite or sand for drainage
- Amend the soil: Test the soil pH; okra prefers a pH of 6.0 to 6.8. Add lime if your soil is too acidic.
- Prepare planting holes: If you’re planting in a garden bed, create rows spaced 3 feet apart, with holes every 12-18 inches for each plant. If using containers, plant 1-2 seeds per container, ensuring they have at least 5 gallons of space to grow.
Step 5: Plant the Pre-Sprouted Seeds
- Planting depth: Carefully plant the pre-sprouted seeds about 1 inch deep in the prepared soil. The roots should be pointed down, and the shoots should be facing up.
- Spacing: If planting multiple seeds, ensure they are spaced 12-18 inches apart to allow for growth.
Step 6: Water Regularly
After planting, water the seeds gently but thoroughly.
- Keep the soil moist: Water the newly planted seeds every day or every other day until they establish themselves. Be careful not to overwater, as this can lead to root rot.
- Use a drip system: If possible, install a drip irrigation system to provide consistent moisture without over-saturating the soil.
Step 7: Mulch for Moisture Retention
Adding mulch around the plants helps retain moisture, suppress weeds, and regulate soil temperature.
- Choose organic mulch: Options include straw, wood chips, or shredded leaves. Apply a layer of mulch about 2-3 inches thick, leaving a small space around the base of each plant to prevent moisture buildup.
Step 8: Fertilize Appropriately
As your okra plants grow, they may benefit from additional nutrients.
- Choose a balanced fertilizer: Use a fertilizer with equal parts nitrogen, phosphorus, and potassium (e.g., 10-10-10) to promote healthy growth.
- Apply after the first true leaves appear: Fertilize when the plants have established a few true leaves. Follow the manufacturer’s instructions for application rates.
Step 9: Pest and Disease Management
Regularly monitor your okra plants for pests and diseases.
- Common pests: Aphids, spider mites, and stink bugs can affect okra. Use organic insecticidal soap or neem oil to control infestations.
- Diseases: Fungal diseases can occur in humid conditions. Ensure proper spacing between plants for good air circulation and avoid overhead watering.
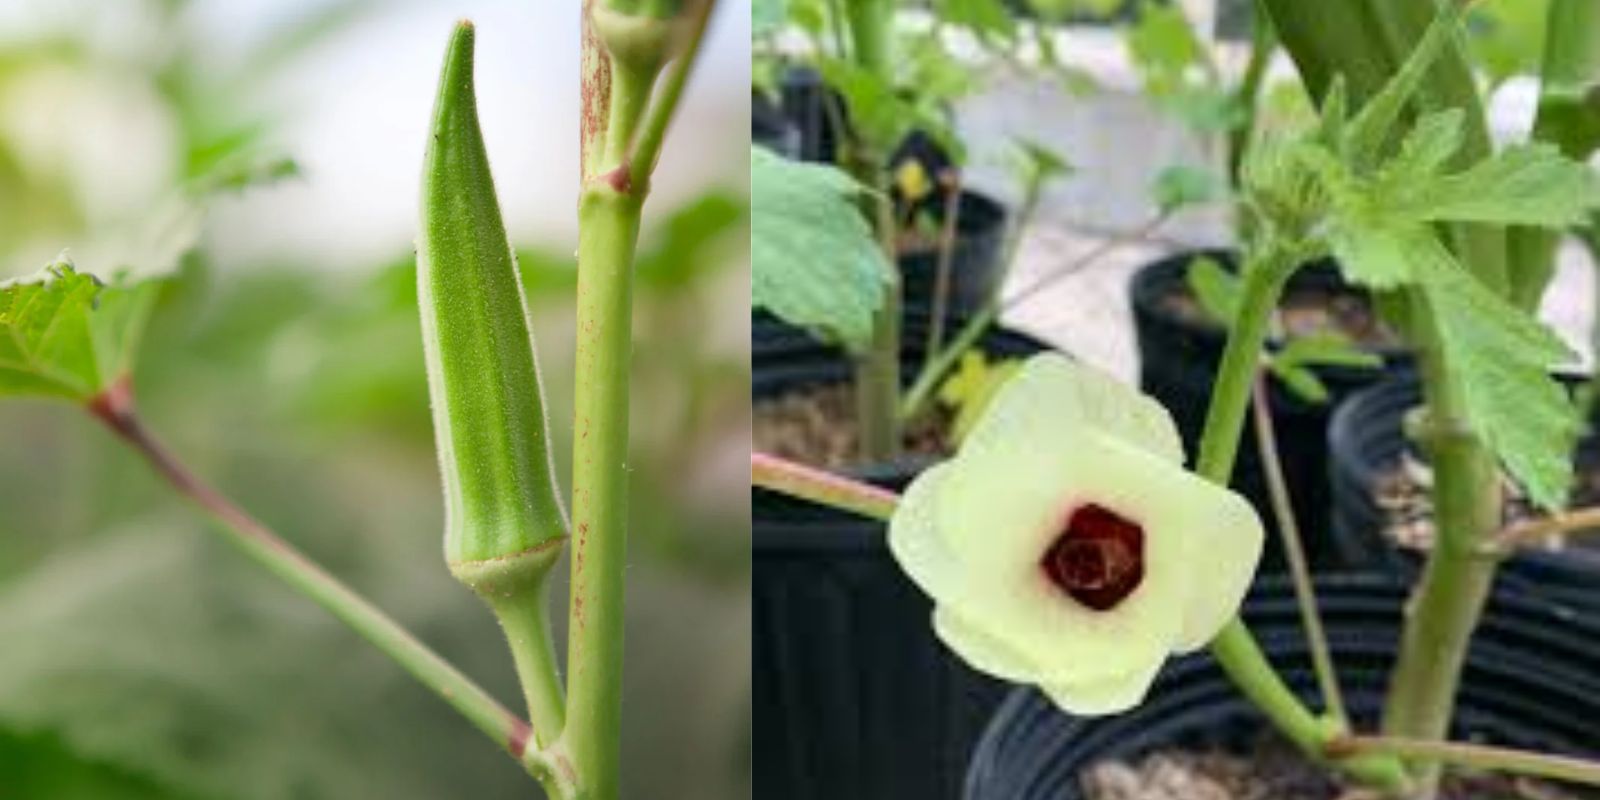
Step 10: Harvesting Okra
Okra is typically ready for harvest about 50-60 days after planting, depending on the variety.
- When to harvest: Look for pods that are 2-4 inches long. They should be firm and tender.
- Harvest regularly: Check your plants every few days, as okra can grow rapidly. Regular harvesting encourages more production and prevents the pods from becoming tough and woody.
Conclusion
Growing okra can be a rewarding and productive endeavor, especially when you utilize the pre-sprouting method to speed up germination. With careful attention to soil preparation, watering, and pest management, you can enjoy a bountiful harvest of fresh okra right from your garden. Not only will you appreciate the taste of homegrown okra, but you’ll also feel a sense of accomplishment in nurturing your plants from seeds to harvest.
Call to Action
Now that you know the fastest way to grow okra, it’s time to get started! Try the pre-sprouting method and watch your garden thrive. Share your experiences and tips with fellow gardeners using the hashtags below!
#GrowOkra #OkraLovers #HomeGardening #VegetableGarden #GardeningTips #SustainableLiving #FastGardening