
Growing your own potatoes is one of the most rewarding gardening experiences. With minimal space and effort, you can enjoy a harvest of fresh, nutritious potatoes from your own backyard or even in containers. Potatoes are a versatile and easy-to-grow crop, making them perfect for gardeners of all experience levels. Whether you’re starting your first garden or looking to expand your homegrown produce, this guide will show you the easiest way to grow potatoes successfully.
In this article, we’ll explore the step-by-step process for growing potatoes, from selecting the right variety to harvesting your crop. Let’s get started!
Why Grow Potatoes at Home?
Potatoes are not only a staple food in many households, but they are also one of the easiest vegetables to grow at home. Here are a few reasons why growing potatoes is a great choice for gardeners:
- Low Maintenance: Potatoes require minimal care once planted, making them an excellent crop for beginners.
- High Yield: A small number of seed potatoes can produce a large harvest.
- Container-Friendly: Potatoes can be grown in the ground, raised beds, or even containers, making them versatile for different garden sizes.
- Long Storage Life: Properly stored potatoes can last for months, providing a steady supply of homegrown food.
Now that you know why potatoes are a great addition to your garden, let’s dive into the steps to grow them with ease.
Step 1: Choose the Right Seed Potatoes
The first step in growing potatoes is selecting the right variety of seed potatoes. Seed potatoes are specially grown for planting and are free from diseases. You can purchase them from garden centers or online stores. Avoid using supermarket potatoes, as they are often treated with chemicals to prevent sprouting and may carry diseases that can affect your crop.
There are many varieties of potatoes, each with different flavors, textures, and growth characteristics. Here are three main types to consider:
- Early Potatoes: These varieties mature in about 60-90 days and are perfect if you want a quick harvest. Examples include Red Norland and Yukon Gold.
- Mid-Season Potatoes: These take around 90-110 days to mature and tend to produce larger yields. Varieties like Kennebec and Purple Majesty fall into this category.
- Late Potatoes: These varieties take 110 days or more to mature and are excellent for long-term storage. Examples include Russet Burbank and Katahdin.
When choosing seed potatoes, consider your climate and growing season length. Early potatoes are best for short growing seasons, while late varieties are ideal for regions with a long summer.
Step 2: Prepare Your Seed Potatoes
Once you have selected your seed potatoes, you’ll need to prepare them for planting. If your seed potatoes are small (about the size of an egg), you can plant them whole. However, if they are larger, you’ll want to cut them into smaller pieces to maximize your yield.
How to Prepare Seed Potatoes:
- Cut the Potatoes: Cut larger seed potatoes into pieces, ensuring that each piece has at least one or two “eyes” (the small dimples where sprouts emerge). Each piece should be about 1-2 inches in size.
- Cure the Pieces: After cutting the potatoes, allow them to sit in a cool, dry place for 1-2 days. This curing process helps the cut surfaces heal, reducing the risk of rot when planted.
By properly preparing your seed potatoes, you’ll ensure they are ready for healthy growth once they are planted in the soil.
Step 3: Prepare Your Soil or Containers
Potatoes grow best in loose, well-drained soil with plenty of organic matter. Whether you’re planting in a garden bed, raised bed, or container, it’s important to prepare the soil properly to promote healthy tuber development.
Soil Preparation:
- Choose a Sunny Location: Potatoes thrive in full sunlight, so choose a spot that receives at least 6-8 hours of sunlight per day.
- Loosen the Soil: Potatoes need loose soil to allow the tubers to grow and expand. Use a garden fork or shovel to loosen the soil to a depth of about 12 inches.
- Add Organic Matter: Potatoes prefer rich soil, so mix in compost or well-rotted manure to improve fertility and drainage. Avoid adding too much nitrogen, as it can encourage leafy growth at the expense of tubers.
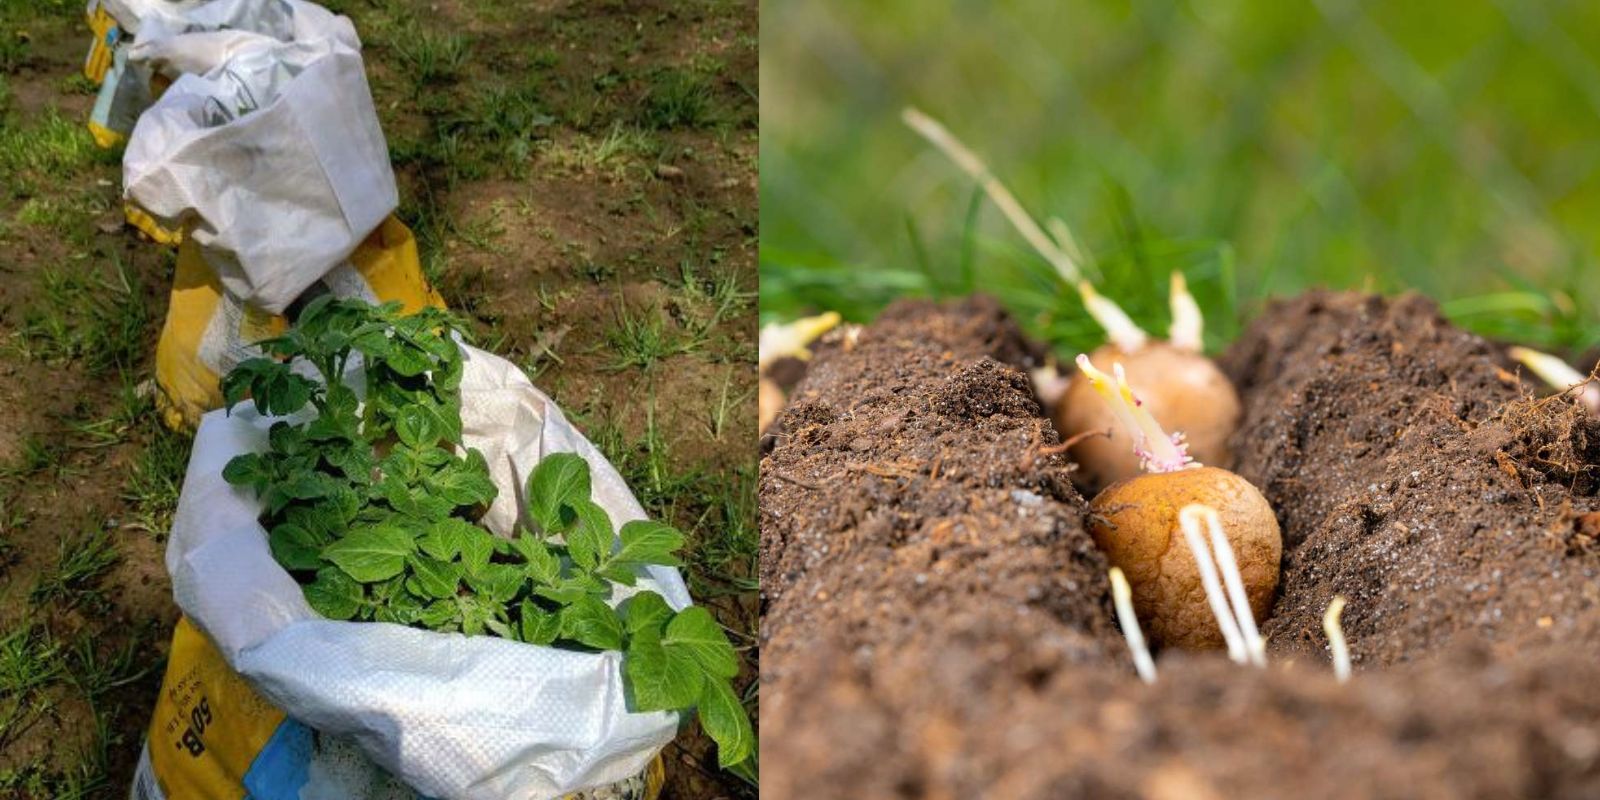
Container Growing:
If you don’t have a garden space, you can easily grow potatoes in large containers or grow bags. Choose containers that are at least 15-18 inches deep and have good drainage holes. Fill the container with loose soil or a quality potting mix, leaving enough space at the top for hilling (adding more soil as the plants grow).
Step 4: Plant the Potatoes
Now that your seed potatoes are prepared and your soil or container is ready, it’s time to plant. Potatoes are typically planted in early spring, about 2-4 weeks before the last expected frost date in your area.
Planting Instructions:
- Dig the Trenches or Holes: If planting in the ground, dig trenches that are about 4-6 inches deep and spaced 12-18 inches apart. For containers, create shallow holes about 4 inches deep.
- Plant the Seed Potatoes: Place the seed potatoes (cut side down, with the eyes facing up) in the trenches or holes, spacing them about 12 inches apart. In containers, place the seed pieces evenly, leaving enough space for them to grow.
- Cover with Soil: Once the potatoes are placed, cover them with about 3-4 inches of soil. As the plants grow, you’ll need to add more soil or mulch to keep the developing tubers covered.
Step 5: Water and Care for Your Potato Plants
Proper care is essential to ensure your potato plants grow strong and healthy. Here are some key care tips for your potato crop:
Watering:
- Consistent Moisture: Potatoes need consistent moisture, especially during the early stages of growth and when tubers are forming. Water deeply once or twice a week, ensuring the soil stays evenly moist but not waterlogged.
- Avoid Overwatering: While potatoes need moisture, overwatering can lead to rot and disease. Ensure the soil has good drainage to prevent waterlogged roots.
Hilling:
- Why Hill Potatoes: As the potato plants grow, the tubers form near the soil surface. To protect the tubers from sunlight (which can cause them to turn green and toxic), you’ll need to hill up soil or mulch around the plants.
- How to Hill: When the potato plants are about 6-8 inches tall, gently mound soil or straw around the base of the plants, leaving the top few inches of foliage exposed. Repeat this process every few weeks as the plants continue to grow.
Fertilizing:
- Feed Your Plants: Potatoes are heavy feeders, so it’s essential to provide them with adequate nutrients. Use a balanced fertilizer or compost tea every few weeks to encourage strong growth and tuber development.
Step 6: Harvesting Your Potatoes
Potatoes are ready to harvest once the plants have flowered, and the foliage begins to die back. Early varieties can be harvested as “new potatoes” when the plants are still green, but for fully mature potatoes, wait until the tops have completely died down.
Harvesting Instructions:
- Wait for the Right Time: For mature potatoes, wait until the plants have completely died back. This usually happens about 2-3 weeks after the plant stops flowering.
- Dig Carefully: Use a garden fork or shovel to gently lift the plants from the soil, being careful not to damage the tubers. For container-grown potatoes, simply empty the container and sift through the soil to collect your crop.
- Cure for Storage: If you plan to store your potatoes, allow them to cure in a cool, dry place for a week or two. This helps toughen the skin and improves their storage life.
Step 7: Storing and Enjoying Your Harvest
After curing, store your potatoes in a cool, dark, and well-ventilated space. Properly stored potatoes can last for several months, providing you with a steady supply of homegrown produce throughout the winter.
Storing Tips:
- Avoid Sunlight: Potatoes exposed to light will turn green and become inedible, so store them in a dark place.
- Monitor for Rot: Check your stored potatoes regularly for signs of rot and remove any affected ones to prevent the spread of disease.
Conclusion
Growing potatoes at home is not only easy but incredibly rewarding. With just a little effort, you can enjoy fresh, nutritious potatoes from your own garden or container. By following the steps outlined in this guide, you’ll be well on your way to a bountiful potato harvest.
Whether you’re growing in a garden bed or a container, the process is simple, and the results are delicious. Start planting your potatoes today and experience the joy of homegrown food!
Ready to grow your own potatoes? Share your gardening journey and tips with others! 🌱🥔