
Lemon trees are a delightful addition to any garden or home. Not only do they offer a fresh supply of lemons, but their glossy green leaves and fragrant flowers add aesthetic appeal. While growing lemons from seeds is possible, it can be time-consuming and uncertain in terms of fruit quality. Propagating lemon trees from cuttings, however, is a straightforward and effective method that ensures the new plant will have the same desirable traits as the parent tree. This article will guide you through the step-by-step process of growing lemons from cuttings, ensuring a successful and rewarding gardening experience.
Introduction
Growing lemons from cuttings is a popular method among gardeners due to its simplicity and high success rate. Cuttings allow you to clone a parent lemon tree, preserving its characteristics, including fruit quality, growth habit, and disease resistance. Whether you’re an experienced gardener or a novice, this method is accessible and can be done with minimal equipment and space.
Benefits of Growing Lemons from Cuttings
- Consistency: Cloning a parent tree ensures the new plant will produce lemons of the same quality.
- Faster Fruit Production: Trees grown from cuttings can bear fruit sooner than those grown from seeds.
- Cost-Effective: Propagating from cuttings is an economical way to expand your garden without purchasing new plants.
- Sustainability: Reusing cuttings from existing plants supports sustainable gardening practices.
Step-by-Step Guide to Growing Lemons from Cuttings
Step 1: Selecting the Cutting
The first step is to choose a healthy, disease-free lemon tree from which to take your cutting. The best time to take cuttings is during the growing season, typically in spring or early summer.
- Choose a Healthy Branch: Select a branch that is about 1/4 inch in diameter and has several sets of leaves. The branch should be from the current or past season’s growth.
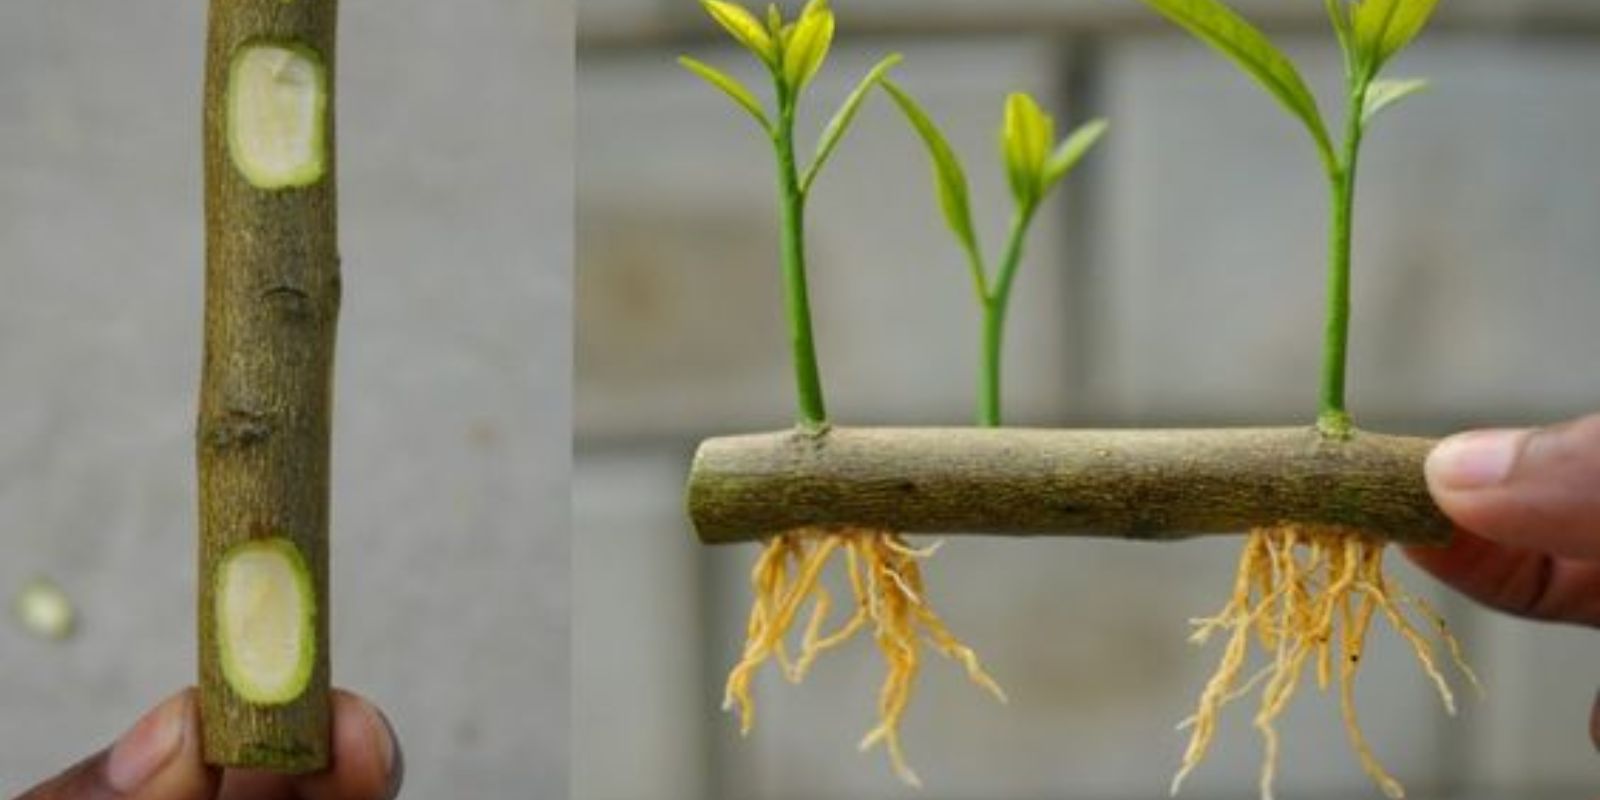
- Cut the Branch: Using a clean, sharp pair of pruning shears, cut a 4-6 inch section of the branch just below a leaf node. A leaf node is the point where a leaf attaches to the stem and is where new roots will develop.
Step 2: Preparing the Cutting
Once you have your cutting, it’s important to prepare it properly to encourage root development.
- Remove Lower Leaves: Carefully trim off the lower leaves, leaving 2-3 sets of leaves at the top. This reduces water loss and focuses the plant’s energy on root development.
- Dip in Rooting Hormone: Although optional, dipping the cut end of the branch in rooting hormone can significantly increase the chances of successful rooting. Rooting hormone contains growth regulators that encourage root development.
Step 3: Planting the Cutting
With your cutting prepared, it’s time to plant it in soil.
- Prepare the Potting Mix: Use a well-draining potting mix, such as a combination of perlite, sand, and peat moss. This type of soil prevents waterlogging and encourages root growth.
- Plant the Cutting: Make a hole in the potting mix with a pencil or stick and insert the cutting, burying it to about half its length. Firm the soil around the cutting to hold it in place.
- Water Thoroughly: Water the cutting well, ensuring the soil is evenly moist but not soggy. Excess water should drain out of the bottom of the pot.
Step 4: Creating the Right Environment
Lemon cuttings need a warm, humid environment to encourage root development.
- Cover with Plastic: Create a mini greenhouse by covering the pot with a clear plastic bag or a plastic bottle with the bottom cut off. This helps retain moisture and creates a humid environment around the cutting.
- Provide Indirect Light: Place the pot in a location with bright, indirect light. Direct sunlight can be too intense and cause the cutting to dry out.
- Maintain Humidity: Check the cutting regularly and mist it with water if the soil or cutting appears dry. Ensure the soil remains consistently moist but not waterlogged.
Step 5: Caring for the Cutting
Patience is key during this stage as the cutting develops roots.
- Check for Roots: After 4-8 weeks, gently tug on the cutting to see if it resists. Resistance indicates that roots have formed.
- Transplanting: Once the cutting has established a good root system, it can be transplanted into a larger pot or directly into the ground, if the climate is suitable.
- Gradual Acclimation: If you plan to move the cutting outdoors, acclimate it gradually to outdoor conditions to prevent shock. Start by placing it outside for a few hours each day, gradually increasing the time.
Additional Tips for Success
- Choose the Right Variety: Some lemon varieties are better suited for propagation by cuttings. Lisbon and Meyer lemons are popular choices.
- Avoid Overwatering: While it’s important to keep the soil moist, overwatering can lead to rot and fungal issues.
- Monitor for Pests: Keep an eye out for common pests such as aphids and spider mites. Treat infestations promptly with insecticidal soap or neem oil.
- Fertilize: Once the cutting is established, feed it with a balanced, water-soluble fertilizer every 4-6 weeks during the growing season.
Conclusion
Growing lemons from cuttings is a rewarding and efficient way to propagate lemon trees. By following these steps and providing the right care, you can enjoy the satisfaction of nurturing a cutting into a thriving lemon tree. Not only will you have a beautiful addition to your garden or home, but you’ll also reap the benefits of fresh, homegrown lemons. Start your propagation journey today and share your experiences with fellow gardeners to inspire and learn from each other.
Motivation:
Ready to start your lemon tree from a cutting? Dive into this simple and fulfilling gardening project and share your journey with friends and fellow gardening enthusiasts. Happy planting!