
Introduction
Grapes are a versatile and rewarding addition to any garden, offering delicious fruit, beautiful foliage, and even the potential for homemade wine. If you’ve ever admired a thriving grapevine and wished you could have one of your own, you’re in luck. Growing grape plants from cuttings is one of the easiest and most cost-effective ways to expand your garden. This method allows you to propagate new plants from an existing vine, ensuring you get the exact variety you desire. In this article, we’ll guide you through the process, from selecting the perfect cutting to nurturing your new grapevine to maturity.
Why Grow Grape Plants from Cuttings?
Growing grapes from cuttings offers several advantages. First, it’s an economical way to start a vineyard or add more grapevines to your garden without purchasing expensive nursery plants. Additionally, by propagating from a healthy, productive vine, you ensure that the new plants will carry the same desirable traits, such as disease resistance and fruit quality. Finally, this method is relatively simple, making it accessible even for novice gardeners.
Selecting and Preparing Your Cuttings
1. Choose the Right Time and Plant:
The first step in growing grape plants from cuttings is selecting the right time to take your cuttings. The best time is during the dormant season, typically late winter or early spring, when the grapevine is not actively growing. Dormant cuttings are more likely to root successfully because they are not competing with the plant’s energy demands.
Choose a healthy, disease-free grapevine from which to take your cuttings. Look for vines that have produced good-quality grapes and have a strong, vigorous growth habit. Avoid any vines that show signs of disease, pests, or damage.
2. Cutting Selection:
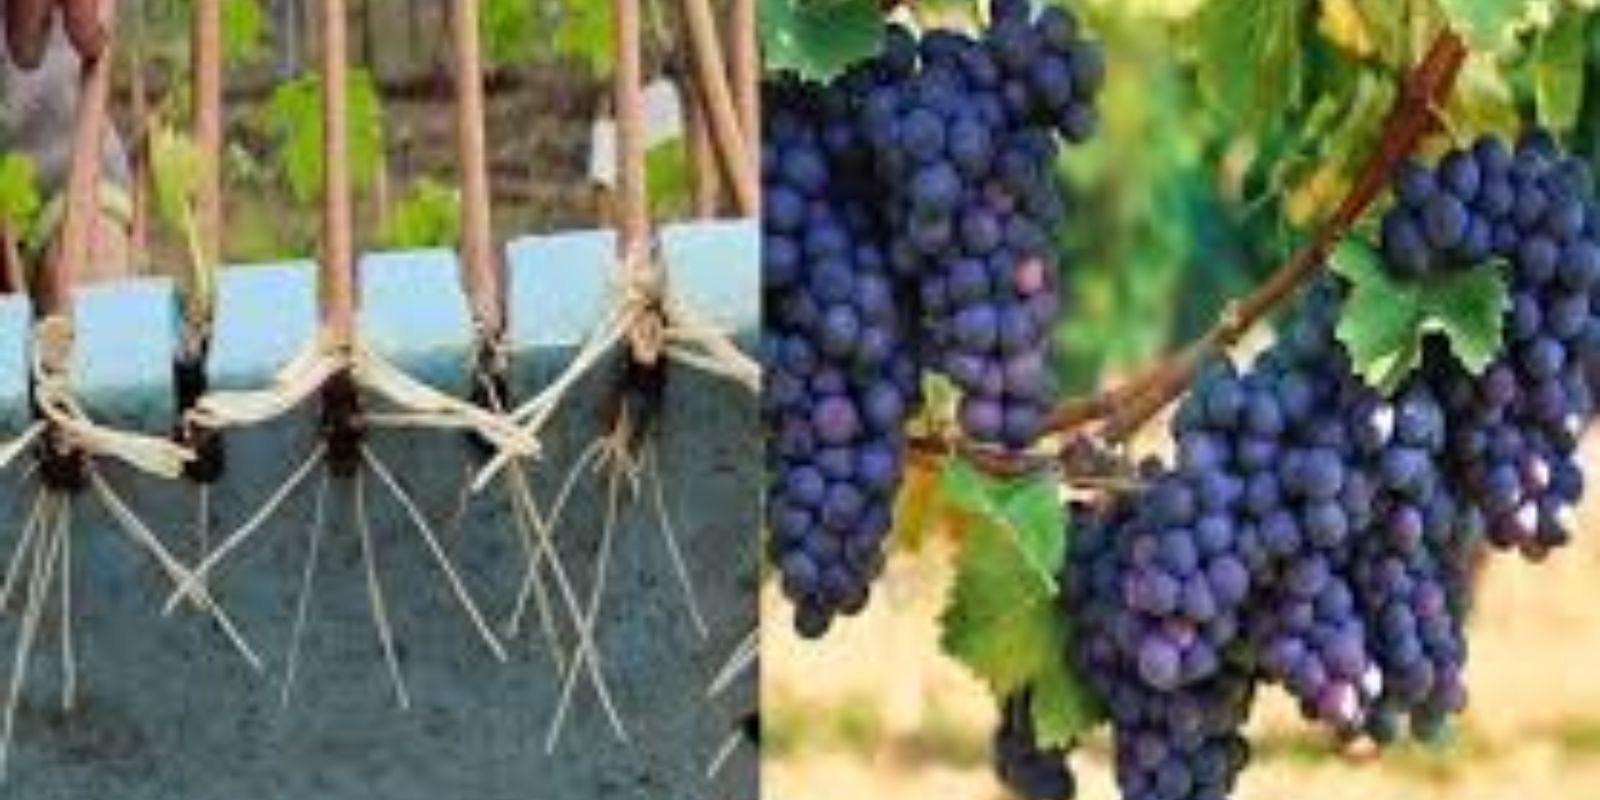
Once you’ve identified a healthy vine, select hardwood cuttings that are about 12-18 inches long and about the thickness of a pencil. Hardwood cuttings are mature, woody stems from the previous season’s growth. They should have at least 3-4 nodes (the small bumps along the stem where leaves and roots will emerge). Cut just below a node at the bottom of the cutting and make the top cut about half an inch above the highest node.
3. Preparing the Cuttings:
After cutting, remove any remaining leaves or tendrils from the bottom part of the cutting, as these can rot when buried in soil. Make a slanted cut at the base of the cutting to increase the surface area for root development. For better rooting success, dip the bottom end of the cutting in rooting hormone, which you can find at most garden centers. This step is optional but recommended, as it encourages faster and more reliable root growth.
Planting the Cuttings
4. Choosing the Right Soil:
Grapevines prefer well-draining soil with a slightly acidic to neutral pH (6.0-7.0). If you’re planting the cuttings directly in the garden, choose a sunny spot with good air circulation. If you’re starting them in containers, use a mix of peat and perlite or a quality potting mix designed for cuttings. The soil should be kept moist but not waterlogged.
5. Planting Process:
To plant the cuttings, dig a hole deep enough to bury the bottom two nodes (about half the cutting) while leaving the top two nodes above the soil surface. Place the cutting in the hole, ensuring the bottom is in contact with the soil, and gently fill the hole with soil, firming it around the cutting to eliminate air pockets. Water the cuttings thoroughly after planting to settle the soil around the roots.
If you’re planting multiple cuttings, space them about 6-8 inches apart if starting in a nursery bed or pot. If planting directly in the garden, space the cuttings at least 2-3 feet apart to allow room for growth.
Caring for Your New Grapevine
6. Watering and Maintenance:
After planting, it’s essential to keep the soil consistently moist but not soggy. Water the cuttings regularly, especially during dry spells, to ensure they don’t dry out. Grapevines are relatively drought-tolerant once established, but young cuttings need regular moisture to develop strong roots.
To help retain moisture and keep weeds at bay, consider applying a layer of mulch around the base of the cuttings. This also helps to regulate soil temperature, which can be beneficial during early spring when temperatures fluctuate.
7. Providing Adequate Light:
Grapevines need plenty of sunlight to thrive. Ensure your cuttings are planted in a location that receives at least 6-8 hours of direct sunlight daily. If you’re starting them indoors or in a greenhouse, place them in the brightest spot available or use grow lights to supplement natural light.
8. Monitoring Growth:
Over the next few weeks, keep an eye on your cuttings for signs of growth. You should start to see new leaves and shoots emerging from the nodes above the soil. This is a good indication that the cutting has successfully rooted. Once the cuttings have established themselves and new growth is evident, you can reduce the frequency of watering slightly.
Transplanting and Long-Term Care
9. Transplanting to a Permanent Location:
Once your grape cuttings have developed a robust root system and have grown several inches, they’re ready to be transplanted to their permanent location in the garden. Choose a site with well-draining soil and full sun. If you’re planting multiple vines, space them 6-8 feet apart to allow room for growth.
Dig a hole that’s twice as wide as the root ball and deep enough to cover the roots. Place the vine in the hole, backfill with soil, and water thoroughly to settle the roots. Applying a layer of mulch around the base will help retain moisture and prevent weeds.
10. Supporting Your Grape Vine:
As your grapevine grows, it will need support to grow upward and produce fruit. Install a trellis, fence, or other support structure to guide the vine’s growth. Regularly tie the vine to the support as it grows, being careful not to damage the delicate shoots.
11. Pruning and Training:
Proper pruning is essential for a healthy grapevine and a bountiful harvest. In the first year, focus on training the vine to grow along its support. In subsequent years, prune the vine in late winter to remove dead or weak wood and encourage new growth. Grapevines produce fruit on new wood, so regular pruning helps maintain productivity.
Conclusion
Growing grape plants from cuttings is a rewarding and straightforward process that allows you to expand your garden or vineyard without breaking the bank. By following these steps, you can successfully propagate grapevines that will provide you with delicious fruit for years to come. Whether you’re a novice gardener or an experienced horticulturist, this method is a great way to enjoy the satisfaction of growing your own grapes.
Call to Action
Ready to start your grape-growing journey? Share your progress, ask questions, or join the conversation in the comments below. Let’s grow something amazing together! 🍇🌱