
Introduction
Pruning is an essential part of plumeria care that keeps the plant healthy, maintains its shape, and encourages a bountiful display of blooms. Known for their vibrant flowers and delightful fragrance, plumeria plants, or “frangipani,” are favorites among gardeners in tropical and subtropical regions. But to keep them thriving, knowing the right way to prune is crucial. In this guide, we’ll walk you through each step of pruning plumeria, the benefits of regular pruning, and best practices for optimal results.
Why Prune Plumeria?
Pruning may seem intimidating at first, but it’s the key to a healthy, lush plumeria. Regular pruning:
- Promotes Flower Production: Removing old branches encourages the growth of new flowering branches.
- Shapes the Plant: Pruning can give your plumeria a tidy, compact shape, making it easier to manage.
- Improves Air Circulation: Removing crowded branches enhances airflow, reducing the risk of disease.
- Increases Sun Exposure: Ensuring all parts of the plant get sufficient sunlight aids in photosynthesis and promotes overall plant health.
Tools You’ll Need
Before you start, make sure you have the right tools:
- Sharp Pruning Shears: High-quality shears provide clean cuts that heal faster, reducing the risk of disease.
- Pruning Saw: For thicker branches, especially on older plants.
- Sanitizer or Disinfectant: Clean your tools before and after use to avoid spreading infections.
- Pruning Sealer: This isn’t strictly necessary but can help protect larger cuts from disease.
Step-by-Step Guide to Pruning Plumeria
1. Choose the Right Time to Prune
Plumeria should ideally be pruned during their dormant season, typically in late winter or early spring. Pruning just before new growth emerges will allow the plant to channel its energy toward new, healthy branches.
2. Examine the Plant Structure
Start by assessing your plumeria’s structure. Identify branches that appear weak, damaged, or diseased, as well as branches that grow inward or cross over others. These branches compete for sunlight and reduce airflow, which can lead to mold or mildew.
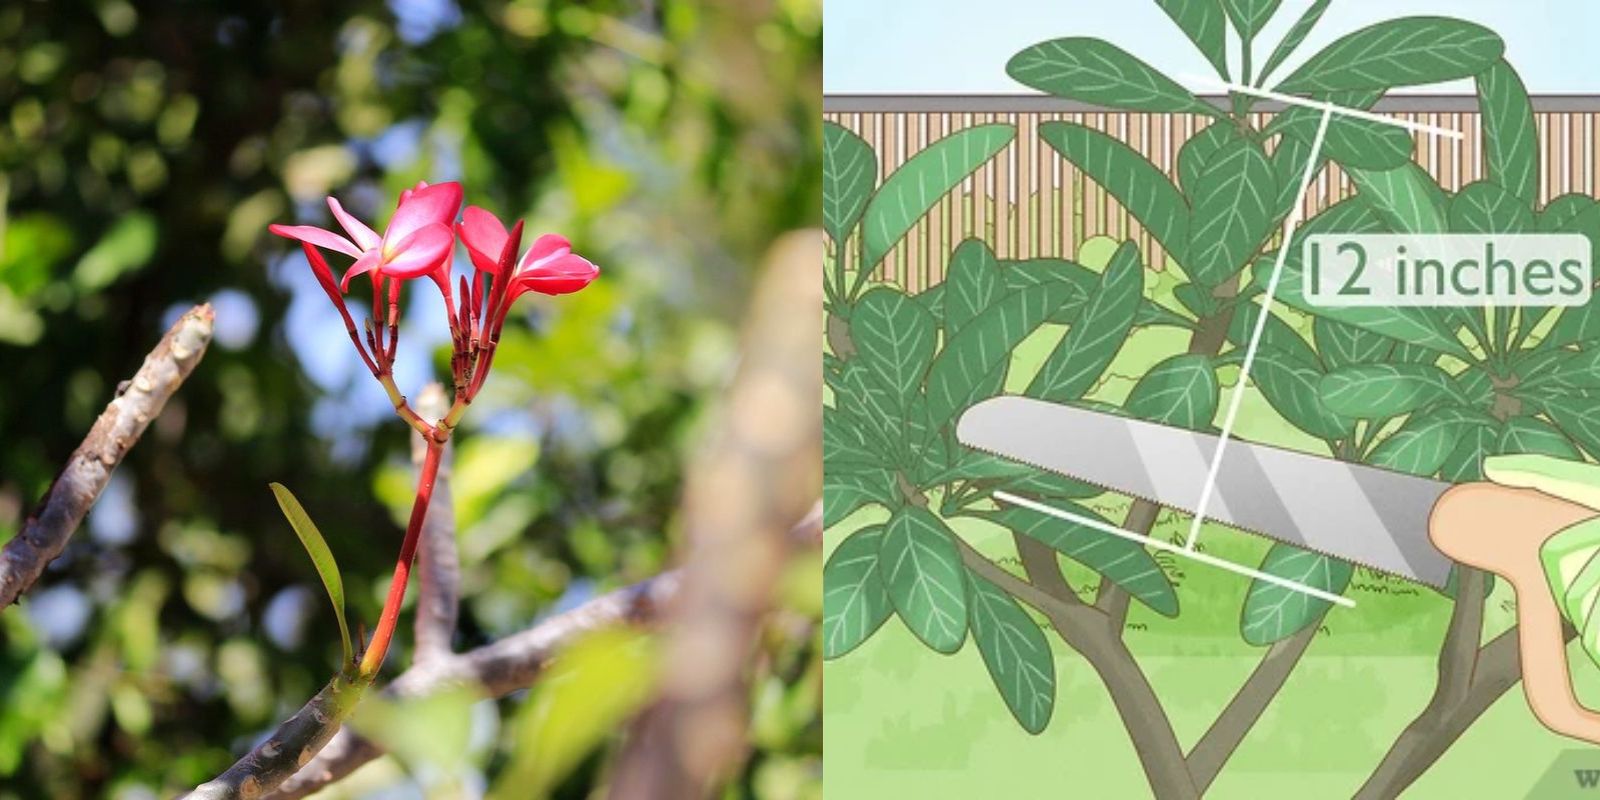
3. Start with Dead or Diseased Branches
Removing dead or diseased branches first is crucial to protect the rest of the plant. Dead branches are usually brittle and may snap easily, while diseased branches might show signs of discoloration or rot. Prune these branches at a 45-degree angle, making clean cuts just above a leaf node.
4. Shape the Plant
Once you’ve removed the damaged parts, focus on shaping your plumeria. Decide on a general shape — a compact form will work best if your plant is in a pot, while a more open shape can look stunning in a garden setting. Aim to create a balanced structure by removing excess branches that crowd the center.
5. Cut Above Leaf Nodes
When pruning healthy branches, always cut about 1/4 inch above a leaf node. The new growth will sprout from these nodes, so making cuts here ensures that the plant will branch out and develop a fuller shape.
6. Limit the Number of Branches Removed
A common mistake is over-pruning, which can stress the plant. Only remove about one-third of the branches at a time, particularly on mature plumerias. This amount strikes a balance between encouraging new growth and preventing shock.
7. Seal Large Cuts
After pruning large branches, you may notice an open wound on the plant. These wounds are vulnerable to pests and disease. Using a pruning sealer helps protect the plant by sealing the cut and retaining moisture.
8. Clean Up and Dispose of Cuttings
Remove all cuttings and diseased plant material from the area to prevent the spread of pests or disease. If the branches are healthy, you can use them for propagation, creating new plumeria plants from the cuttings.
Tips for Pruning Plumeria Cuttings for Propagation
One of the perks of pruning plumeria is the chance to propagate new plants from the cut branches. Here’s how:
- Select healthy branches with at least three nodes.
- Let the cutting dry and callous over for a few days in a shaded area.
- Plant the cutting in a well-draining soil mix and water sparingly until roots form, usually within 4-6 weeks.
Common Mistakes to Avoid
Pruning isn’t complicated, but there are a few mistakes to watch out for:
- Pruning Too Late in the Season: Avoid heavy pruning during blooming or active growth, as this can reduce flower production.
- Cutting Too Close to the Node: Cutting too close can damage the node, hindering new growth.
- Over-Pruning: Removing more than a third of the plant at once can shock it, leading to slowed growth and fewer blooms.
When and How Often to Prune
Plumerias benefit from annual pruning during the dormant season. Regularly pruning each year will help maintain the plant’s shape and maximize flowering.
Additional Care Tips Post-Pruning
After pruning, give your plumeria a little extra care:
- Fertilize: Once new growth appears, apply a balanced fertilizer to encourage strong growth.
- Water: Water sparingly at first, gradually increasing as the plant becomes more active.
- Inspect for Pests: Pruning can sometimes attract pests, so keep an eye out for any signs of infestation.
Conclusion
Pruning plumeria doesn’t just improve the plant’s appearance — it keeps it healthy and promotes a stunning display of blooms. By following these pruning tips, your plumeria will reward you with vibrant, fragrant flowers that enhance your garden’s beauty. So, grab your pruning shears and give your plumeria the care it deserves!