
Grafting is one of the most effective methods of propagating olive trees, allowing gardeners to produce trees with the best characteristics of two different trees: a strong rootstock and a desirable scion (the part of the tree that will bear fruit). Whether you’re looking to increase the production of your olive orchard or you’re trying to grow a specific variety that thrives in your region, grafting can be a rewarding and efficient way to go about it. In this comprehensive guide, we’ll take you through the entire process of grafting olive trees, from choosing the right rootstock to caring for the graft until it’s fully established.
What is Grafting and Why is it Important?
Grafting is a horticultural technique used to combine parts from two different plants so that they grow as one. In the case of olive trees, the rootstock (the tree’s root system) is typically chosen for its strength, resistance to pests and diseases, and adaptability to various soil types, while the scion (the part that produces the fruit) is selected for its fruiting qualities—such as size, taste, and disease resistance. The two parts are carefully joined together, allowing the scion to benefit from the rootstock’s superior root system while maintaining the desirable fruiting traits of the parent tree.
There are several reasons why gardeners choose to graft olive trees:
- Faster Production: Grafting allows olive trees to bear fruit much earlier than if they were grown from seed, which can take many years.
- Better Adaptation: Grafting allows you to combine varieties of olive trees that may not naturally be suited to the local environment. For instance, if a particular rootstock is resistant to drought, it can help an otherwise delicate scion thrive in dry conditions.
- Healthier Trees: Some rootstocks are more resistant to soil-borne diseases and pests, which can help your olive trees grow healthier over the long term.
- Maintaining Varietal Integrity: Grafting allows you to propagate your favorite olive varieties, maintaining their specific characteristics, such as flavor or appearance, which might not be possible with traditional planting methods like seeds or cuttings.
Tools and Materials for Grafting Olive Trees
Before diving into the grafting process, you’ll need to gather the following tools and materials:
- Sharp Grafting Knife: For making clean cuts on both the scion and rootstock. A dull knife can crush the plant tissues, hindering successful grafting.
- Pruning Shears: To trim any unwanted branches from the rootstock and scion.
- Grafting Tape or Parafilm: To secure the graft and keep it protected from moisture loss and contaminants.
- Rootstock: A healthy, well-established olive tree that will act as the root system. Typically, rootstocks are selected for their resistance to pests, diseases, and environmental conditions.
- Scion: A healthy, young shoot or bud from a mature olive tree variety you want to propagate. It should have the desired fruiting characteristics and be free of disease.
- Grafting Wax or Sealant (Optional): To seal the graft and protect it from drying out, especially if you’re working in a particularly dry climate.
- Rooting Hormone (Optional): Some gardeners use rooting hormone to promote better graft take.
Choosing the Right Rootstock and Scion
Choosing the right rootstock and scion is crucial for the success of the graft. Here’s a quick guide on how to select the best options:
- Rootstock Selection:
- The rootstock should be compatible with your soil conditions. For example, some rootstocks are better suited to drought-prone areas, while others may be better for clay-rich or saline soils.
- Disease-resistant rootstocks are ideal, particularly if you have problems with pests or soilborne diseases.
- The rootstock should have a strong root system to support the growth of the scion and help the tree thrive.
- Scion Selection:
- The scion should come from a healthy olive tree with desirable characteristics, such as high fruit yield, disease resistance, or superior fruit quality.
- It’s important to select a scion that is young, ideally taken from a branch that is about one year old. The scion should be about the same size as the rootstock to ensure a good fit.
Grafting Methods for Olive Trees
There are several grafting techniques that can be used for olive trees, but the two most common are the cleft graft and the whip-and-tongue graft. Let’s explore both methods:
1. Cleft Graft
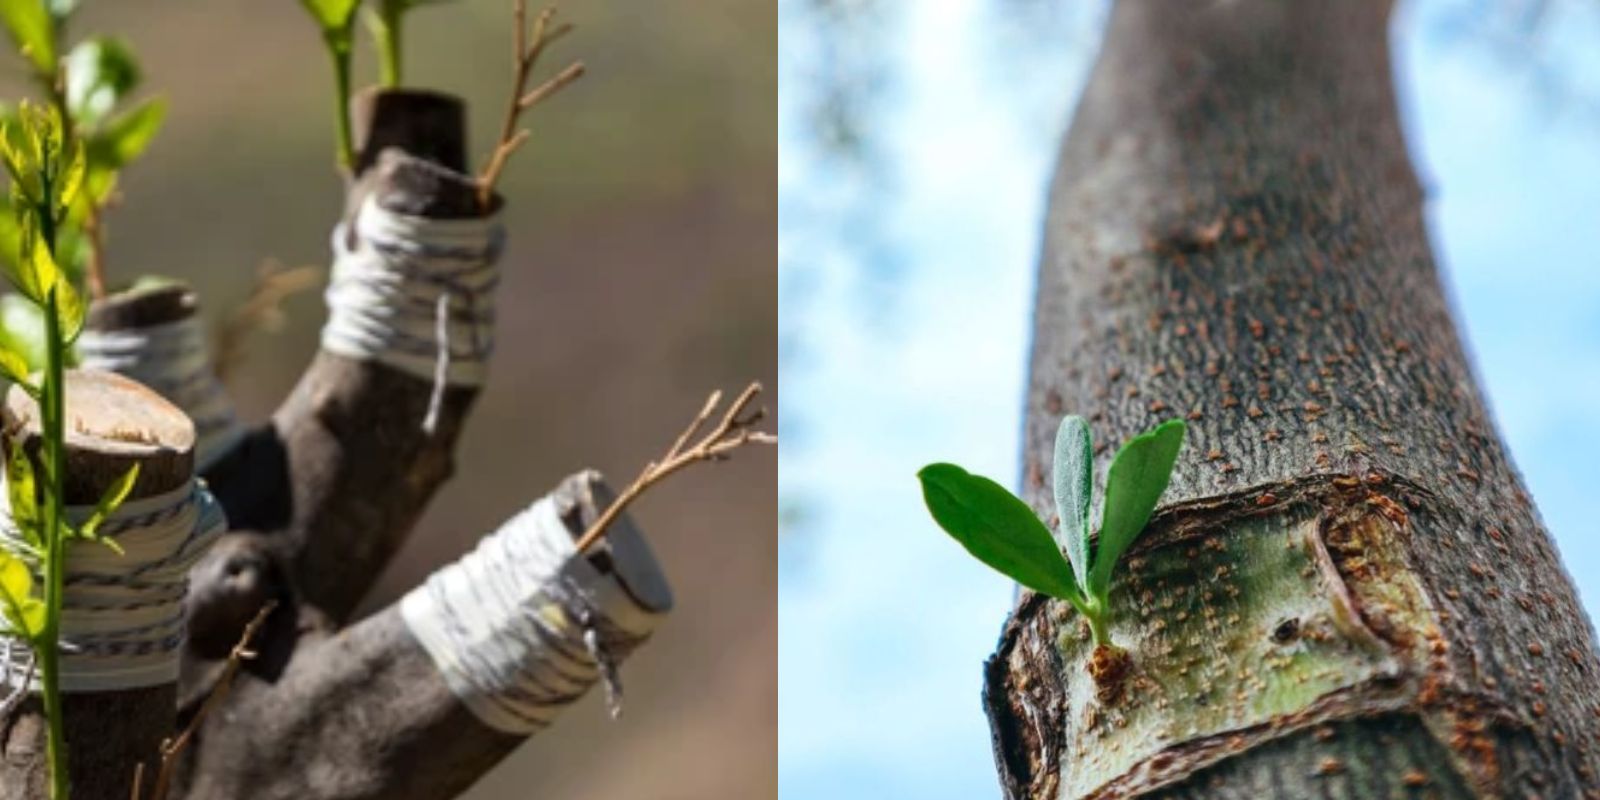
The cleft graft is one of the most widely used methods for grafting olive trees. It involves cutting the rootstock to expose a flat surface and then splitting the rootstock down the middle to create a “cleft.” The scion is then inserted into the cleft, and the two parts are tightly secured together.
Steps for Cleft Grafting:
- Choose a healthy rootstock and make a clean cut across the stem of the rootstock.
- Use a grafting knife to split the rootstock down the center, creating a cleft.
- Cut the scion to the same length as the cleft in the rootstock, ensuring that both parts are similar in diameter.
- Insert the scion into the cleft so that the cambium layers (the thin green layer of tissue just beneath the bark) of both the scion and rootstock are in contact.
- Secure the graft tightly with grafting tape or parafilm to hold it in place.
- Seal the graft with wax or sealant to protect it from moisture loss.
2. Whip-and-Tongue Graft
The whip-and-tongue graft is another effective method for grafting olive trees, particularly when you want to join two parts of similar size. This method involves making a diagonal cut on both the scion and rootstock, with a small “tongue” cut on each piece that will interlock, helping to secure the graft.
Steps for Whip-and-Tongue Grafting:
- Make a diagonal cut on both the rootstock and scion using a sharp knife.
- On each piece, make a small tongue-shaped cut at the base of the diagonal cut.
- Fit the scion and rootstock together by interlocking the tongues, ensuring the cambium layers are aligned.
- Wrap the graft tightly with tape or parafilm to hold the pieces together.
- Seal the graft to prevent moisture loss.
After Grafting Care
After successfully grafting your olive tree, it’s important to provide the graft with the right care and environment to ensure it heals properly. Here’s how to care for your grafted olive tree:
- Protect the Graft: Place the grafted tree in a sheltered area, away from direct sun or extreme temperatures. This will reduce stress on the graft and allow it to heal without interference from the elements.
- Watering: Water the grafted tree lightly, ensuring that the rootstock is kept moist but not waterlogged. Too much water can lead to root rot, while too little can cause the graft to dry out.
- Observe the Graft: Check the graft regularly for signs of success. If the scion is still alive and there’s new growth, it’s likely that the graft has taken. However, if the graft fails to show any signs of life after a few weeks, it may need to be reattempted.
- Pruning: Once the graft has taken and the scion begins to grow, you may need to prune the tree to encourage stronger growth. Remove any unwanted shoots that emerge from the rootstock to ensure that the scion is the dominant growth.
Conclusion
Grafting olive trees is a fantastic method of propagating healthy, fruitful trees while ensuring that your trees are adapted to local conditions and resistant to common pests and diseases. Whether you’re a seasoned gardener or a beginner, following these steps will help you successfully graft your olive trees, ensuring a bountiful harvest in the future. So, grab your tools and get started on your grafting project today!
Remember, patience is key. As your grafted tree matures, you’ll be rewarded with a resilient, high-quality olive tree ready to bear fruit for years to come. Happy grafting!