
Guava trees are beloved for their delicious fruit, adaptability, and ease of cultivation. However, growing a guava tree from seed can take years to produce fruit and may not always replicate the parent tree’s quality. Grafting offers an effective solution, allowing gardeners to propagate desired varieties quickly and ensure strong, healthy trees.
This guide provides an in-depth look at the most effective method for grafting a guava tree, from preparation to aftercare, ensuring you achieve a high success rate.
What Is Grafting, and Why Do It?
Grafting is a horticultural technique that joins the tissue of one plant (scion) to another plant (rootstock) so they grow as a single plant.
Benefits of Grafting Guava Trees
- Faster Fruiting: Grafted guava trees can produce fruit in 1–2 years, compared to the 3–8 years required for seed-grown trees.
- Preserving Varieties: Grafting ensures the new tree retains the desirable traits of the parent plant, such as fruit size, flavor, and resistance to pests or diseases.
- Improved Resilience: Rootstock often provides better disease resistance and adaptability to soil conditions.
Best Time for Grafting Guava Trees
The ideal time to graft guava trees is during the growing season, typically in spring or early summer, when the tree is actively growing, and the cambium layers are active.
Step-by-Step Guide to Grafting a Guava Tree
1. Gather Your Materials
You’ll need the following:
- Sharp, sterilized grafting knife or pruning shears
- Healthy rootstock and scion
- Grafting tape or rubber strips
- Plastic bag or grafting wax
- A clean work surface
2. Choose Healthy Rootstock and Scion
- Select a rootstock that is strong, disease-resistant, and well-established. The rootstock should have a diameter similar to or slightly larger than the scion.
- Choose a scion (the branch or stem to be grafted) from a healthy guava tree with desirable traits, such as high fruit yield or excellent flavor.
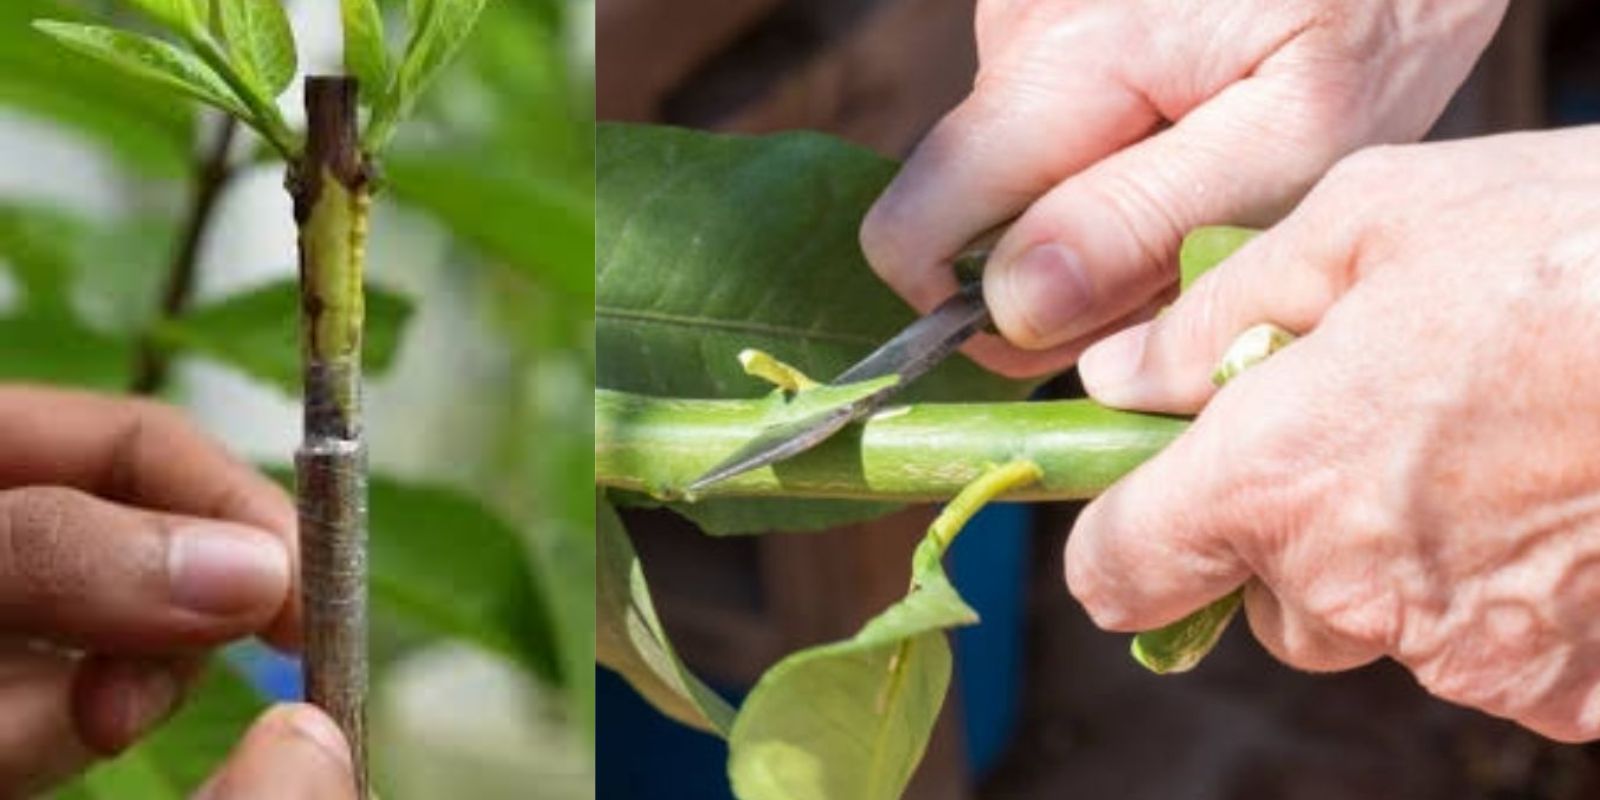
3. Prepare the Rootstock
- Make a clean, diagonal cut about 2–3 inches long on the rootstock. This will create a flat, smooth surface for joining the scion.
- Ensure the cut is clean and free of jagged edges to promote better contact and healing.
4. Prepare the Scion
- Trim the scion to about 4–6 inches in length, ensuring it has at least 2–3 healthy buds.
- Shape the base of the scion into a wedge or V-shape to fit snugly into the rootstock.
5. Join the Scion and Rootstock
- Align the cambium layers (the green, actively growing tissue just beneath the bark) of the scion and rootstock as closely as possible. Proper alignment is crucial for nutrient and water flow.
- Insert the scion into the rootstock cut, ensuring a tight fit.
6. Secure the Graft
- Wrap the graft area with grafting tape or rubber strips to hold the scion in place. Ensure the wrap is tight enough to prevent movement but not so tight that it restricts growth.
- If needed, apply grafting wax to seal any exposed cuts and protect against moisture loss or infections.
7. Protect the Graft
- Cover the graft with a plastic bag or a small plastic bottle cut in half to create a mini greenhouse. This helps retain moisture and protect the graft from environmental stress.
Post-Grafting Care
1. Place the Tree in a Suitable Location
- Keep the grafted tree in a shaded, protected area to prevent direct sunlight and strong winds from drying out the graft.
2. Monitor Growth
- Check the graft weekly for signs of success, such as swelling buds or new shoots emerging from the scion.
- Remove any shoots or growth from below the graft to ensure all energy is directed to the scion.
3. Gradually Expose to Sunlight
- After 3–4 weeks, once the graft has healed and new growth is visible, gradually expose the tree to sunlight to acclimate it.
4. Remove the Tape
- After 6–8 weeks, once the graft union is strong, gently remove the grafting tape to avoid girdling the tree.
Common Problems and Solutions
1. Graft Failure
- Cause: Poor cambium alignment or insufficient contact.
- Solution: Ensure clean cuts and perfect alignment. Practice makes perfect!
2. Drying Out
- Cause: Lack of moisture or exposure to harsh conditions.
- Solution: Use a plastic cover or grafting wax to retain moisture.
3. Infection or Rot
- Cause: Contamination during the grafting process.
- Solution: Sterilize tools before use and monitor the graft for signs of disease.
Tips for Successful Guava Grafting
- Work Quickly: The cambium layers dry out rapidly, so complete the grafting process as quickly as possible.
- Use Sharp Tools: Dull tools can crush plant tissue, reducing the chances of a successful graft.
- Practice Patience: Grafting is a skill that improves with practice. Don’t be discouraged by initial failures.
The Reward: A Thriving Grafted Guava Tree
Grafting guava trees is a simple yet highly effective technique for producing healthier, faster-fruiting plants. With the right materials, timing, and care, you can enjoy delicious, homegrown guavas from your grafted tree within a couple of years.
Whether you’re an experienced gardener or a beginner, this method opens up a world of possibilities for propagating fruit trees and improving their yield.
💬 Have you tried grafting a guava tree or any other fruit tree? Share your results or ask questions below!