
Introduction:
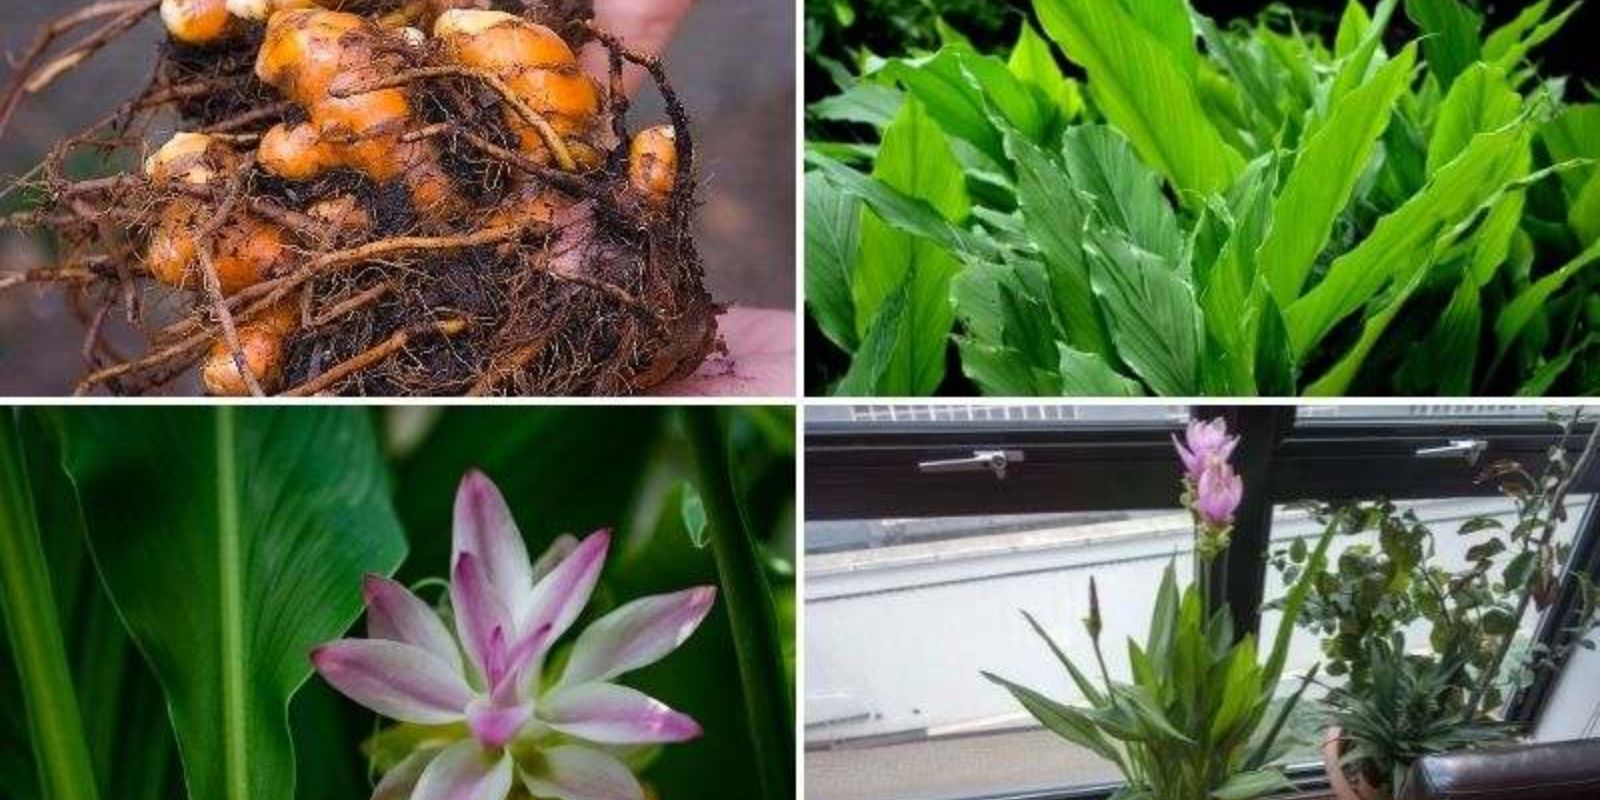
Turmeric, scientifically known as Curcuma longa, is a tropical plant that is as beneficial to your health as it is to your garden. Known for its vibrant yellow roots, turmeric is a prized herb used in cooking, medicine, and beauty treatments. While many gardeners may assume that turmeric should only be planted in the warmer months, the truth is that winter can be the perfect time to propagate turmeric, especially when growing it in pots. By leveraging the colder season’s advantages, you can ensure stronger roots, better growth, and an eventual bountiful harvest. In this article, we’ll explore how winter is the ideal time for growing turmeric and guide you through the essential steps to propagate it in pots.
Why Winter is the Perfect Time to Propagate Turmeric:
Turmeric, a plant native to Southeast Asia, thrives in warm, humid conditions, which is why many gardeners choose to grow it in tropical or subtropical environments. However, propagating turmeric in pots during the winter season has distinct advantages that can help boost its growth. Here’s why winter propagation can work wonders for your turmeric:
- Slower Growth Encourages Stronger Roots:
Turmeric is a slow-growing plant that requires plenty of time to establish a strong root system. When propagated in the colder months, the plant’s growth slows down, giving it more time to focus on developing deep, sturdy roots. This is particularly important when growing turmeric in pots, as it prevents the roots from becoming overcrowded and ensures healthier, more robust growth. - Ideal Temperature for Root Development:
While turmeric needs warmth to grow, excessive heat can stunt its root development. The winter months provide a balanced environment where the plant can slowly develop a strong root system without being overwhelmed by too much heat. This results in healthier plants in the long term. - Less Pest and Disease Activity:
The cold weather of winter reduces the activity of pests and fungi that can harm plants. By propagating turmeric during the colder months, you minimize the risk of pest infestations and fungal infections, giving your turmeric plants a better chance to thrive without the interference of unwanted invaders. - Better Control Over Growing Conditions:
When growing turmeric indoors, winter provides an ideal opportunity to control the environment more effectively. With less humidity and warmer indoor temperatures, you can create the perfect microclimate for your turmeric, ensuring consistent growth. Indoor gardening in winter also allows you to avoid the harsh outdoor elements, giving your plants the best conditions for success.
Steps to Grow Turmeric in Pots During Winter:
Now that you know why winter is the best time to propagate turmeric, it’s time to get started. Follow these steps to successfully grow turmeric in pots and watch it thrive throughout the season.
Step 1: Select the Right Pot
Choosing the right pot is the first step in successfully propagating turmeric. Opt for a pot that is at least 12-16 inches deep and wide. Turmeric grows from rhizomes, which spread out as the plant grows, so ample space is essential. A container with good drainage holes is crucial to avoid waterlogging and to maintain healthy roots. Plastic, clay, or ceramic pots all work well, but ensure they are large enough to accommodate the growth of the plant.
Step 2: Choose the Right Soil Mix
Turmeric thrives in well-drained, rich, loamy soil. The soil should retain moisture but not become soggy. A mixture of potting soil, compost, and sand is ideal, as it ensures proper drainage while still providing the nutrients necessary for turmeric’s growth. To improve soil fertility, you can also add organic matter such as well-rotted manure or compost.
Step 3: Select and Prepare the Rhizomes
Turmeric grows from rhizomes, which are underground stems that store the plant’s nutrients. When propagating turmeric, choose fresh, healthy rhizomes that have visible “eyes” or buds on them. These are the parts of the rhizome that will sprout into new shoots. You can either buy turmeric rhizomes from a garden center or use a rhizome from a store-bought turmeric root.
Cut the rhizomes into pieces, ensuring that each piece contains at least one eye. Let the pieces sit for a day or two in a cool, dry place to allow the cut surfaces to heal over. This helps prevent the rhizomes from rotting once planted.
Step 4: Plant the Rhizomes
Once your rhizomes are prepared, it’s time to plant them. Fill the pot with your soil mixture, leaving about 2-3 inches of space at the top. Plant the rhizome pieces about 2-3 inches deep, ensuring that the buds are facing upward. You can plant one or two rhizomes in each pot, depending on the size of the container. Make sure they’re spaced out enough to allow for proper root expansion.
Step 5: Provide Optimal Temperature and Light
Turmeric needs warmth to grow, even in winter. Place your pot in a warm, sunny spot where it can receive indirect sunlight for at least 6 hours a day. If you’re growing turmeric indoors, you can place the pot near a south-facing window or under grow lights if natural light is insufficient.
Although turmeric prefers warmth, it should not be exposed to direct hot sunlight or temperatures exceeding 85°F (29°C). In the winter, ensure the temperature remains between 60°F and 75°F (15°C-24°C), which is optimal for growth.
Step 6: Watering and Humidity
Turmeric needs consistent moisture to grow but can easily suffer from overwatering, which can lead to root rot. Keep the soil moist but not soggy. Water your turmeric when the top inch of soil feels dry to the touch, ensuring the water drains out of the pot. Avoid letting the plant sit in standing water.
If you’re growing turmeric indoors, maintaining humidity can help the plant thrive. You can increase humidity by misting the plant occasionally or placing a tray of water near the pot. However, make sure the plant isn’t in a damp, stagnant environment as this can cause mold or fungal growth.
Step 7: Be Patient and Watch for Growth
Turmeric is a slow grower, and it can take several weeks for the rhizomes to sprout. Once the shoots begin to emerge, continue to care for the plant by ensuring it gets enough water, light, and warmth. As the plant grows, you’ll notice large, green leaves developing. These leaves are the key to producing healthy rhizomes when the plant matures.
Over time, the plant will reach about 3 feet in height, with long, arching leaves. When the leaves begin to yellow and die back (usually after 8-10 months), it’s a sign that the plant is ready for harvest. At this point, you can carefully dig up the rhizomes and enjoy your home-grown turmeric.
Conclusion:
Growing turmeric in pots during the winter months offers several advantages, including slower root development, reduced pest activity, and a controlled growing environment. By following these steps, you can successfully propagate turmeric in pots and enjoy the many benefits of this powerful plant. Whether you’re using it in your kitchen or for its medicinal properties, home-grown turmeric is a rewarding plant to add to your garden.
Winter is the perfect time to get started with this unique gardening project. With patience, care, and the right environment, you can cultivate your own turmeric and reap the harvest well into the following seasons. So why not give it a try? Start propagating turmeric today and watch your garden flourish!
Call to Action:
Are you ready to grow turmeric in your garden this winter? Share your thoughts, questions, and tips below—let’s get this turmeric-growing journey started! 🌿