
Introduction
Orchids, with their striking and delicate blooms, are prized in homes and gardens worldwide. However, these beautiful plants can sometimes face challenges that affect their health and vitality. If you’re struggling with orchids that have weak roots or distressed leaves, a traditional Asian technique may offer a solution. This method promises to rejuvenate your orchids quickly, helping them to produce healthy roots and fresh leaves. In this article, we’ll explore the steps of this effective technique and provide additional tips for ensuring the ongoing health of your orchids.
Understanding the Asian Revival Technique
The Asian method for reviving orchids is rooted in time-honored practices that focus on natural growth enhancement. This technique involves using a simple soaking solution to promote root health and rejuvenate the plant. By following this approach, you can effectively address common issues such as root rot and leaf damage.
Step-by-Step Guide to Reviving Orchids
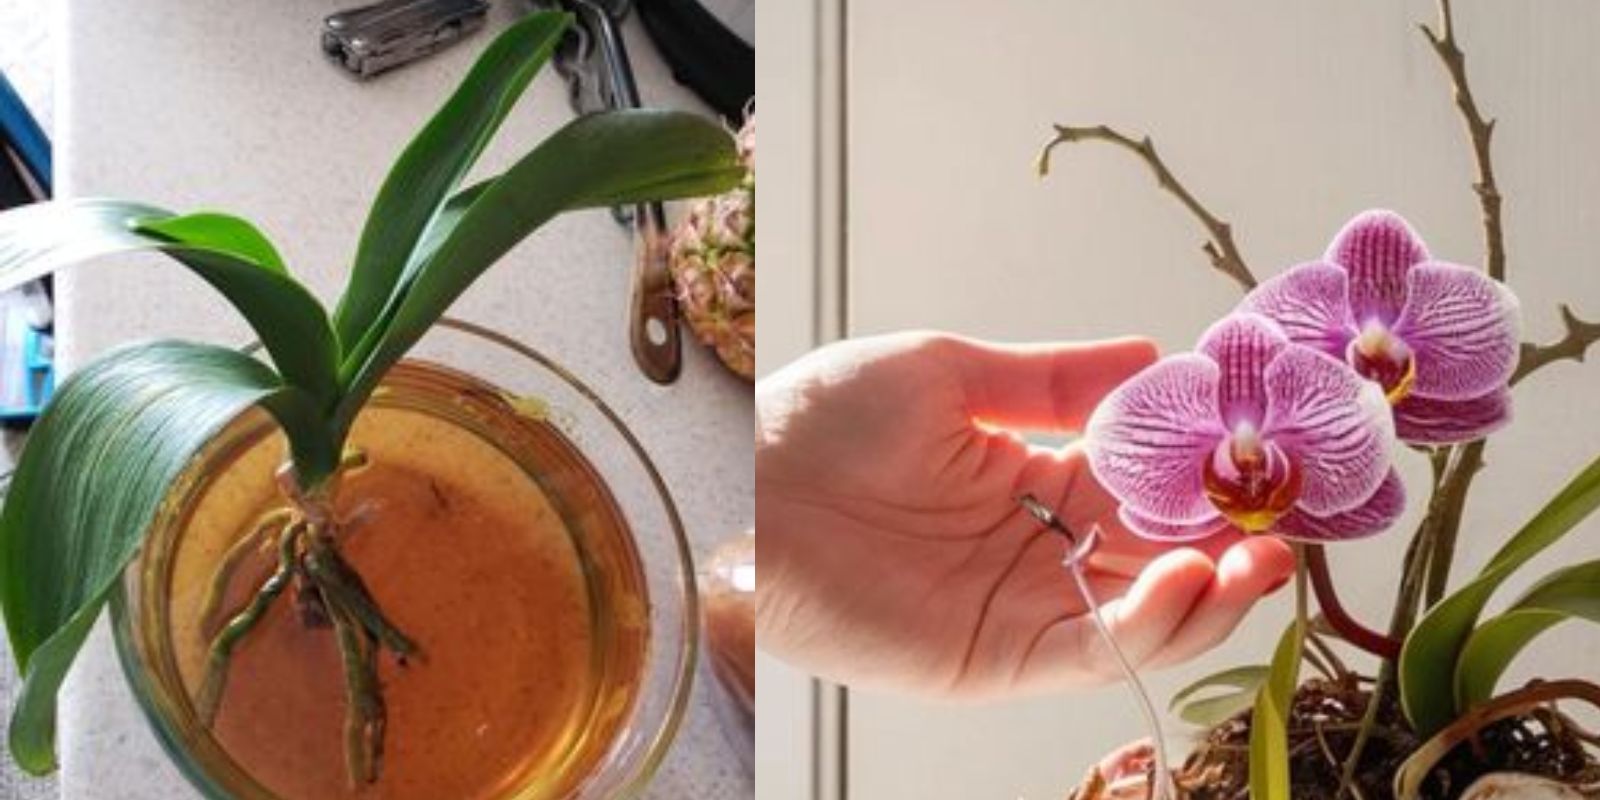
1. Prepare a Soak Solution
- Ingredients:
- Rice Water: Rice water is a nutrient-rich byproduct of washing rice. It contains vitamins, minerals, and amino acids that can benefit orchid roots.
- Diluted Orchid Fertilizer: If rice water is not available, you can use a diluted orchid fertilizer. Use a balanced, water-soluble fertilizer diluted to half strength.
- Mix the Solution:
- Rice Water: To prepare rice water, rinse a cup of rice in water, and then use the water for soaking. It’s best to use the water from the first rinse, as it contains the most nutrients.
- Fertilizer Solution: Mix one part orchid fertilizer with four parts water. Ensure the solution is well-mixed.
2. Soak the Roots
- Immersion: Gently remove the orchid from its pot and carefully wash off any old potting medium from the roots.
- Soaking Time: Place the orchid roots in the prepared solution and let them soak for about 30 minutes. This process helps to rehydrate the roots and infuse them with essential nutrients.
3. Trim Dead Parts
- Inspection: After soaking, inspect the orchid roots and leaves. Look for any dead, rotting, or damaged parts.
- Pruning: Use sterile scissors or pruning shears to carefully trim away any unhealthy roots and leaves. Removing dead parts helps prevent further rot and allows the plant to focus its energy on new growth.
4. Repot the Orchid
- Choosing a Pot:
- Pot Selection: Select a pot with good drainage holes. Orchids need well-draining conditions to prevent waterlogging and root rot.
- Potting Medium: Use a fresh, well-draining potting mix designed for orchids. Options include orchid bark, perlite, and sphagnum moss.
- Repotting Process:
- Positioning the Orchid: Place the orchid in the pot, spreading the roots out evenly. Add potting mix around the roots, gently pressing it down to secure the plant.
- Watering: Water the orchid lightly after repotting to help settle the mix around the roots.
5. Provide Optimal Conditions
- Light Requirements:
- Lighting: Place the repotted orchid in a location with bright, indirect light. Orchids thrive in filtered sunlight, so avoid direct exposure, which can scorch the leaves.
- Artificial Lighting: If natural light is insufficient, use grow lights to provide the necessary light levels.
- Humidity:
- Maintaining Humidity: Orchids prefer high humidity levels. Aim for a humidity range of 50% to 70%. You can use a humidity tray, a room humidifier, or mist the plant regularly to maintain adequate moisture.
- Temperature:
- Ideal Temperature: Maintain a temperature range of 65°F to 75°F (18°C to 24°C) during the day and slightly cooler temperatures at night. Avoid placing the orchid near drafts, heaters, or air conditioners.
Additional Tips for Orchid Care
- Watering Schedule:
- Watering Needs: Orchids should be watered only when the potting medium is dry to the touch. Overwatering can lead to root rot, while underwatering can stress the plant.
- Water Quality: Use room-temperature water, and avoid using softened or chlorinated water, as these can harm the orchid.
- Fertilizing:
- Feeding Schedule: Fertilize your orchid with a balanced, water-soluble orchid fertilizer every 2-4 weeks during the growing season (spring and summer). Reduce fertilizing during the dormant period.
- Application: Follow the manufacturer’s instructions for dilution and application to avoid over-fertilizing.
- Pest and Disease Management:
- Inspection: Regularly check your orchid for signs of pests, such as mealybugs, spider mites, or scale. Treat infestations promptly using insecticidal soap or neem oil.
- Disease Prevention: Ensure proper air circulation around the plant to prevent fungal and bacterial diseases. Avoid overhead watering, which can contribute to mold and mildew.
- Repotting:
- Timing: Repot your orchid every 1-2 years or when the potting mix breaks down. Repotting helps refresh the growing medium and provides space for root growth.
Troubleshooting Common Issues
- No New Growth: If your orchid shows no signs of new growth after following the revival technique, check for potential issues such as insufficient light, poor humidity, or pest problems.
- Persistent Root Rot: Persistent root rot may require more intensive treatment. Consider using a fungicide designed for orchids and ensure the plant is in an appropriate environment.
Conclusion
Reviving orchids using the traditional Asian technique of soaking roots in a nutrient-rich solution is an effective method to restore their health and vitality. By following the steps outlined—preparing the soak solution, soaking the roots, trimming dead parts, repotting the orchid, and providing optimal conditions—you can help your orchids recover and flourish. Embrace this time-tested method and enjoy the beauty and elegance of your rejuvenated orchids. With the right care and attention, your orchids will thrive, bringing their stunning blooms and charm into your home.