
Anthuriums are a popular and elegant choice for both indoor and outdoor gardens. Their glossy, heart-shaped leaves and vibrant, long-lasting flowers make them a striking addition to any space. While buying new plants every season may seem tempting, why not try propagating your own Anthuriums? Reproducing Anthurium plants is a simple process, and with a few innovative techniques, you can easily multiply your collection without spending extra money. This step-by-step guide will explore different methods of propagating Anthuriums, allowing you to share or grow new plants with ease.
Understanding Anthuriums
Before diving into the propagation methods, it’s important to understand a little bit about Anthuriums. These tropical plants belong to the Araceae family and are native to the rainforests of Central and South America. Known for their bright, waxy flowers (called spathes), which can come in various colors like red, pink, and white, Anthuriums are often referred to as “flamingo flowers” or “laceleaf.”
While Anthuriums are mostly cultivated for their unique flowers, they also have glossy green leaves that can add a lush touch to any room. In addition, these plants are known for being relatively easy to care for, making them an ideal choice for both beginner and experienced gardeners.
Benefits of Propagating Anthuriums
There are several reasons why propagating Anthuriums is a great idea. Firstly, it allows you to expand your collection without having to purchase more plants. Secondly, propagating is a rewarding experience for plant enthusiasts, as you get to witness the growth process from start to finish. Lastly, by propagating your Anthuriums, you ensure that you have a consistent supply of fresh, healthy plants that will thrive in your garden.
Best Times to Propagate Anthuriums
Like many plants, Anthuriums are best propagated during their growing season, which is typically in the warmer months. The spring and early summer are ideal for propagation because the plant is actively growing. The warmer temperatures encourage root growth and faster development. That being said, it is possible to propagate Anthuriums year-round, but the best success rates are often seen when propagating during the growing season.
Methods of Propagating Anthuriums
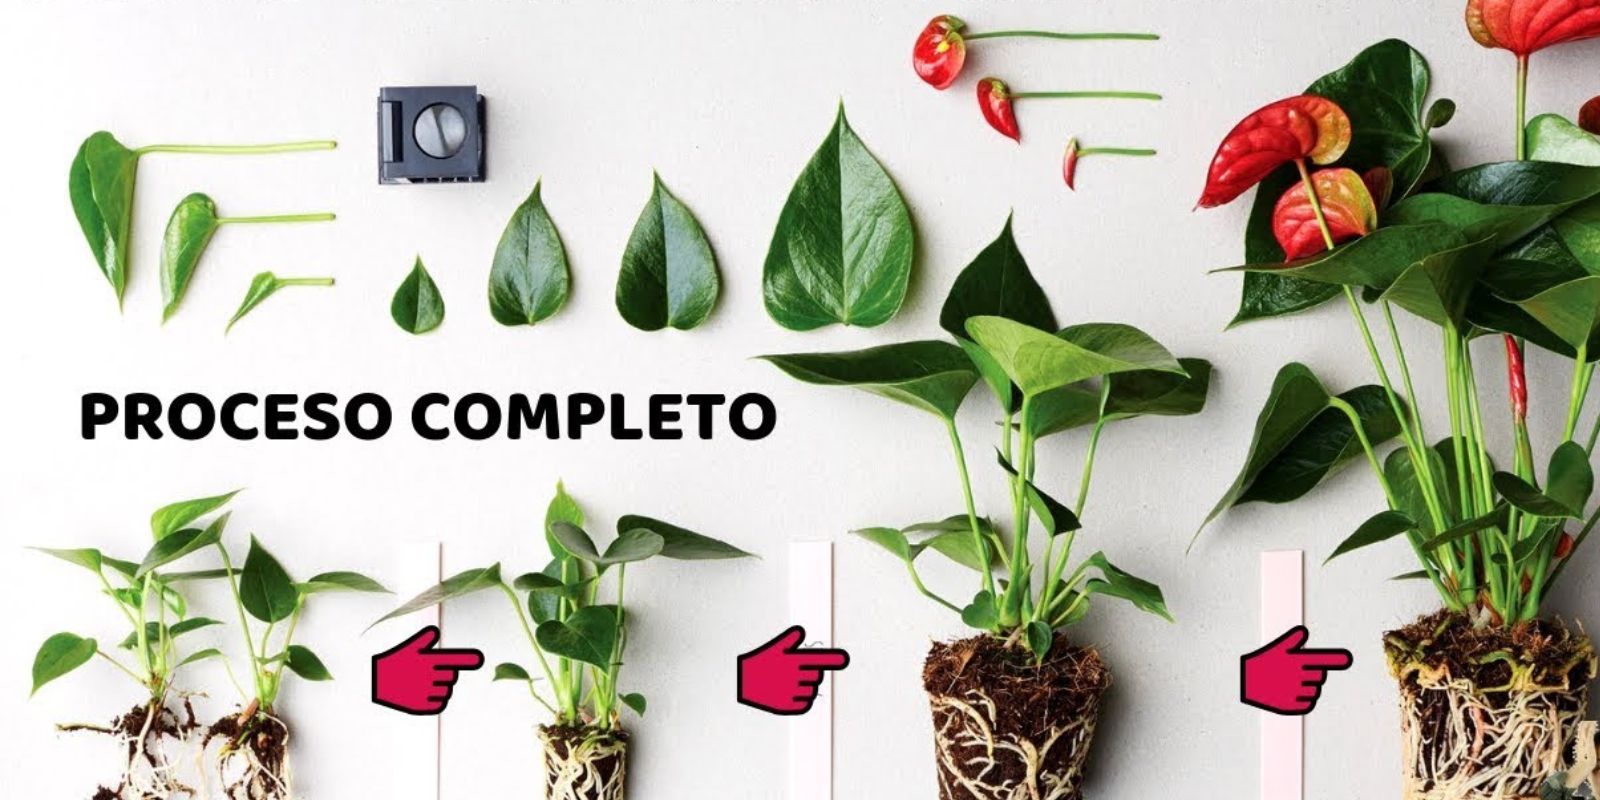
There are several effective methods for propagating Anthurium plants. Below, we’ll explore four of the most popular techniques: stem cuttings, division, leaf cuttings, and air layering.
1. Stem Cutting Method
The stem cutting method is one of the most commonly used ways to propagate Anthuriums. It’s a relatively simple and straightforward technique that yields good results.
Step-by-Step Guide:
- Select a Healthy Stem: Look for a mature, healthy stem with at least one leaf and a small section of stem attached to it. Ensure that the stem is free of pests or disease.
- Make the Cut: Using a clean, sharp knife or scissors, cut the stem just below the node. A node is the point on the stem where the leaf is attached. This is where roots will emerge.
- Prepare the Cutting: Remove any excess leaves or side branches from the cutting to leave only the main stem and one or two leaves.
- Rooting in Water or Soil: You can propagate Anthurium cuttings in either water or soil. If propagating in water, place the cutting in a jar or vase with enough water to submerge the cut end, making sure the leaves remain dry. Change the water every few days to prevent stagnation. If propagating in soil, place the cutting in a pot with well-draining soil and water lightly to encourage root development.
- Provide the Right Conditions: Place the cutting in a warm, humid environment with indirect sunlight. A plastic bag or mini greenhouse can be used to maintain humidity levels. Be patient – rooting can take anywhere from 2 to 4 weeks.
- Transplanting: Once roots have developed, and new growth begins to appear, transplant the cutting into its own pot with fresh soil.
2. Division Method
The division method is another great way to propagate Anthuriums, especially if your plant has grown large enough to be separated into smaller sections. This technique involves dividing the root ball of an existing plant to create multiple new plants.
Step-by-Step Guide:
- Remove the Plant: Gently remove the Anthurium from its pot and shake off any excess soil. This will expose the root ball, making it easier to divide.
- Separate the Roots: Carefully separate the root ball into smaller sections. Each section should have at least one strong root and one or two leaves.
- Replant the Divided Sections: Place each divided section into its own pot with fresh, well-draining potting mix. Water the new plants lightly and place them in a warm, bright spot.
- Ongoing Care: Continue to care for the divided plants as you would a mature Anthurium. Make sure they receive adequate water and indirect light to ensure they thrive.
3. Leaf Cutting Method
While the stem cutting method is popular, some gardeners may also choose to propagate Anthuriums using leaf cuttings. Though less common, this method is still effective for producing new plants.
Step-by-Step Guide:
- Choose a Healthy Leaf: Select a mature, healthy leaf from the Anthurium plant. Ensure it is free from any signs of disease or damage.
- Make the Cut: Use a clean, sharp knife or scissors to cut the leaf at its base, near the stem. If you want to increase your chances of success, cut the leaf into smaller sections, each containing at least one vein.
- Prepare the Cutting: Dip the cut end of the leaf into rooting hormone to help stimulate root growth. You can also use a mixture of honey and cinnamon as a natural rooting agent.
- Plant in Soil: Plant the leaf cuttings in a small pot filled with well-draining soil. Bury the cut end about an inch deep into the soil.
- Create a Humid Environment: To encourage root growth, create a humid environment for the cutting. Cover it with a plastic bag or place it inside a small greenhouse. Keep the soil moist but not soggy.
- Wait for Roots to Develop: Leaf cuttings can take longer to root compared to stem cuttings, sometimes up to 6 weeks. Be patient and maintain optimal conditions for the cutting to thrive.
4. Air Layering Method
Air layering is an advanced technique that involves encouraging a portion of the stem to grow roots while still attached to the parent plant. This method is ideal for larger, more mature Anthurium plants.
Step-by-Step Guide:
- Choose the Right Stem: Select a healthy, mature stem that is at least 12 inches long and free from any disease.
- Make a Small Wound: Using a sterile knife or pruning tool, make a small cut or scrape on the stem, just below a node. Be careful not to damage the plant excessively.
- Wrap the Wound: Wrap the wounded area with moist sphagnum moss. You can secure the moss with plastic wrap or aluminum foil, ensuring the moss stays moist.
- Wait for Roots to Form: Over time, roots will start to form in the moss. This process can take anywhere from 4 to 8 weeks, depending on the plant’s conditions.
- Cut and Transplant: Once roots have fully developed, cut the stem below the new root growth and transplant it into a new pot with fresh, well-draining soil.
Tips for Successful Anthurium Propagation
- Humidity is Key: Anthuriums are tropical plants that thrive in humid conditions. To promote root growth and prevent the cuttings from drying out, maintain a high humidity level.
- Use Clean Tools: Always use sterilized cutting tools to prevent the spread of disease or infection.
- Be Patient: Propagating Anthuriums takes time. Whether you’re using stem cuttings, division, leaf cuttings, or air layering, be patient and allow the plant to root and grow.
- Light and Temperature: Provide your cuttings with indirect sunlight and maintain a warm environment. Avoid placing them in direct sunlight, as this can cause them to dry out or burn.
Conclusion
Propagating Anthuriums is an enjoyable and rewarding process that allows you to expand your collection, share your plants with others, and experiment with different methods of propagation. Whether you choose stem cuttings, division, leaf cuttings, or air layering, each technique provides you with an opportunity to create new Anthurium plants that will flourish in your home or garden. Remember to be patient, provide the right care, and enjoy the process of watching your plants grow and thrive.
Happy propagating, and may your Anthurium collection flourish!