
Roses are not just flowers; they embody beauty, love, and a sense of nostalgia. For many gardeners, growing roses from cuttings offers a rewarding way to propagate beloved varieties without the cost of purchasing new plants. In this comprehensive guide, we will delve into the steps required to successfully grow roses from cuttings, ensuring you can fill your garden with these stunning blooms.
Understanding the Basics of Rose Propagation
Before we jump into the specifics of propagation, it’s essential to understand a few key concepts:
What is Plant Propagation?
Plant propagation is the process of creating new plants from a variety of sources, including seeds, cuttings, and division. Propagating roses from cuttings is a popular method because it is often simpler and more cost-effective than starting from seed.
Why Choose Cuttings?
- Genetic Consistency: When you take cuttings from a rose plant, the new plants are genetically identical to the parent plant. This is particularly important for maintaining specific characteristics of certain rose varieties.
- Cost-Effective: Propagating from cuttings allows you to expand your rose garden without the expense of purchasing new plants from a nursery.
- Speed: Starting from cuttings can yield quicker results than growing roses from seeds, which can take longer to germinate and establish.
The Best Time to Take Rose Cuttings
The timing of your cuttings can significantly affect your success rate. The best time to take rose cuttings is during the late spring or early summer when the plants are actively growing. During this period, the stems are firm yet flexible, making them ideal for propagation.
Step-by-Step Guide to Growing Roses from Cuttings
Step 1: Choose the Right Rose Plant
Selecting a healthy rose plant is the foundation of successful propagation. Look for plants that exhibit vibrant leaves, healthy stems, and no signs of disease or pest infestations. It’s best to choose varieties known for their ease of propagation.
Step 2: Gather Your Materials
Before you begin, gather the necessary materials:
- Sharp Pruning Shears or Scissors: Ensure they are clean and sterilized to prevent disease transmission.
- Rooting Hormone (optional): While not mandatory, rooting hormone can enhance root development and improve your chances of success.
- Potting Mix: A well-draining potting mix is crucial for preventing rot.
- Containers: Use small pots or trays for planting your cuttings.
- Plastic Bag or Dome: To maintain humidity around the cuttings.
Step 3: Taking the Cuttings
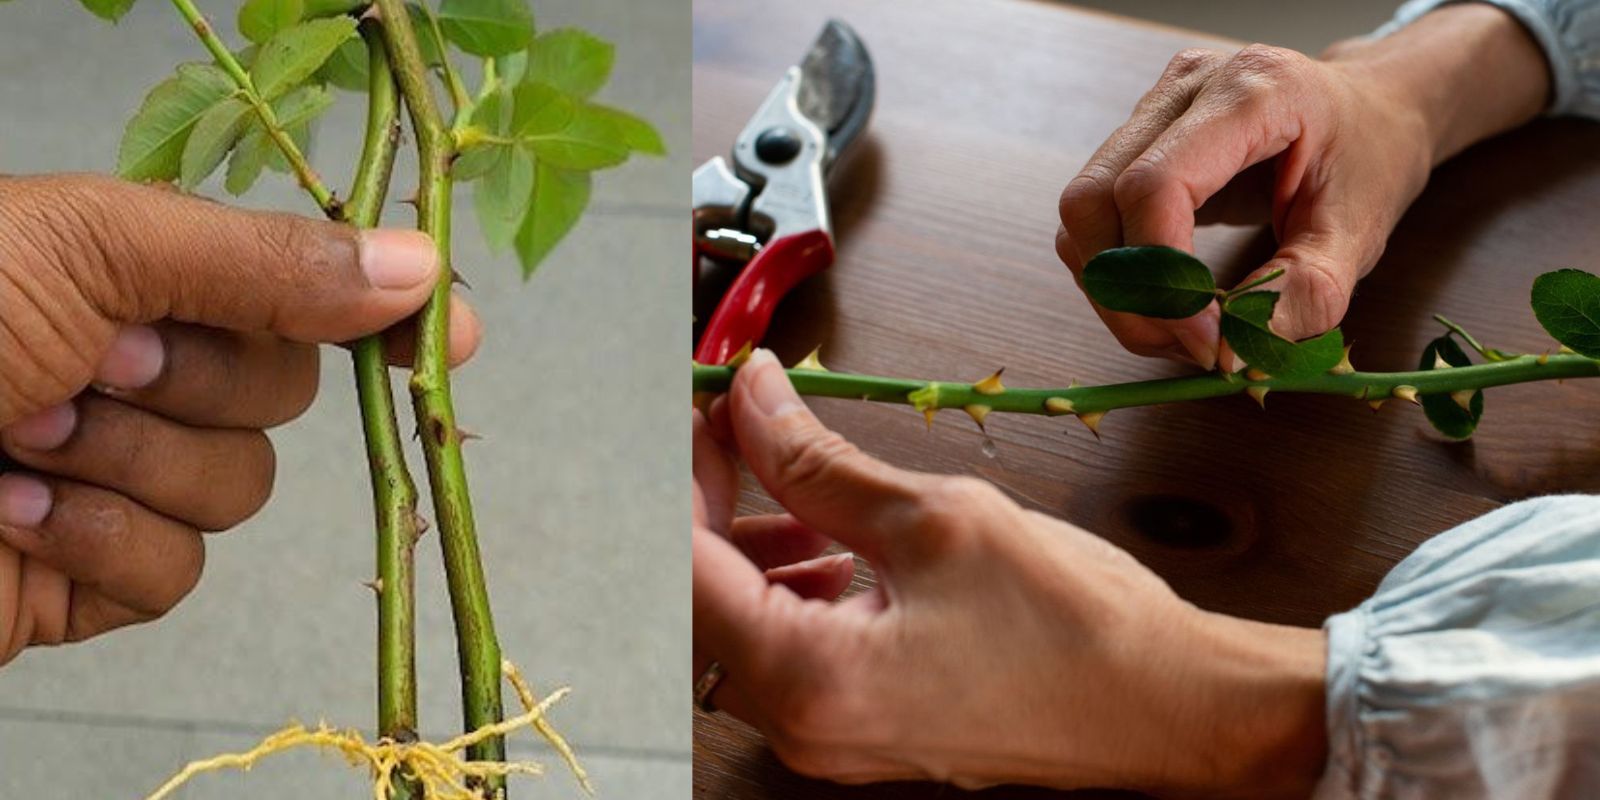
- Make Your Cuts: Choose healthy stems from the current season’s growth. Cut sections that are about 6-8 inches long, ensuring that each cutting has at least two to three leaf nodes. Make your cut just below a leaf node for the best results.
- Trim the Leaves: Remove the leaves from the lower half of the cutting, leaving just a few at the top. This reduces water loss and encourages the plant to focus on root development.
Step 4: Applying Rooting Hormone
While this step is optional, applying rooting hormone can increase your chances of success. Dip the cut end of each cutting into the rooting hormone, ensuring it’s well coated. Shake off any excess powder.
Step 5: Planting the Cuttings
- Prepare the Potting Mix: Fill your containers with a well-draining potting mix. You can use a mix specifically formulated for starting seeds or general potting soil.
- Insert the Cuttings: Make holes in the potting mix using a pencil or your finger and insert the cuttings, burying them about 2-3 inches deep. Ensure that at least one leaf node is below the surface, as this is where roots will emerge.
- Water the Cuttings: Water the cuttings gently to settle the soil around them. Ensure the soil is moist but not overly saturated.
Step 6: Creating a Humid Environment
To help your cuttings establish roots, you’ll need to create a humid environment:
- Cover the Cuttings: Place a plastic bag or a clear plastic dome over the containers to maintain humidity. Make sure the cover does not touch the leaves; you can use stakes or skewers to support it if needed.
- Provide Indirect Light: Place the covered cuttings in a location with bright, indirect sunlight. Avoid direct sunlight, as this can cause the cuttings to overheat and dry out.
Step 7: Monitoring Growth
Check your cuttings regularly to ensure the soil remains moist. It’s important not to overwater, as this can lead to rot. After about 4-6 weeks, you should see new growth, indicating that roots are developing.
Step 8: Transplanting the Cuttings
Once your cuttings have established roots and new growth, it’s time to transplant them:
- Prepare New Containers: Choose larger pots filled with the same well-draining potting mix.
- Gently Remove the Cuttings: Carefully remove the cuttings from their original containers, taking care not to damage the roots.
- Plant in New Pots: Place each rooted cutting in a new pot, filling in around the roots with soil. Water gently to settle the soil.
Step 9: Caring for Your New Roses
- Gradual Acclimation: If you plan to move your roses outdoors, gradually acclimate them to outdoor conditions by placing them outside for a few hours each day, gradually increasing the time over a week or two.
- Watering: Keep the soil consistently moist but not waterlogged. Water the plants deeply when the top inch of soil feels dry.
- Fertilizing: After a few weeks, you can start fertilizing your roses with a balanced, slow-release fertilizer to encourage healthy growth.
- Pruning: As your roses grow, prune them to promote bushier growth and remove any dead or diseased leaves.
Common Challenges and Solutions
While propagating roses from cuttings is generally straightforward, some challenges may arise. Here are a few common issues and how to address them:
1. Cuttings Not Rooting
If your cuttings are not developing roots, ensure that they were taken at the right time and that you are using healthy stems. Consider using rooting hormone for improved success.
2. Mold Growth
If you notice mold developing around the cuttings, it may be due to excess moisture. Remove the cover and allow for better airflow. You can also sprinkle a little cinnamon on the soil to help combat mold.
3. Wilting Leaves
Wilting can indicate either underwatering or overwatering. Check the soil moisture and adjust your watering routine as necessary.
Conclusion
Growing roses from cuttings is a delightful way to expand your garden and cultivate a variety of blooms. By following the steps outlined in this guide, you’ll be well on your way to creating a thriving rose garden filled with beautiful, fragrant flowers. The joy of watching your cuttings grow and eventually flourish into full-sized roses is unmatched and will surely enhance your gardening experience.
Embrace the art of rose propagation, and soon you will have a vibrant collection of roses that can be shared with friends and family. Happy gardening! 🌹
Motivation to Interact
Have you tried propagating roses from cuttings? Share your experiences and tips with fellow gardeners! Let’s cultivate a community of rose lovers! 🌿💚 #RoseGardening #GardenTips #Propagation #GreenThumb #FlowerPower