
Introduction
Grapevines are a cherished addition to any garden, producing luscious fruit and adding beauty with their sprawling foliage. For those interested in growing their own grapes, starting from cuttings is an effective method. By using water bottles, you can successfully propagate grapevines with minimal cost and effort. This article will guide you through a simple and effective technique for growing grapes in water bottles, ensuring a high success rate in your grape-growing endeavors.
Step-by-Step Guide to Growing Grapes in Water Bottles
1. Select Healthy Grape Cuttings
The success of growing grapes in water bottles begins with selecting healthy cuttings. Choose grapevines that are vigorous and free from disease. Ideally, your cuttings should be taken during the dormant season, which is late winter to early spring. Look for mature, semi-hardwood cuttings that are 6-8 inches long and have at least 2-3 nodes (the points where leaves and branches grow).
2. Prepare the Cuttings
Once you have your grape cuttings, it’s time to prepare them for rooting. Begin by trimming the cuttings just below a node. Remove any excess leaves, ensuring that the cuttings are clean and free from debris. If you wish, you can dip the cut end of each cutting in rooting hormone to encourage root development, though this step is optional.
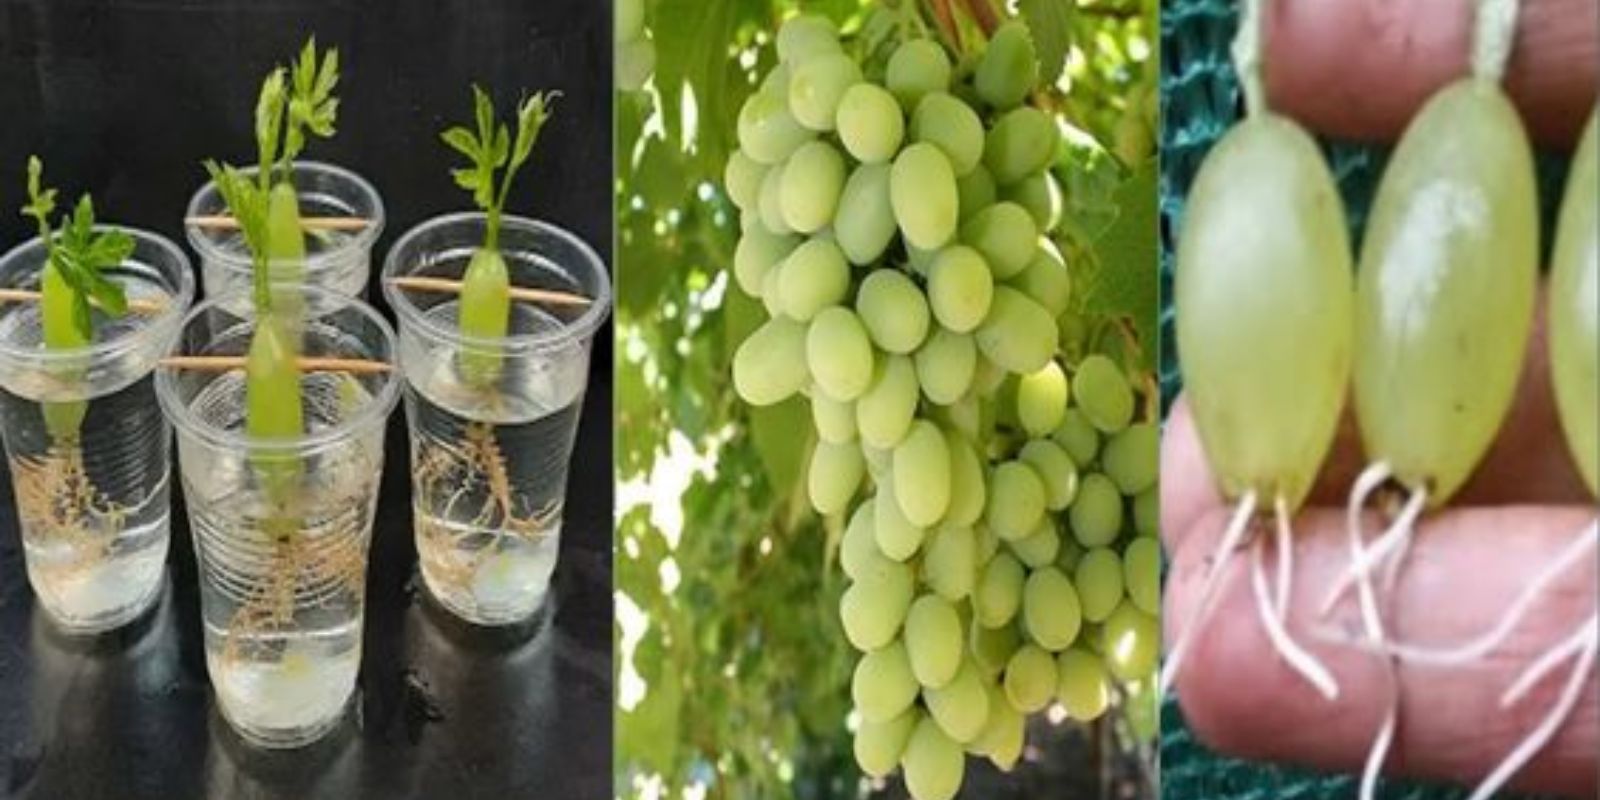
3. Use Water Bottles
Using water bottles for propagating grape cuttings is a straightforward and effective method. Here’s how to prepare your bottles:
- Choose the Right Bottles: Opt for clear, transparent water bottles. This allows you to monitor root growth and ensures that the cuttings receive adequate light. Plastic bottles or glass bottles work equally well.
- Prepare the Bottles: Rinse the bottles thoroughly to remove any residue. Fill them with clean, room-temperature water. Ensure that the bottles are filled enough to submerge the nodes of the cuttings but not too full to prevent spillage.
- Insert the Cuttings: Place the grape cuttings into the bottles, making sure that at least one node is submerged in the water. This node is where the roots will eventually develop.
4. Provide Proper Light
For optimal growth, place the water bottles in a location with bright, indirect sunlight. Avoid direct sunlight, as it can cause algae growth in the water and potentially harm the cuttings. A sunny windowsill or under a grow light are ideal spots. The light will help the cuttings produce the energy needed for root development.
5. Maintain and Monitor
Proper maintenance is crucial for successful propagation:
- Change the Water Regularly: To keep the water fresh and prevent stagnation, change it every 2-3 days. This helps to provide the cuttings with a clean environment and prevents the growth of harmful bacteria.
- Watch for Root Development: After a few weeks, you should start to see roots forming from the submerged nodes. The roots will initially appear as small, white threads. Once the roots are a few inches long, your cuttings are ready to be transplanted.
6. Transplant the Cuttings
Once your grape cuttings have developed a sufficient root system, it’s time to transplant them into soil or larger containers:
- Choose a Suitable Soil Mix: Use a well-draining potting mix that is suitable for grapevines. A mix of potting soil, perlite, and compost works well. If you’re planting directly in the ground, ensure that the soil is loose and well-drained.
- Prepare the Planting Containers: If you’re using pots, choose containers that are large enough to accommodate the growing roots. Make sure the pots have drainage holes to prevent waterlogging.
- Transplant Carefully: Gently remove the cuttings from the water bottles, being careful not to damage the roots. Plant them in the soil, ensuring that the roots are spread out and covered with soil. Water thoroughly to settle the soil around the roots.
7. Provide Ongoing Care
After transplanting, continue to care for your grapevines to ensure healthy growth:
- Watering: Keep the soil consistently moist but not waterlogged. Grapevines need regular watering, especially during the growing season. Allow the top inch of soil to dry out between waterings.
- Fertilizing: Feed the grapevines with a balanced fertilizer during the growing season to promote vigorous growth and fruit production.
- Pruning: As the grapevines grow, prune them to encourage a strong structure and remove any dead or diseased wood. Proper pruning also improves air circulation and light penetration.
Conclusion
Growing grapes in water bottles is an accessible and effective way to propagate grapevines from cuttings. By following these steps, you can successfully root your grape cuttings and watch them flourish into healthy vines. This method not only provides a practical solution for grape propagation but also offers a rewarding gardening experience. Embrace this technique and enjoy the process of nurturing your own grapevines from the comfort of your home. Share your success stories and inspire others to grow their own grapes, making the journey of gardening even more enjoyable.