
Raised garden beds are a fantastic way to improve the beauty and functionality of your garden. They provide numerous benefits such as better soil quality, improved drainage, easier maintenance, and more efficient use of space. Whether you’re looking to grow vegetables, herbs, or ornamental plants, raised garden beds can help you achieve a thriving garden. In this article, we’ll guide you through the steps to create stunning raised garden beds that will enhance your landscaping and make your garden the envy of the neighborhood.
Introduction to Raised Garden Beds
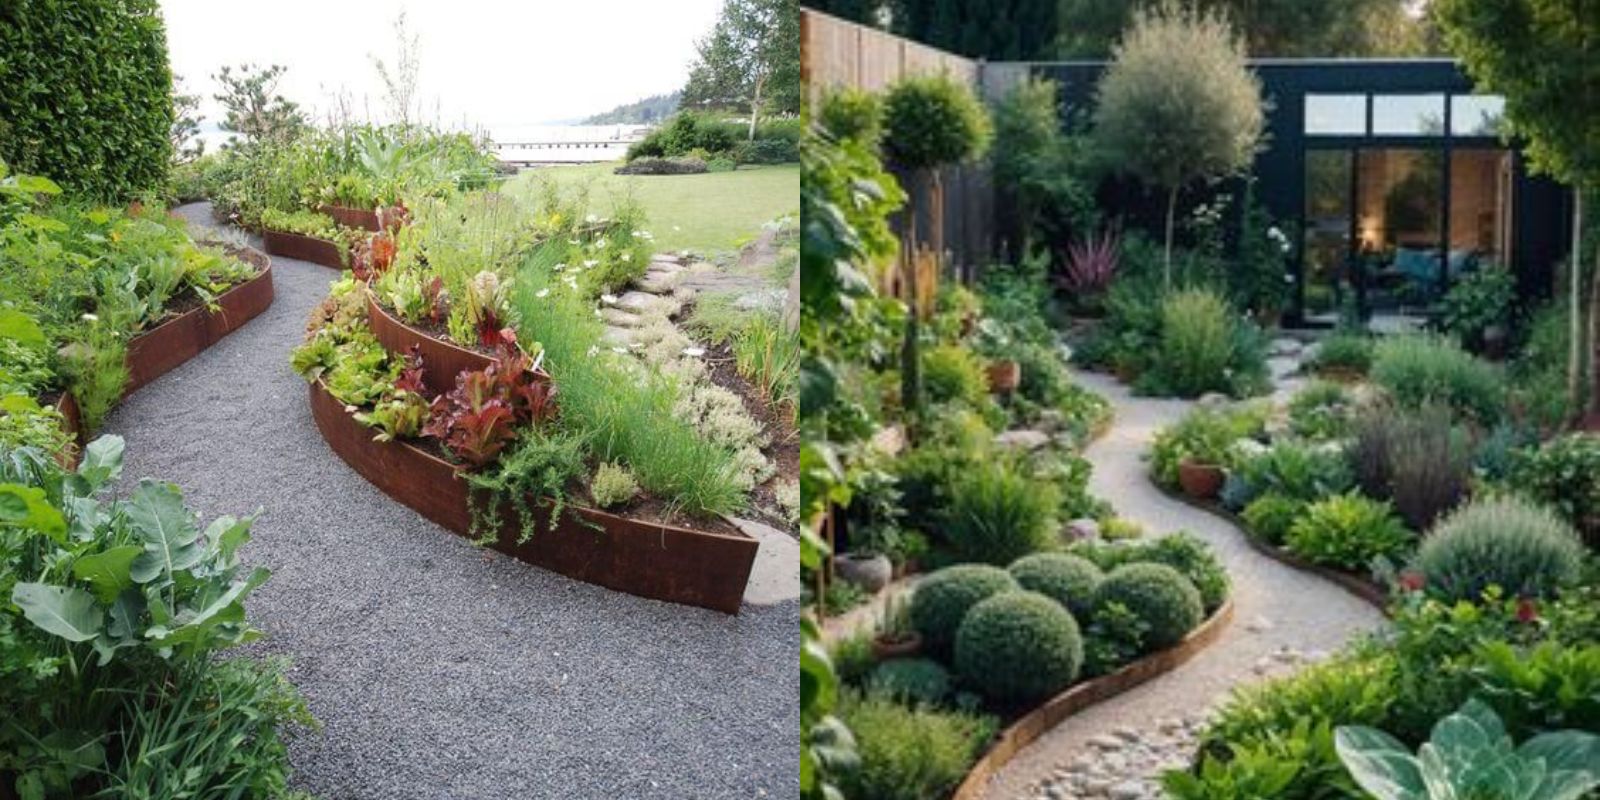
Raised garden beds are elevated frames filled with soil, allowing you to grow plants above ground level. This setup offers several advantages over traditional in-ground gardening. Raised beds improve soil structure, make it easier to control weeds, and provide better drainage, which is crucial for plant health. They also make gardening more accessible, as you don’t have to bend over as much to tend to your plants. Raised beds can be constructed from various materials, such as wood, stone, or recycled materials, and can be customized to fit any garden style.
Steps to Create Stunning Raised Garden Beds
1. Choose the Location
Selecting the right location for your raised garden beds is crucial. Most plants, especially vegetables and flowers, need at least 6-8 hours of sunlight per day. Choose a sunny spot with good drainage to ensure your plants thrive. Avoid low-lying areas where water might accumulate, as poor drainage can lead to root rot and other issues.
2. Plan the Design
Before you start building, plan the design of your raised garden beds. Consider the shape and size that will best fit your space and meet your gardening needs. Rectangular or square beds are common, but you can also create circular or irregular shapes for a unique look. Sketch out your design and decide on the height of the beds. Taller beds are easier to work with and are better for deep-rooted plants.
3. Gather Materials
Choose materials that are durable and suitable for your garden’s aesthetic. Wood is a popular choice due to its natural look and ease of use. Cedar and redwood are excellent options because they are naturally resistant to rot and insects. Stone or brick can give your garden a more formal appearance, while recycled materials like old pallets can add a rustic charm. Ensure you have enough materials to construct the frames according to your design.
4. Prepare the Ground
Clear the area where you plan to build your raised beds. Remove any grass, weeds, or debris to create a clean surface. If you’re concerned about weeds growing up through the soil, you can lay down a weed barrier or landscape fabric at the bottom of the bed.
5. Build the Frames
Assemble the frames for your raised beds using the materials you’ve chosen. Make sure the frames are level and securely fastened. If you’re using wood, pre-drill holes to prevent splitting, and use galvanized screws or nails to avoid rust. For added stability, consider reinforcing the corners with brackets.
6. Line the Beds
Lining the beds with a weed barrier or landscape fabric can help prevent weeds from growing through and keep the soil in place. This step is particularly important if you’re placing your raised beds on top of grass or weedy areas.
7. Fill with Soil
Fill the raised beds with a high-quality garden soil mix. A good mix typically includes topsoil, compost, and organic matter. You can purchase pre-mixed soil or create your own by combining equal parts of these components. The soil should be loose and well-draining to promote healthy root growth.
8. Add Compost
Enrich the soil with compost or other organic matter to provide essential nutrients for your plants. Compost improves soil structure, enhances moisture retention, and supports beneficial microorganisms. Mix the compost thoroughly with the soil to ensure even distribution of nutrients.
9. Install Irrigation
Setting up a drip irrigation system or soaker hoses can help you maintain consistent moisture levels in your raised beds. Drip irrigation delivers water directly to the roots, reducing water waste and preventing foliage diseases caused by overhead watering. It’s also convenient and time-saving, especially during hot summer months.
10. Plant Your Garden
Once your beds are filled with soil and ready to go, it’s time to plant! Choose a mix of vegetables, herbs, and flowers to create a diverse and visually appealing garden. Follow planting guidelines for each type of plant, paying attention to spacing and depth requirements. Companion planting, where you plant complementary species together, can help maximize space and improve plant health.
11. Mulch the Surface
Applying mulch to the surface of the soil helps retain moisture, suppress weeds, and regulate soil temperature. Organic mulches like straw, wood chips, or grass clippings are excellent choices. Spread a 2-3 inch layer of mulch around your plants, being careful not to cover the stems.
12. Stake Tall Plants
Provide support for taller plants, such as tomatoes or climbing beans, by staking them or using trellises. This prevents the plants from toppling over and makes it easier to manage their growth. Staking also improves air circulation around the plants, reducing the risk of fungal diseases.
13. Label Your Plants
Use markers to identify the different plants in your raised beds. This is especially useful if you’re growing multiple varieties of the same plant or if you’re new to gardening. Labeling helps you keep track of your garden’s layout and makes it easier to follow care instructions for each plant.
14. Monitor Moisture
Keep the soil consistently moist but not waterlogged. Raised beds tend to dry out faster than in-ground gardens, so regular watering is essential. Check the soil moisture regularly by sticking your finger into the soil. If it feels dry an inch below the surface, it’s time to water.
15. Fertilize Regularly
Use organic fertilizers to nourish your plants and promote healthy growth. Compost tea, fish emulsion, and worm castings are excellent options. Follow the recommended application rates for each type of fertilizer to avoid overfeeding your plants.
16. Prune and Trim
Regular pruning and trimming help maintain plant health and encourage more blooms or fruit production. Remove dead or diseased leaves, thin out crowded branches, and pinch back growing tips to promote bushier growth. Pruning also improves air circulation and reduces the risk of pests and diseases.
17. Watch for Pests
Monitor your raised beds for signs of pests and take action as needed. Common garden pests include aphids, caterpillars, and slugs. Use organic pest control methods, such as introducing beneficial insects, using insecticidal soap, or applying diatomaceous earth.
18. Rotate Crops
Practicing crop rotation helps maintain soil health and reduce the risk of pests and diseases. Change the location of your plants each season, planting different types of crops in each bed. This prevents the buildup of specific pests and depletes soil nutrients evenly.
19. Harvest and Enjoy
Pick your produce at peak ripeness to enjoy the best flavors and nutritional value. Harvesting regularly also encourages plants to produce more fruit and flowers. Share your bounty with friends and family or preserve it for later use.
20. Beautify the Edges
Add decorative touches to the edges of your raised beds to enhance their appearance. You can use edging materials like bricks, stones, or decorative tiles. Plant low-growing flowers or groundcovers around the base to create a seamless transition between the beds and the rest of your garden.
Conclusion
Creating stunning raised garden beds is a rewarding project that can transform your outdoor space. By following these steps, you’ll enjoy the benefits of improved soil quality, better drainage, and easier maintenance while adding beauty and productivity to your garden. Happy gardening, and don’t forget to share your progress and tips with us! 🌿🌸
Ready to create your own raised garden beds? Share your progress and tips with us! 🌿👇