
Introduction
Have you ever planted seeds and waited anxiously, only to find that some take forever to sprout while others never germinate at all? The solution to this common gardening problem might be simpler than you think—soaking seeds before planting.
Pre-soaking seeds is an age-old gardening technique that can significantly improve germination rates, speed up sprouting, and give your plants a strong start. By mimicking natural conditions where seeds absorb moisture before germinating, this method helps break down tough seed coats and awakens dormant seeds.
In this comprehensive guide, we’ll explore why soaking seeds is beneficial, how to do it correctly, and which seeds respond best to this technique. By the end, you’ll be ready to put this simple yet powerful gardening hack into practice!
Why Should You Soak Seeds Before Planting?
Many seeds have a protective outer coating that prevents them from sprouting too soon in nature. This mechanism ensures they don’t germinate in unfavorable conditions, such as during a drought. However, in a controlled gardening environment, we can give seeds a head start by softening their tough shells.
Here are some key benefits of soaking seeds before planting:
- Speeds Up Germination – Water triggers the germination process, helping seeds break dormancy faster.
- Softens Hard Seed Coats – Seeds with thick outer shells, like beans and peas, absorb water and sprout more easily.
- Reduces the Risk of Disease – Hydrated seeds have a better chance of developing strong roots, making them more resistant to soil-borne pathogens.
- Increases Uniform Germination – Soaking ensures that more seeds sprout at the same time, leading to even plant growth.
- Mimics Natural Conditions – Seeds in nature often soak in rainwater before sprouting, so this technique simply enhances what would naturally occur.
How to Soak Seeds Before Planting: A Step-by-Step Guide
Step 1: Choose the Right Seeds
While many seeds benefit from soaking, some seeds don’t need it or could even be harmed by excessive moisture. Seeds with hard, thick coats are the best candidates for soaking.
Ideal Seeds for Soaking:
- Beans (kidney beans, black beans, pinto beans, etc.)
- Peas (snap peas, snow peas, garden peas)
- Sunflower seeds
- Corn
- Beets
- Chard
- Pumpkin and squash seeds
- Cucumber seeds
Seeds That Don’t Need Soaking:
- Small seeds like lettuce, basil, or carrots (they can become too fragile when soaked)
- Pelleted seeds (these have coatings that may dissolve in water)
- Seeds prone to fungal infections when soaked too long
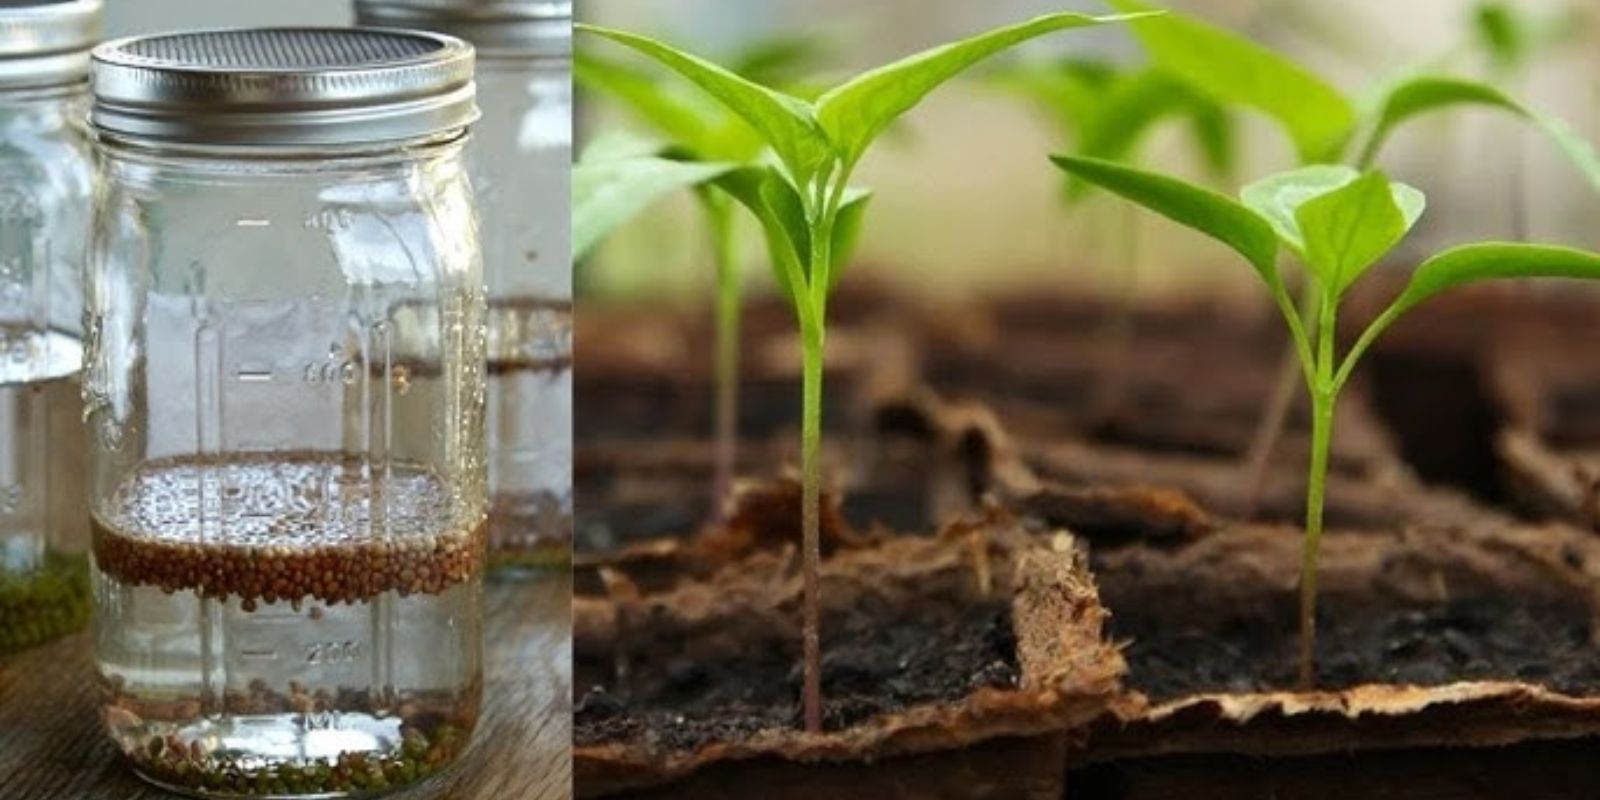
Step 2: Prepare the Water
Fill a container with lukewarm water (not hot!). The water temperature should be around 65-75°F (18-24°C). Using warm water helps speed up absorption without shocking the seeds.
Step 3: Soak the Seeds
Place the seeds in the water and let them soak. The amount of time needed depends on the seed type:
- Small seeds (like lettuce, basil) – No soaking required
- Medium seeds (like squash, cucumber, beets) – Soak for 4-6 hours
- Large seeds (like beans, peas, corn, sunflowers) – Soak for 8-24 hours
- Extra-hard seeds (like morning glories, nasturtiums, and okra) – Soak for 24 hours or gently nick the seed coat to help water penetration.
💡 Pro Tip: Don’t soak seeds for longer than 24 hours, as they might start to rot or drown from lack of oxygen.
Step 4: Drain and Dry Slightly
After soaking, remove the seeds from the water and place them on a paper towel to drain excess moisture. They should be moist but not dripping wet before planting.
Step 5: Plant Immediately
Once your seeds are soaked, it’s best to plant them right away. Soaked seeds absorb water and begin their internal germination process, so delaying planting can cause them to dry out and lose viability.
Alternative Methods to Enhance Seed Germination
Soaking is not the only way to improve germination! Here are some additional techniques to try:
🌿 Scarification – This involves lightly scratching the seed coat with sandpaper or a knife to help water penetrate (useful for hard-coated seeds like morning glories and okra).
🌿 Stratification – Some seeds, like apple and lavender seeds, require a cold period before they sprout. This can be done by placing them in moist soil in the fridge for several weeks before planting.
🌿 Hydrogen Peroxide Soak – A diluted hydrogen peroxide solution can help disinfect seeds and prevent fungal growth.
Common Mistakes to Avoid When Soaking Seeds
🚫 Over-soaking Seeds – Leaving seeds in water for more than 24 hours can suffocate them, leading to rot instead of sprouting.
🚫 Using Hot Water – Extreme temperatures can damage delicate seeds and reduce germination rates.
🚫 Forgetting to Plant Immediately – Once soaked, seeds must be planted quickly before they dry out.
🚫 Soaking the Wrong Seeds – Not all seeds need soaking, and some may suffer from excessive moisture exposure.
Conclusion
Soaking seeds before planting is a simple yet powerful gardening trick that can make a big difference in your garden’s success. By softening tough seed coats and jump-starting germination, you can ensure quicker, stronger growth and healthier plants.
Whether you’re growing beans, peas, sunflowers, or squash, give this technique a try and watch your seedlings emerge faster and stronger than ever!
🌱 Have you tried soaking seeds before? What’s your experience? Let us know in the comments! 👇✨
#GardeningHacks #SeedStarting #GrowYourOwn #GardenTips #OrganicGardening #GreenThumb