
Growing seedlings is a rewarding experience, offering a glimpse into the world of gardening and the promise of fresh vegetables, fruits, or beautiful flowers. However, many novice gardeners face a common challenge: yellowing leaves on their seedlings. This issue can be frustrating and alarming, especially when you’ve put so much care and effort into nurturing your young plants. Fortunately, understanding the underlying causes of yellowing leaves and implementing effective solutions can restore your seedlings to vibrant health. In this article, we will explore the reasons behind yellowing leaves, the steps to diagnose and fix the problem, and tips to promote strong, healthy growth.
Understanding the Causes of Yellowing Leaves
1. Nutrient Deficiencies
One of the primary reasons for yellowing leaves in seedlings is nutrient deficiencies, particularly a lack of nitrogen. Nitrogen is essential for plant growth, as it is a vital component of chlorophyll, the pigment responsible for the green color in plants. Without sufficient nitrogen, leaves can turn yellow and stunt growth.
In addition to nitrogen, other nutrient deficiencies, such as iron, magnesium, and manganese, can also lead to yellowing leaves. Each nutrient plays a specific role in plant health, and a lack of any one of them can impact the overall vigor of your seedlings.
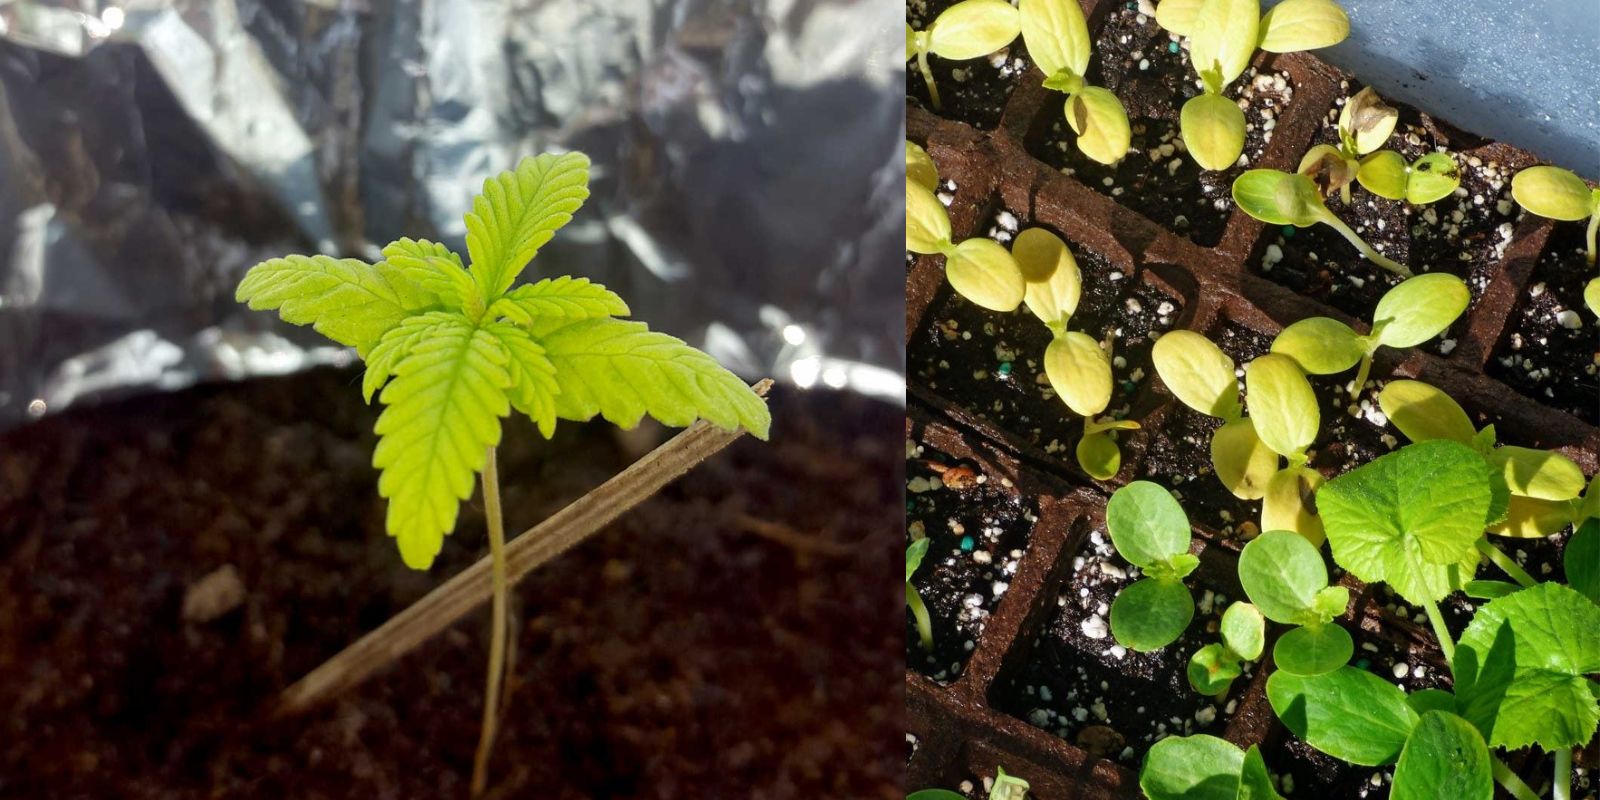
2. Overwatering or Underwatering
Watering practices significantly affect the health of seedlings. Overwatering can lead to root rot, which suffocates roots and prevents them from absorbing nutrients. As a result, seedlings may display yellow leaves and weak growth.
Conversely, underwatering can cause stress and hinder nutrient uptake, leading to yellowing leaves. It’s crucial to find a balance in your watering routine to keep seedlings hydrated without saturating the soil.
3. Inadequate Light Conditions
Seedlings require ample light to grow healthy and strong. Inadequate light can lead to weak, leggy plants and yellowing leaves. This is especially true for seedlings grown indoors or in shaded areas, where natural sunlight may be limited.
To promote healthy growth, seedlings typically need 12 to 16 hours of bright light each day. If natural light is insufficient, consider supplementing with grow lights to provide the necessary illumination.
4. Poor Soil Quality
The quality of the soil in which your seedlings are planted plays a crucial role in their health. Poor soil, lacking organic matter or proper drainage, can lead to nutrient lockout, where roots cannot access the nutrients in the soil. This can result in yellowing leaves and stunted growth.
Choosing a well-draining, nutrient-rich potting mix is essential for optimal seedling growth. Adding organic matter, such as compost, can improve soil quality and promote healthy root development.
5. Pest Infestation
Pests such as aphids, spider mites, and thrips can cause significant damage to seedlings. These pests feed on plant sap, leading to nutrient deficiencies and stress in the affected plants. In addition to yellowing leaves, you may notice other symptoms such as distorted growth, sticky residue, or visible pests on the plants.
Regularly inspecting your seedlings for pests and taking appropriate action, such as introducing beneficial insects or using insecticidal soap, can help manage infestations effectively.
6. Environmental Stress
Seedlings are sensitive to their environment, and fluctuations in temperature, humidity, and air circulation can impact their health. Ideal temperatures for most seedlings range from 65 to 75°F (18 to 24°C). Extreme heat or cold can stress plants and lead to yellowing leaves.
Similarly, high humidity levels can encourage fungal diseases, while low humidity can cause water stress. Monitoring environmental conditions and making necessary adjustments can help mitigate stress on your seedlings.
Steps to Diagnose and Fix Yellowing Leaves
Step 1: Assess Watering Practices
Evaluate your watering routine. Check the moisture level of the soil by sticking your finger about an inch deep into the soil. If it feels dry, your seedlings may need more water. If it’s soggy, reduce your watering frequency. The goal is to keep the soil consistently moist but not waterlogged.
Step 2: Check for Nutrient Deficiencies
To determine if nutrient deficiencies are the culprit, inspect your seedlings closely. If you suspect a nitrogen deficiency, consider applying a balanced fertilizer or a nitrogen-rich amendment, such as fish emulsion or blood meal. For deficiencies in other nutrients, consider using a complete fertilizer that contains micronutrients.
Step 3: Evaluate Light Conditions
Assess the light conditions your seedlings are receiving. If they are not getting enough light, consider moving them to a sunnier location or supplementing with grow lights. Ensure that your seedlings receive adequate light for at least 12 to 16 hours each day.
Step 4: Inspect Soil Quality
Check the quality of your soil. If it appears compacted or lacks organic matter, consider repotting your seedlings into a better-quality potting mix. Look for a mix designed for seedling growth, which typically contains peat moss, perlite, and compost.
Step 5: Monitor for Pests
Regularly inspect your seedlings for any signs of pest infestations. Look for small insects, webs, or sticky residue on the leaves. If you detect pests, treat the affected plants with insecticidal soap, neem oil, or other organic pest control methods. Consider introducing beneficial insects, such as ladybugs or lacewings, to help manage pest populations naturally.
Step 6: Adjust Environmental Conditions
Monitor the temperature and humidity levels in your growing environment. If temperatures are fluctuating or humidity is too high or low, consider relocating your seedlings or using a fan to improve air circulation. Use a thermometer and hygrometer to keep track of conditions and make adjustments as necessary.
Tips for Promoting Strong, Healthy Seedling Growth
- Use High-Quality Seeds: Start with fresh, high-quality seeds to increase your chances of success. Store seeds in a cool, dry place to maintain their viability.
- Harden Off Seedlings: Before transplanting seedlings outdoors, gradually acclimate them to outdoor conditions. This process, known as hardening off, helps reduce transplant shock and prepares seedlings for the outdoors.
- Provide Support: As seedlings grow, consider providing support, such as stakes or cages, for taller varieties. This helps prevent breakage and promotes healthy growth.
- Rotate Crops: If you’re growing seedlings in the same area each year, practice crop rotation to prevent soil-borne diseases and nutrient depletion.
- Mulch Around Seedlings: Applying a layer of mulch can help retain soil moisture, suppress weeds, and regulate soil temperature, promoting healthy seedling growth.
- Regularly Monitor Progress: Keep a close eye on your seedlings as they grow. Regularly inspect for any signs of stress or problems and address them promptly to ensure optimal growth.
Conclusion
Yellowing leaves on seedlings can be disheartening, but with careful observation and appropriate interventions, you can nurse your plants back to health. By understanding the causes of yellowing leaves, assessing your watering practices, evaluating light conditions, monitoring for pests, and adjusting environmental factors, you can promote healthy growth and vibrant seedlings.
Gardening is a journey filled with learning experiences. Embrace the challenges and successes along the way, and remember that even the most seasoned gardeners face setbacks. With patience and perseverance, you can cultivate a flourishing garden full of healthy, green plants. Happy gardening!