
There’s something deeply satisfying about starting plants from seed. Watching tiny seeds sprout into strong, healthy plants is a rewarding experience for both novice and seasoned gardeners. Starting your own seeds is also a fantastic way to grow a wide variety of plants, especially those that may not be readily available at local nurseries. Plus, it’s often a more affordable option compared to buying seedlings.
If you’re new to seed starting or looking to improve your techniques, this guide will take you through everything you need to know, from choosing the right seeds to successfully transplanting your seedlings into the garden. By following these steps, you’ll be well on your way to a thriving garden!
1. Choosing Your Seeds
The first step in seed starting is selecting the right seeds. Not all plants are well-suited to starting from seed indoors, so it’s important to research which plants are ideal for your climate and growing season. For example, many vegetables like tomatoes, peppers, and lettuce, as well as flowers such as marigolds and zinnias, are perfect candidates for indoor seed starting.
Tips for Selecting Seeds:
- Check Growing Zones: Make sure the seeds you choose are suited to your hardiness zone. This will ensure that your plants thrive in your climate.
- Heirloom vs. Hybrid: Heirloom seeds are open-pollinated and tend to produce plants with more traditional characteristics. Hybrid seeds are bred for specific traits like disease resistance or uniform growth. Choose based on your preferences.
- Organic Seeds: If you want to grow organically, opt for certified organic seeds, which are produced without synthetic chemicals or GMOs.
Once you’ve chosen your seeds, it’s time to prepare for planting.
2. Preparing Your Containers
The next step is choosing the right containers for seed starting. Seeds can be started in various types of containers, from seed trays and flats to recycled materials like yogurt cups or egg cartons. The goal is to provide a container that allows for proper drainage and room for root development.
Container Options:
- Seed Starting Trays: These are shallow trays with individual cells designed specifically for seed starting. They’re great for uniform planting and easy transplanting.
- Biodegradable Pots: Peat pots or cow pots can be planted directly in the soil, reducing transplant shock.
- Recycled Containers: Repurposing items like plastic cups or milk cartons works well, as long as you poke holes in the bottom for drainage.
Whatever container you choose, ensure it is clean and disinfected to prevent diseases from affecting your seeds.
3. Using the Right Soil
When it comes to seed starting, not just any soil will do. Garden soil is too heavy and can harbor diseases that might harm young seedlings. Instead, use a seed-starting mix designed to be light, well-draining, and free of pathogens. Seed-starting mixes are typically made from peat moss, coconut coir, vermiculite, and perlite, providing the ideal environment for seeds to germinate and develop strong roots.
Steps for Preparing Soil:
- Moisten the Mix: Before filling your containers, pre-moisten the seed-starting mix so it’s damp but not soggy. This helps provide the right amount of moisture for seed germination.
- Fill the Containers: Gently fill each container with the seed-starting mix, leaving a little space at the top. Avoid compacting the soil too much.
- Level the Surface: Smooth the soil surface so that seeds have an even bed to grow on.
4. Sowing the Seeds
Now that your containers are ready, it’s time to sow the seeds. The depth at which you plant seeds varies depending on the type of plant. Generally, larger seeds like beans or peas are planted deeper, while smaller seeds like lettuce or basil should be sprinkled on the surface and lightly covered.
How to Sow Seeds:
- Read the Seed Packet: Seed packets contain essential information about planting depth, spacing, and light requirements. Follow these instructions carefully.
- Sow the Seeds: For smaller seeds, lightly press them into the soil using your finger or the tip of a pencil. For larger seeds, poke small holes in the soil at the recommended depth and drop the seeds in.
- Cover Lightly: If needed, cover the seeds with a thin layer of soil. Some seeds, like lettuce, require light to germinate and should be left uncovered.
After sowing the seeds, lightly mist the surface with water to avoid disturbing them.
5. Providing Light and Warmth
Seeds need the right balance of light and warmth to germinate successfully. Most seeds germinate best in temperatures between 65-75°F (18-24°C). You can provide this warmth using a seedling heat mat, which gently warms the soil from below, encouraging quicker germination. However, many seeds will germinate just fine at room temperature.
Once the seeds sprout, light becomes essential. Without enough light, seedlings can become leggy and weak.
Light Options:
- Natural Light: Place your seed trays in a sunny windowsill that gets at least 6-8 hours of sunlight each day. South-facing windows are ideal.
- Grow Lights: If you don’t have enough natural light, consider using grow lights. Position the lights just a few inches above the seedlings, and keep them on for 12-16 hours a day.
Adjust the light source as your seedlings grow, keeping it close but not too hot to avoid scorching the leaves.
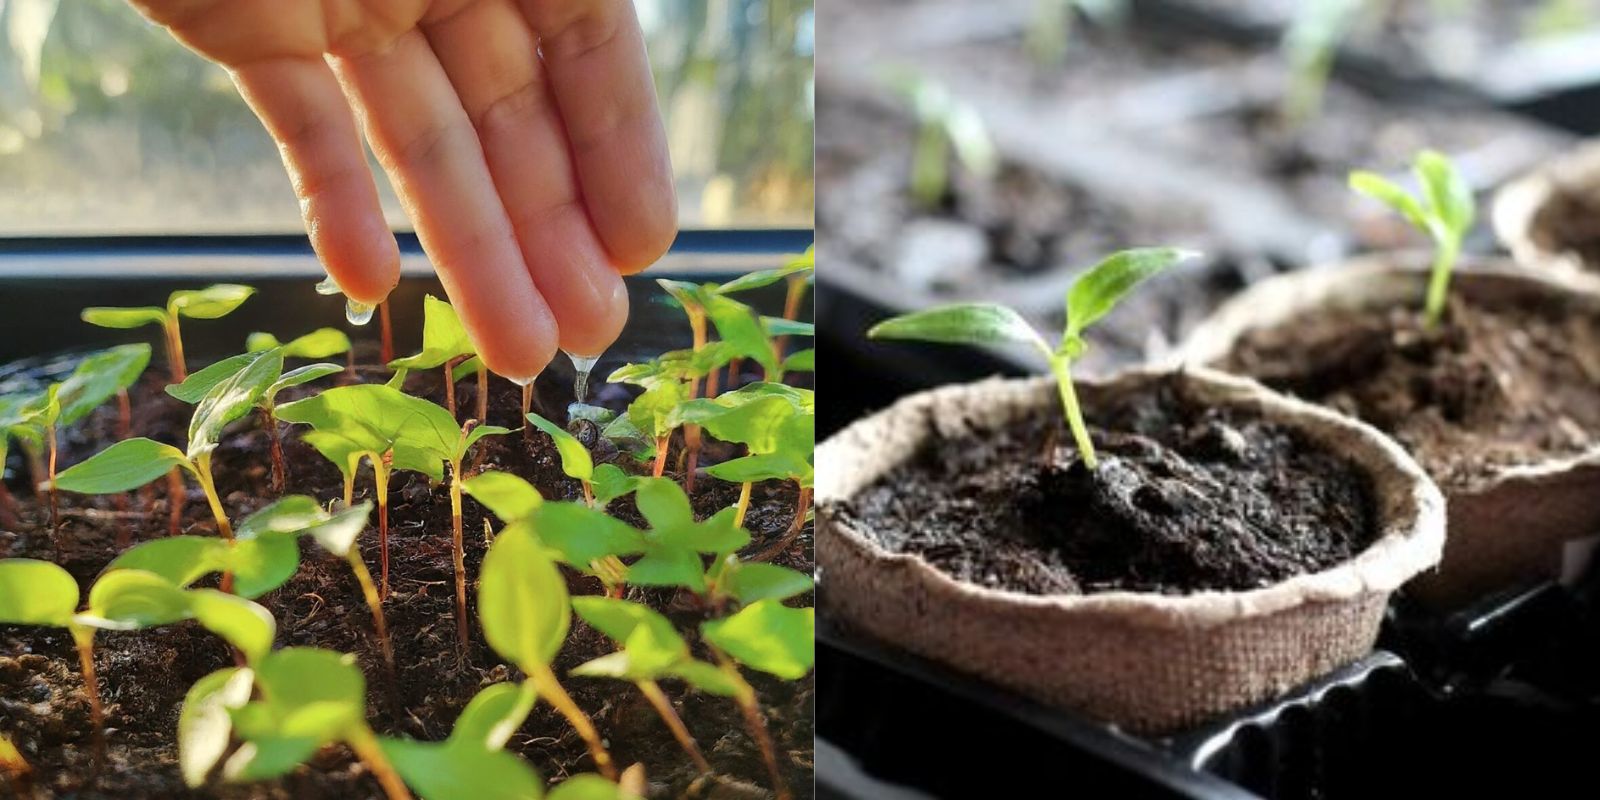
6. Watering and Ventilation
Watering seedlings can be tricky. While seeds need consistent moisture to germinate, too much water can lead to fungal diseases like damping-off. The key is to keep the soil evenly moist without overwatering.
Watering Tips:
- Bottom Watering: Place the seed trays in a shallow dish of water and allow the soil to absorb moisture from the bottom up. This prevents the soil surface from becoming waterlogged and minimizes the risk of fungal issues.
- Misting: Lightly mist the soil surface with a spray bottle, especially when seeds are just germinating.
Adequate air circulation is also important for healthy seedlings. Consider placing a small fan near your seedlings to promote airflow and prevent disease.
7. Thinning Seedlings
Once your seeds have germinated and developed a few sets of true leaves, it’s time to thin them. Thinning is necessary to prevent overcrowding, which can stunt growth and lead to weak plants.
How to Thin Seedlings:
- Identify the Strongest Seedlings: Keep the strongest, healthiest seedlings and remove the others.
- Snip, Don’t Pull: Instead of pulling out the unwanted seedlings, which can disturb the roots of the remaining plants, use small scissors to snip them at soil level.
Proper spacing ensures that each seedling has enough room to grow and develop strong roots.
8. Hardening Off Your Seedlings
Before transplanting your seedlings outdoors, they need to be hardened off. Hardening off is the process of gradually acclimating seedlings to outdoor conditions, such as fluctuating temperatures, wind, and direct sunlight. Skipping this step can lead to transplant shock, which can harm or even kill young plants.
Steps to Harden Off Seedlings:
- Start Indoors: Begin by moving the seedlings to a sheltered outdoor location for a few hours each day.
- Gradually Increase Exposure: Over the course of a week, gradually increase the time they spend outdoors, exposing them to more sunlight and cooler temperatures.
- Watch for Frost: Avoid putting seedlings outside during frost or extremely cold weather, as this can damage tender plants.
After a week or two, your seedlings will be ready to transition to their permanent home in the garden.
9. Transplanting Into the Garden
Once your seedlings are hardened off, it’s time to plant them in the garden. Choose a day when the weather is mild, and the soil is warm and workable.
Transplanting Tips:
- Water Seedlings: Water your seedlings thoroughly a few hours before transplanting to reduce stress.
- Dig Holes: Dig holes in the garden that are slightly larger than the seedling’s root ball.
- Plant Carefully: Gently remove the seedlings from their containers, being careful not to damage the roots. Place them in the prepared holes, firm the soil around the base, and water them in.
After transplanting, keep an eye on your plants to ensure they are adjusting well to their new environment.
Conclusion
Starting seeds is a fun and cost-effective way to grow a wide variety of plants, from vegetables to flowers. By following the steps outlined in this guide, you’ll be well on your way to becoming a seed-starting pro! From selecting seeds and providing the right light and warmth to caring for seedlings and transplanting them into the garden, these tips will help you nurture your plants every step of the way.
Now, grab your seeds and start planting for a bountiful gardening season! 🌱💚 #SeedStarting #GrowYourOwn #GardenLife #PlantLovers #GardeningHacks #IndoorGardening #HomeGarden