
Growing your own flowers can be one of the most rewarding aspects of gardening. Not only do they beautify your space, but they also attract pollinators, create a habitat for beneficial insects, and provide a sense of accomplishment. However, one of the most cost-effective and sustainable ways to maintain your flower garden year after year is by saving seeds from annual flowers. This article will provide a comprehensive guide on how to save seeds from annual flowers, the benefits of seed saving, and tips for successful storage and germination.
Understanding Annual Flowers
Annual flowers complete their life cycle within one growing season. They sprout, bloom, set seeds, and die, all in the span of a few months. Common annual flowers include marigolds, zinnias, sunflowers, and cosmos. While these plants are relatively easy to grow from seeds, saving seeds from them can significantly enhance your gardening experience.
Benefits of Saving Seeds
- Cost-Effective: Purchasing seeds can add up over time, especially if you have a large garden. By saving seeds, you can significantly reduce your gardening expenses.
- Biodiversity: Many commercially available seeds are hybrids, meaning they are bred for specific traits. By saving seeds from your own plants, you contribute to the preservation of plant diversity and can even develop varieties that are well-suited to your local environment.
- Customization: Saving seeds allows you to cultivate your favorite flowers with traits you prefer. Over time, you can create plants that thrive in your garden’s unique conditions.
- Environmental Impact: Seed saving reduces the demand for commercially produced seeds, which often involves significant environmental impact due to packaging and transportation.
- Connection to Nature: Engaging in seed saving fosters a deeper connection to your plants and the natural cycle of growth, decay, and renewal.
When to Save Seeds
The best time to save seeds from annual flowers is when the flowers have fully matured and dried on the plant. This can vary depending on the type of flower, but a general rule of thumb is to wait until the flower heads are brown and dry.
- Observe the Plant: Monitor your plants as they grow. Most annual flowers will begin to produce seeds once their blooms fade. It’s crucial to let the seeds fully develop on the plant before harvesting.
- Know the Signs: Look for the following signs that indicate seeds are ready for harvesting:
- Dryness: The flower head should feel dry and brittle.
- Color Change: The flower head may change color, typically turning brown or tan.
- Seed Pods: For flowers with seed pods (like sweet peas), wait until the pods turn brown and dry out before collecting.
How to Save Seeds from Annual Flowers: Step-by-Step Guide
Step 1: Choose Healthy Plants
Start by selecting the healthiest and most vigorous plants in your garden. Look for plants that exhibit strong growth, vibrant blooms, and resistance to pests and diseases. These characteristics will ensure that your saved seeds have the best chance of producing robust offspring.
Step 2: Wait for Seed Maturity
Once you’ve identified the plants you want to collect seeds from, allow them to grow until the seeds are mature. This is typically when the flowers have dried out on the plant. For most annual flowers, this means waiting several weeks after the last bloom.
Step 3: Harvest the Seeds
When the seeds are ready, carefully cut the flower heads or seed pods from the plant. Use sharp, clean scissors or pruning shears to avoid damaging the plant. Here are a few tips for harvesting different types of seeds:
- Seed Heads: For flowers like sunflowers and zinnias, cut the seed heads off and place them in a paper bag. Gently shake the bag to release the seeds from the flower head.
- Seed Pods: For plants like sweet peas and poppies, allow the pods to dry completely on the plant before cutting them off. Once harvested, you can easily split the pods open to extract the seeds.
Step 4: Clean the Seeds
After harvesting, it’s important to clean your seeds to remove any debris, petals, or plant material. This can be done by gently rubbing the seeds between your fingers or using a sieve to sift out the unwanted bits.
Step 5: Dry the Seeds
Properly drying your seeds is crucial for long-term storage. Spread the cleaned seeds on a paper towel or screen in a cool, dry place for several days. Ensure that the seeds are not exposed to direct sunlight, as this can damage them. Once they feel dry and crisp, they are ready for storage.
Step 6: Store the Seeds
Store your dried seeds in a cool, dark, and dry environment. Here are some tips for effective seed storage:
- Use Paper Envelopes: Place the seeds in labeled paper envelopes. Be sure to write the flower type and the date on each envelope to keep track of your saved seeds.
- Glass Jars: For long-term storage, consider using glass jars with airtight lids. This can help keep moisture out and preserve seed viability.
- Cool Storage: If possible, store seeds in a refrigerator or a cool basement. Maintaining a stable temperature will help prolong seed life.
Step 7: Test Seed Viability
Before planting your saved seeds, it’s a good idea to test their viability. To do this, take a few seeds and plant them in a pot or seed tray. Keep them in a warm location with adequate moisture. After a few weeks, check for germination. If a significant number of seeds sprout, they are likely viable.
Common Annual Flowers to Save Seeds From
While you can save seeds from many types of annual flowers, here are some popular choices:
- Marigolds: Known for their vibrant blooms and pest-repelling qualities, marigolds produce easy-to-save seeds.
- Zinnias: These colorful flowers are great for attracting pollinators and are simple to propagate from seed.
- Sunflowers: Not only do sunflowers add beauty to your garden, but their seeds are also delicious and nutritious.
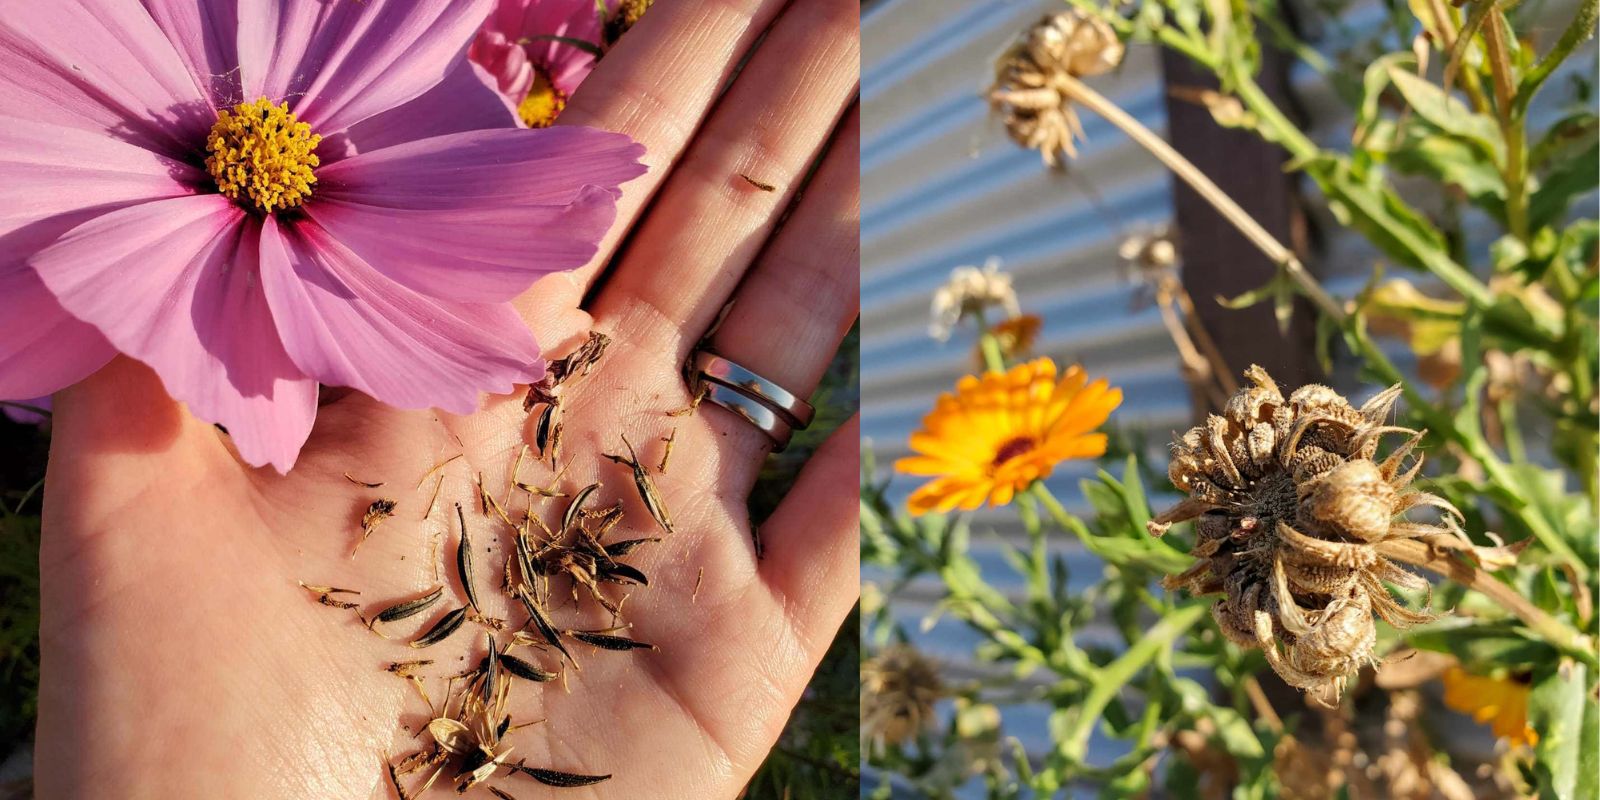
- Cosmos: With their delicate flowers and long blooming period, cosmos are an excellent choice for seed saving.
- Nasturtiums: These edible flowers are not only beautiful but also attract beneficial insects.
- Petunias: While they can be a bit trickier to save seeds from, petunias are worth the effort for their vibrant colors.
Tips for Successful Seed Saving
- Isolate Varieties: If you’re saving seeds from different varieties of the same flower species, be aware of cross-pollination. To avoid hybrid seeds, try to isolate different varieties by distance or time of flowering.
- Label Everything: Always label your seeds with the flower type and date. This will help you keep track of your saved seeds and ensure you plant them in the correct season.
- Be Patient: Seed saving can be a slow process, and it may take time to see the results. Be patient and enjoy the journey of growing your flowers from saved seeds.
- Stay Educated: Continue learning about the plants you grow and the seed-saving techniques that work best for them. Join local gardening groups or online forums to share experiences and gain new insights.
Conclusion
Saving seeds from annual flowers is a rewarding practice that not only enhances your gardening skills but also contributes to environmental sustainability. By following the steps outlined in this guide, you can successfully collect, clean, dry, and store seeds, ensuring a vibrant and diverse garden for years to come.
As you embark on your seed-saving journey, remember that every seed you save is a step towards a more sustainable and beautiful garden. Happy gardening! 🌻🌱
By engaging in seed saving, you are not only ensuring your garden flourishes year after year but also fostering a deeper connection with nature and contributing to biodiversity. Start saving seeds today and watch your garden grow in ways you never imagined! Don’t forget to share your seed-saving stories and tips using #SeedSaving, #GardeningTips, #GrowYourOwn, and #FlowerGarden!