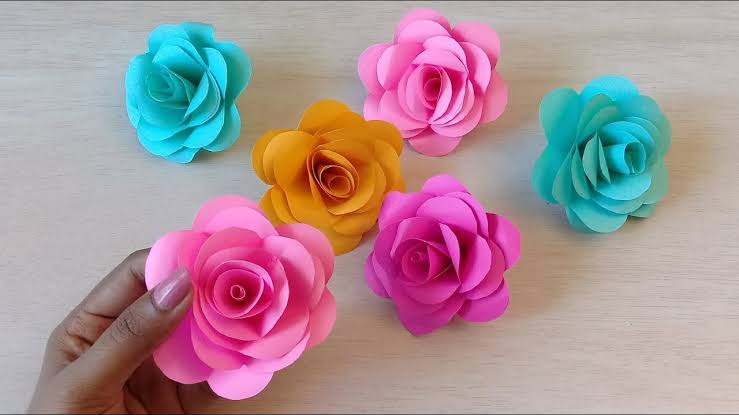
Looking to bring the beauty of blooms into your home — no watering, no wilting? Then it’s time to discover the secret paper flowers tips that crafters everywhere are obsessed with! Whether you want to decorate your room, make handmade gifts, or design stunning centerpieces, paper flowers are the perfect creative project — budget-friendly, long-lasting, and fun for all skill levels.In this guide, you’ll learn how to make paper flowers like a pro, along with insider tricks to make them look realistic, vibrant, and elegant. Let’s dive into these secret paper flowers tips and transform simple paper into gorgeous floral art!🌼 Why Make Paper Flowers?Before we get to the hacks, here’s why paper flowers have become a favorite among DIY lovers in the U.S., U.K., and Canada:💐 Long-lasting beauty: They never wilt or fade.🎨 Fully customizable: Choose any color, size, or shape.💸 Budget-friendly: Made with paper, glue, and a few basic tools.🌿 Eco-friendly décor: Reuse or recycle materials easily.🎁 Perfect for gifts & parties: Ideal for weddings, birthdays, and home décor.✂️ Essential SuppliesBefore you start, gather these must-haves for your DIY paper flowers:Colored paper or cardstock (crepe paper gives a realistic texture)Scissors or craft knifeHot glue gun or craft glueFloral wire or pipe cleaners (for stems)Green floral tapePencil and templates (optional but helpful)Hack Inside! 🌸Use crepe paper for petals — its stretch and texture mimic real flowers beautifully.🌹 Step-by-Step: How to Make Paper FlowersH2: Step 1 – Choose Your Flower TypeStart simple with roses, tulips, or daisies. Once you’re comfortable, try peonies, sunflowers, or hydrangeas.Hack Inside! 🪷Use photos of real flowers as a reference to match petal shapes and layering.H2: Step 2 – Cut Petals and LeavesDraw or trace petal shapes onto your paper and cut them out. For fuller flowers, cut several layers in varying sizes.Secret Tip: Slightly curl the petal edges using a pencil or the side of scissors to give a natural look.H2: Step 3 – Shape and Layer the PetalsUse your fingers to gently stretch, roll, or bend each petal to add dimension.Start gluing petals one by one around a center base (this can be a small paper ball or a rolled paper strip).Hack Inside! 🌼Layer petals tightly in the middle and looser at the outer edges — this creates a more realistic bloom shape.H2: Step 4 – Make the Stem and LeavesWrap floral wire with green floral tape for the stem. Add paper leaves by gluing them onto the stem or taping them as you go.Pro Tip: If you want your flowers to stand tall in a vase, use thicker wire or even bamboo skewers for extra support.H2: Step 5 – Add Realistic DetailsNow for the fun part — the finishing touches!Lightly brush the petal edges with pastel chalks or watercolor paint for natural shading.Add a tiny pearl or bead in the center for sparkle.Spray with matte acrylic sealer for durability.Hack Inside! 🎨Mix different paper types — like matte, glossy, and crepe — in one bouquet for a lush, high-end look.🌸 Secret Paper Flowers Tips You’ll LoveReady for the best insider tricks? These secret paper flower hacks will take your crafting to the next level:🌷 1. Double-Layer for DepthGlue two petals together with slightly different shades of paper — this gives your flower a 3D, lifelike color gradient.🌼 2. Use Templates for ConsistencyIf you’re making multiple flowers, print or draw one perfect petal and trace it — consistency makes your arrangement look professional.🌹 3. Heat Tools Make a DifferenceA gentle blow from a hairdryer or heat gun softens crepe paper, making it easier to shape petals. Just be careful not to overheat!🌺 4. Create Texture with ToolsUse a bone folder or round-tip pen to gently crease petal lines for realistic veining.🌻 5. Add Scent for RealismDab a drop of essential oil (like rose or lavender) on the back of the petals — your flowers will smell just as lovely as they look!🌼 6. Mix Sizes and ColorsCombine large statement blooms with smaller filler flowers and leaves to make your bouquet look balanced and natural.🌹 7. Use Metallic Paper for GlamourFor special occasions, use gold, silver, or pearlized paper for a luxurious touch — perfect for weddings or holiday décor.💐 Creative Ways to Use Paper FlowersPaper flowers aren’t just for vases! Try these fun and beautiful ideas:🌸 Wall décor: Create a floral backdrop for parties or photos.🎁 Gift wrapping: Add a mini bloom to wrapped presents.🕯️ Centerpieces: Combine with candles or fairy lights for table arrangements.💌 Cards & scrapbooks: Glue small flowers for handmade charm.👑 Headbands or crowns: Perfect for kids’ parties or festivals!Hack Inside! 💡Attach paper flowers to string lights to create a magical glowing garland for bedrooms or weddings.🌹 Common Mistakes to AvoidEven seasoned crafters make these errors — but you don’t have to!❌ Using thick paper that doesn’t bend easily.❌ Over-gluing petals (less is more!).❌ Skipping shaping — flat petals look unrealistic.❌ Forgetting color contrast — use at least two tones for dimension.Hack Inside! 🧡If you accidentally tear a petal, don’t toss it — patch it from the back with a thin layer of glue and blend it in with a touch of color!🌺 Conclusion: Bring Your Paper Garden to LifeWith these secret paper flowers tips, you’ll be able to craft stunning, lifelike blooms that never fade. Whether you’re decorating for an event, gifting handmade art, or just adding beauty to your space, paper flowers are an endlessly creative and rewarding project.All it takes is a little patience, the right materials, and a few clever tricks — and soon, you’ll have your own paper garden blooming year-round! 🌷So grab your scissors, paper, and glue, and start creating magic today. 🌸✨