
Orchids are among the most beloved houseplants, prized for their exquisite blooms and elegant structure. However, for many new orchid enthusiasts, the question arises: What should I do after the flowers fall? This post-bloom period is a crucial stage in the orchid’s lifecycle, offering an opportunity to promote healthy root growth and prepare your plant for future blooming. In this detailed guide, we’ll explore the steps needed to ensure your orchid thrives after its blooms fade.
Understanding the Post-Bloom Phase
When orchid flowers fall, it signals the end of the flowering cycle but not the end of the plant’s vitality. This period is when orchids focus on root development and nutrient storage, setting the stage for their next spectacular display. With proper care, you can support your orchid’s transition and encourage strong root growth.
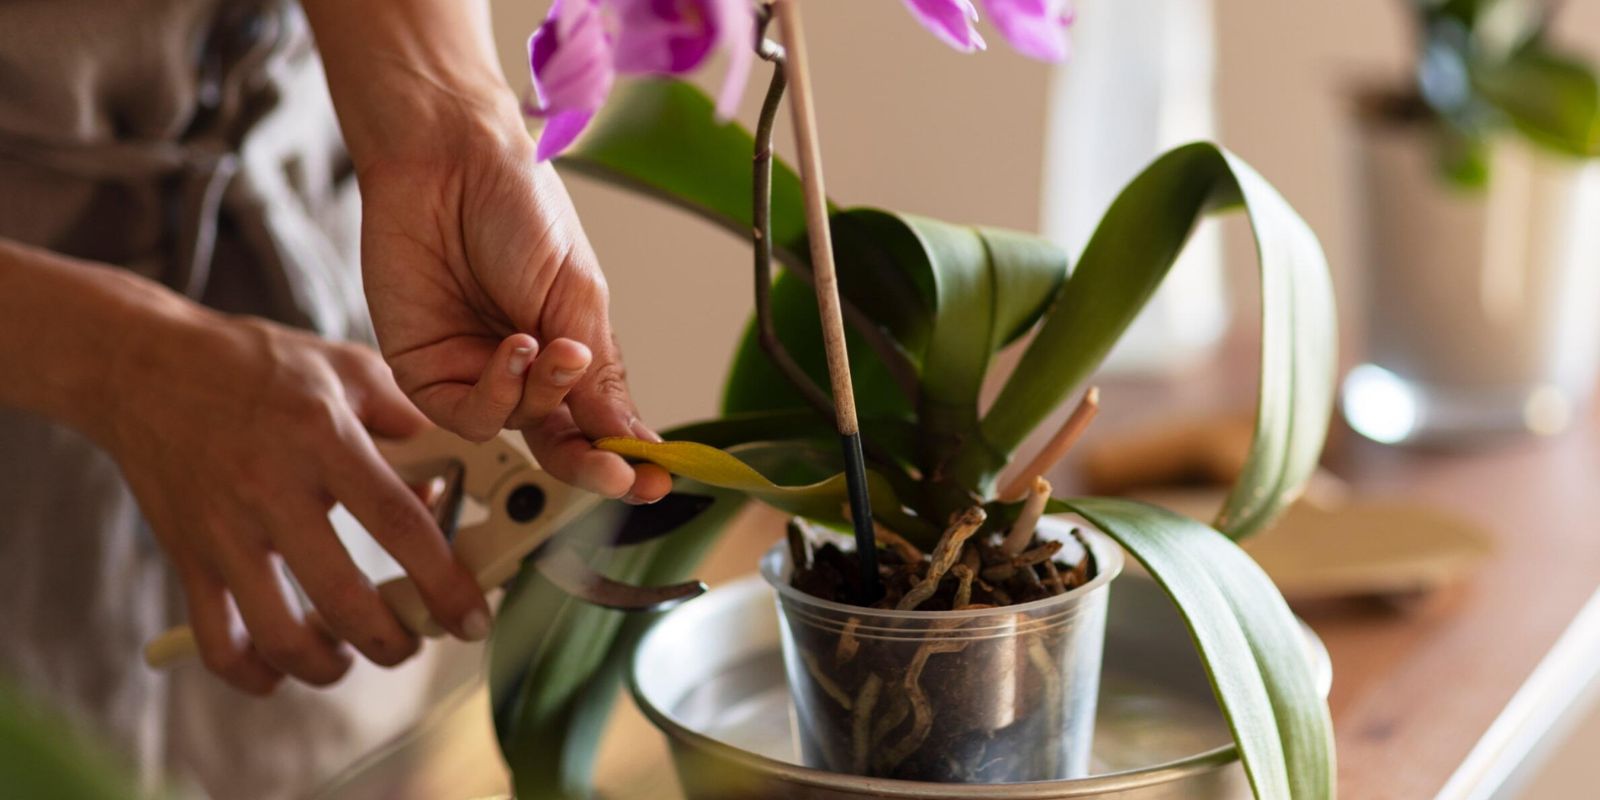
Step 1: Remove Faded Blooms
After the blooms fall, inspect the flower spike:
- If the Spike is Brown: Trim it back to the base using sterilized scissors or pruning shears. This allows the orchid to redirect its energy to root and leaf growth.
- If the Spike is Green: Leave it intact. A green spike may rebloom or produce a keiki (baby orchid).
Trimming faded blooms helps the plant conserve energy and focus on new growth.
Step 2: Inspect and Repot Your Orchid
Repotting is a vital step after blooming, especially if the orchid has been in the same medium for over a year.
- Carefully Remove the Orchid: Gently take the plant out of its pot, shaking off old medium from the roots.
- Inspect the Roots: Healthy roots are firm and green or white. Trim away any black, mushy, or dried roots with sterilized scissors.
- Choose Fresh Orchid Medium: Use a well-draining mix, such as bark chips, sphagnum moss, or a combination of both. This ensures the roots have proper air circulation and moisture balance.
- Repot in a Suitable Container: Choose a pot with adequate drainage holes. Transparent pots are ideal for monitoring root health.
Repotting rejuvenates the orchid and gives it the fresh foundation it needs for robust root growth.
Step 3: Provide a Nutrient Boost
Orchids benefit from extra care during this recovery phase.
- Use Rooting Hormones: Apply a rooting hormone to stimulate the development of new roots.
- Specialized Fertilizers: Use a balanced orchid fertilizer (such as 20-20-20) or one with higher phosphorus content to encourage root development.
Apply fertilizer at half strength every two weeks during the active growth phase. Avoid over-fertilizing, as this can damage sensitive roots.
Step 4: Strategic Watering
Watering is a delicate balance for orchids.
- After Repotting: Allow the plant to rest for 2–3 days before watering to let trimmed roots heal.
- Regular Routine: Water only when the medium is dry to the touch. Overwatering can lead to root rot, while underwatering can stunt growth.
- Drainage is Key: Ensure water flows freely through the pot, leaving no stagnant moisture.
A consistent and strategic watering routine supports healthy root establishment.
Step 5: Optimize Light and Humidity
Orchids thrive in bright, indirect light and humid environments.
- Light: Place your orchid near a window with filtered sunlight. Avoid direct sun, as it can scorch the leaves.
- Humidity: Orchids prefer a humidity level of 50–70%. Use a humidifier or a pebble tray with water beneath the pot to maintain optimal levels.
Proper light and humidity conditions encourage the plant to focus on root growth.
Step 6: Be Patient and Observant
Orchids are slow growers, and new root growth may take several weeks to appear. Patience is crucial during this period.
- Look for new root tips, which are typically green or white and appear at the base of the plant.
- Monitor the plant for signs of stress, such as yellowing leaves or shriveling roots, and adjust care as needed.
Celebrate small victories as your orchid shows signs of rejuvenation.
Common Pitfalls to Avoid
- Overwatering: This is the most common mistake and can lead to root rot.
- Neglecting Medium Quality: Old or compacted medium can suffocate roots and harbor pests.
- Excess Fertilizer: Too much fertilizer can burn roots, hindering growth.
By avoiding these pitfalls, you set your orchid up for success.
Integrating Post-Bloom Care into a Comprehensive Routine
For long-term success, incorporate post-bloom care into a broader orchid care routine:
- Light: Ensure year-round access to bright, indirect light.
- Temperature: Maintain a consistent temperature range of 65–75°F (18–24°C).
- Humidity: Keep humidity levels high, especially during the growing season.
- Regular Fertilizing: Feed orchids during their active growth phase and taper off during dormancy.
The Reward of Patience
Caring for orchids after their blooms fall is a rewarding experience. By focusing on root growth during this period, you lay the foundation for vibrant leaves and future flowering cycles. Orchids may seem finicky, but with consistent care and observation, they can thrive and reward you with dazzling blooms year after year.
Conclusion
“Roots of Renewal” isn’t just a care routine; it’s a journey into understanding the rhythms of orchid growth. When the blooms fade, don’t despair—embrace the opportunity to nurture your orchid’s roots. Whether you’re a beginner or a seasoned gardener, these steps will help you unlock the full potential of your orchid collection.
Now it’s your turn to share! Have you tried this post-bloom ritual with your orchids? Comment below with your experiences, and don’t forget to tag your fellow orchid lovers!
#OrchidCare #GardeningTips #GreenThumb #BloomAndGrow #HouseplantLove 🌸