
Orchids are some of the most elegant and cherished houseplants, known for their stunning blooms and captivating structure. However, they can also be quite finicky, especially when their roots fail. If you’ve found yourself with an orchid that has lost its roots, don’t give up hope. Orchids can be revived with the right techniques, patience, and care. This guide provides a step-by-step approach to bringing back an orchid without roots and nurturing it to thrive again.
Understanding Orchid Root Loss
Orchid roots are vital for nutrient absorption and hydration. Common causes of root loss include:
- Overwatering, leading to root rot.
- Poor drainage or compacted growing media.
- Fungal or bacterial infections.
- Insufficient humidity or improper light levels.
When root loss occurs, the orchid struggles to sustain itself, leading to wilting leaves and a weakened structure. The good news is that orchids are resilient plants, and with the right care, they can regenerate new roots and recover.
Tools and Materials Needed
Before starting the revival process, gather the following materials:
- Sterilized scissors or pruning shears.
- Hydrogen peroxide (3%).
- Sphagnum moss or a small container for water culture.
- A humidity dome or clear plastic bag.
- Orchid fertilizer (diluted).
- Clean workspace and gloves.
Step-by-Step Guide to Reviving Rootless Orchids
1. Assess the Orchid’s Condition
Start by examining the orchid to determine its overall health. Look for signs of:
- Green, firm leaves (a good sign of potential recovery).
- Wilting or yellow leaves (a sign of stress but not a lost cause).
- Blackened, mushy, or missing roots (indicating the extent of damage).
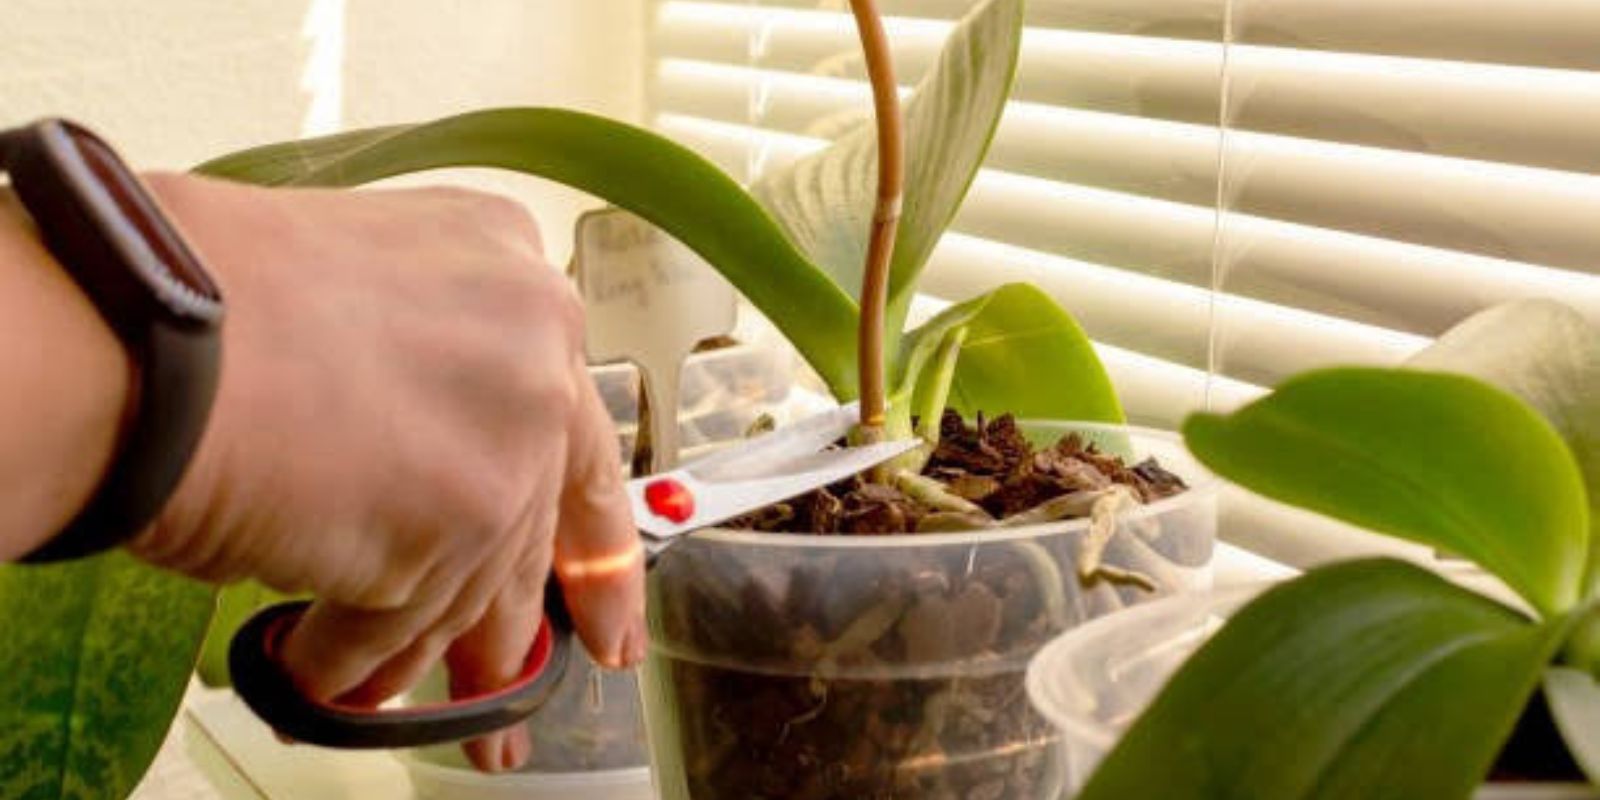
2. Trim Away Dead Tissue
Using sterilized scissors, carefully remove any dead, black, or mushy tissue from the base of the orchid. This prevents further infection and encourages new growth. Ensure that all cuts are clean and precise.
3. Disinfect the Orchid
Prepare a solution of lukewarm water and hydrogen peroxide (3%). Soak the base of the orchid for 5-10 minutes to kill any bacteria, fungi, or pathogens. This step is crucial for preventing further decay. After soaking, let the plant air dry for a few hours.
4. Select a Revival Method
There are two popular methods for reviving orchids without roots:
A. Water Culture Method:
- Fill a small glass or container with enough water to touch the base of the orchid without submerging it.
- Place the orchid in the container, ensuring the water only lightly brushes the base.
- Change the water every 2-3 days to keep it clean.
B. Sphagnum Moss Method:
- Moisten sphagnum moss so it’s damp but not soggy.
- Wrap the moss gently around the base of the orchid.
- Place the moss-covered orchid in a well-ventilated container or pot.
5. Create a Humid Environment
High humidity is essential for root regeneration. Place the orchid in a clear plastic bag or humidity dome to trap moisture. Ensure there is ventilation to prevent mold or fungal growth.
6. Provide Indirect Light
Position the orchid in a spot that receives bright, indirect sunlight. Avoid direct sunlight, which can scorch the plant. A window with filtered light or a grow light works well.
7. Fertilize with Care
Once the orchid begins to show signs of recovery, such as new root nubs or leaves, start feeding it with a diluted orchid fertilizer. Use fertilizer every 2-3 weeks to support growth.
8. Monitor Progress
Be patient, as it can take several weeks or even months for the orchid to develop new roots. Keep a close eye on the plant’s health and adjust care as needed.
Tips for Long-Term Orchid Health
1. Proper Watering Techniques
- Orchids prefer to dry out between waterings. Water only when the growing medium feels dry to the touch.
- Use room-temperature water and avoid overwatering.
2. Use Well-Draining Medium
- Ensure the orchid is planted in a medium like bark or sphagnum moss that allows for proper drainage and aeration.
- Repot the orchid every 1-2 years to refresh the medium and prevent rot.
3. Maintain Ideal Humidity Levels
- Orchids thrive in humidity levels between 50-70%. Use a humidifier or a pebble tray to maintain these levels.
4. Ensure Proper Lighting
- Orchids need bright, indirect light. Too much direct sunlight can burn their leaves, while insufficient light hinders growth and blooming.
5. Avoid Pests and Diseases
- Regularly inspect the orchid for pests like mealybugs, scale, or aphids.
- Use natural remedies or horticultural oils to address infestations promptly.
Signs of Recovery
As your orchid begins to heal, you’ll notice:
- Small root nubs forming at the base.
- Leaves becoming firm and vibrant.
- New growth emerging, such as shoots or leaves.
Once the orchid develops a healthy root system, it can be repotted in its regular medium and resume normal care.
Conclusion
Reviving an orchid without roots is a test of patience and dedication, but the results are incredibly rewarding. These resilient plants often come back stronger and bloom more beautifully after recovery. By following the steps outlined above and providing consistent care, you can save your orchid and enjoy its stunning blooms for years to come.
💬 Have you ever revived an orchid without roots? Share your experiences and tips in the comments below!
#OrchidCare #PlantRescue #GardeningTips #IndoorPlants #OrchidLove #PlantParentLife