
Geraniums are a favorite among gardening enthusiasts due to their vibrant flowers and versatility in decorating windows, balconies, and gardens. However, these resilient plants can sometimes suffer from leaf loss and stem damage, often caused by insufficient light, poor nutrition, or harsh environmental conditions. If your geranium has gone “bald,” there’s no need to despair—this guide will help you not only revive your struggling plant but also propagate new ones from the cuttings.
Why Geraniums Go Bare
Before diving into the solution, it’s essential to understand why your geranium might lose its foliage. Common causes include:
- Lack of sunlight: Geraniums thrive in bright, direct sunlight. Without adequate light, they may become leggy and lose leaves.
- Nutritional deficiencies: Poor soil or lack of fertilization can stunt growth and cause leaf drop.
- Improper watering: Overwatering can lead to root rot, while underwatering can cause stress and leaf loss.
- Seasonal dormancy: Some geranium varieties naturally slow their growth and lose leaves during cooler months.
The Revival Process
Reviving bare geraniums involves pruning, fertilizing, and repotting while paying attention to environmental factors. Here’s a step-by-step guide to bring your geraniums back to life.
Step 1: Examine the Plant
Begin by carefully inspecting your geranium. Look along the stem for 4-5 healthy buds (nodes). These buds are typically located about 5 cm (2 inches) from the base of the plant and are essential for new growth.
Step 2: Prune the Stem
Using sharp, sterilized pruning shears, cut the stem just above the healthy buds. This will encourage the plant to channel its energy into producing new shoots and leaves. Removing dead or damaged parts of the plant also prevents the spread of disease.
Step 3: Apply Fertilizer
After pruning, provide your geranium with a nitrogen-rich fertilizer. This nutrient promotes leafy growth, helping the plant recover quickly. Fertilizers specifically formulated for flowering plants are ideal, as they also support root health and bloom production.
Propagating Geranium Cuttings
Don’t throw away the parts of the plant you’ve pruned! Geraniums are easy to propagate from cuttings, allowing you to grow new plants while revitalizing the old one.
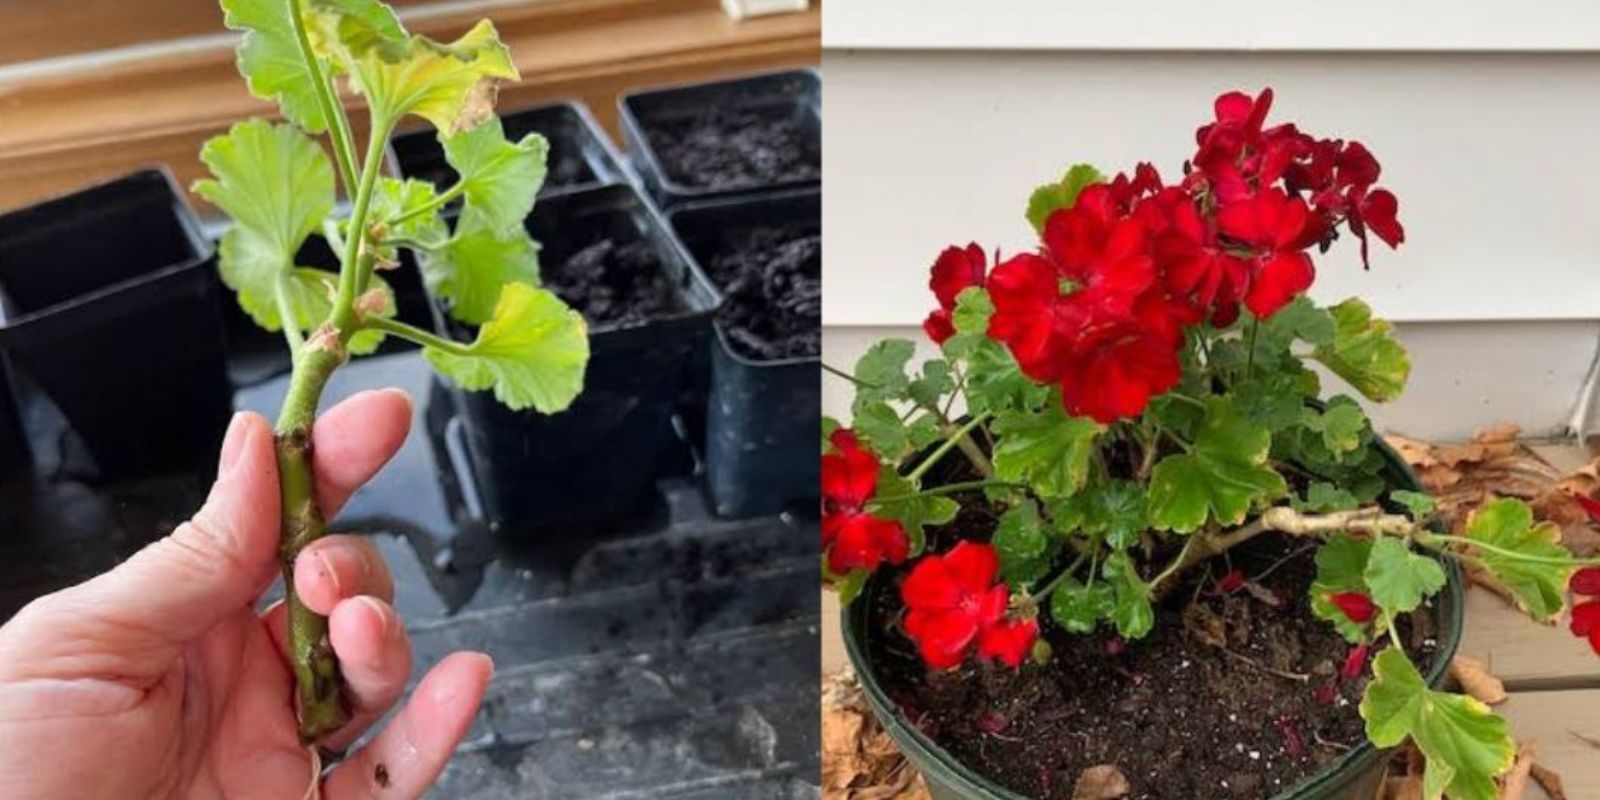
Step 4: Prepare the Cuttings
Take a cutting about 10 cm (4 inches) long from the top of the pruned stem. Remove any excess leaves, leaving only 2-3 at the top. This prevents the cutting from losing too much moisture during the rooting process.
Step 5: Remove Flowers and Buds
If the cutting has any flowers or buds, pinch them off. These can sap energy that should be directed toward rooting.
Step 6: Let the Cutting Dry
Allow the cutting to rest for 2-6 hours in a shaded, dry area. This drying period helps seal the cut end, reducing the risk of bacterial or fungal infections when planted.
Planting the Cuttings
Once your cuttings are prepared, it’s time to plant them in soil and create an environment conducive to root development.
Step 7: Plant the Cutting
Fill a small pot with well-draining soil, such as a mix of potting soil and sand or perlite. Make a small hole in the soil, insert the cutting about 2-3 cm (1 inch) deep, and press the soil gently around the base.
Step 8: Prevent Disease
To minimize the risk of fungal infections or rot, treat the soil with a diluted solution of Fitosporin or a similar fungicide. This step is particularly important if you’re planting in humid or damp conditions.
Step 9: Create a Greenhouse Effect
Place the pot inside a ziplock bag or cover it with a clear plastic dome to maintain high humidity. This helps the cutting retain moisture while developing roots. Be sure to ventilate the setup daily to prevent mold or mildew.
Step 10: Provide Indirect Light
Position the pot in a warm, bright area with indirect sunlight. Avoid direct exposure, as this can dry out the cutting before roots form. Geranium cuttings usually root within 2-4 weeks.
Care Tips for Healthy Growth
Once your original plant starts to grow new shoots and your cuttings have rooted, follow these tips to ensure continued success:
- Light Requirements: Place your geraniums in a spot with at least 6 hours of direct sunlight daily. For indoor plants, a south-facing window is ideal.
- Watering Routine: Water your geraniums when the top inch of soil feels dry. Avoid overwatering, as geraniums prefer slightly dry conditions.
- Fertilize Regularly: Feed your plants every 2-4 weeks during the growing season with a balanced fertilizer to support blooming and foliage growth.
- Pest Control: Inspect your plants regularly for signs of pests like aphids or spider mites. Treat infestations promptly with neem oil or insecticidal soap.
- Pruning Maintenance: Trim your geraniums periodically to remove spent flowers and leggy growth, encouraging a compact and bushy shape.
Conclusion: A Rewarding Revival
Reviving bare geraniums is a rewarding gardening experience that not only brings new life to struggling plants but also provides an opportunity to propagate fresh blooms for your garden or home. With proper care, attention to detail, and patience, your geraniums will flourish, filling your space with vibrant colors and lush foliage.
What’s your favorite geranium care tip? Share your gardening hacks in the comments below! 🌸