
Orchids are known for their exotic beauty, elegant blooms, and ability to brighten any space. However, they can be temperamental plants, and caring for them can sometimes feel like solving a mystery. If your orchid looks lifeless, don’t despair—it’s not necessarily a lost cause! With the right approach, even the most distressed orchid can be revived using the gentle power of water and proper care techniques.
In this comprehensive guide, we’ll walk you through step-by-step methods to bring your orchid back to life, using “aquatic magic” and a bit of love.
Why Do Orchids Struggle?
Orchids are epiphytic plants, meaning they naturally grow on trees and absorb moisture from the air rather than from soil. When grown indoors, they can struggle due to overwatering, underwatering, insufficient light, or poor humidity levels. Identifying the root of the problem is the first step to helping your orchid recover.
Signs Your Orchid Needs Help
Here are some common indicators that your orchid is in trouble:
- Wilted leaves: Leaves look limp, wrinkled, or dull.
- Yellowing leaves: A sign of overwatering or nutrient deficiencies.
- Brown or mushy roots: A clear indication of root rot from waterlogged conditions.
- No blooms for years: If your orchid isn’t flowering, it may be stressed.
- Fallen blooms: Flowers drop prematurely when the plant isn’t happy.
If your orchid shows any of these symptoms, it’s time to take action!
Steps to Revive Your Orchid with Aquatic Magic
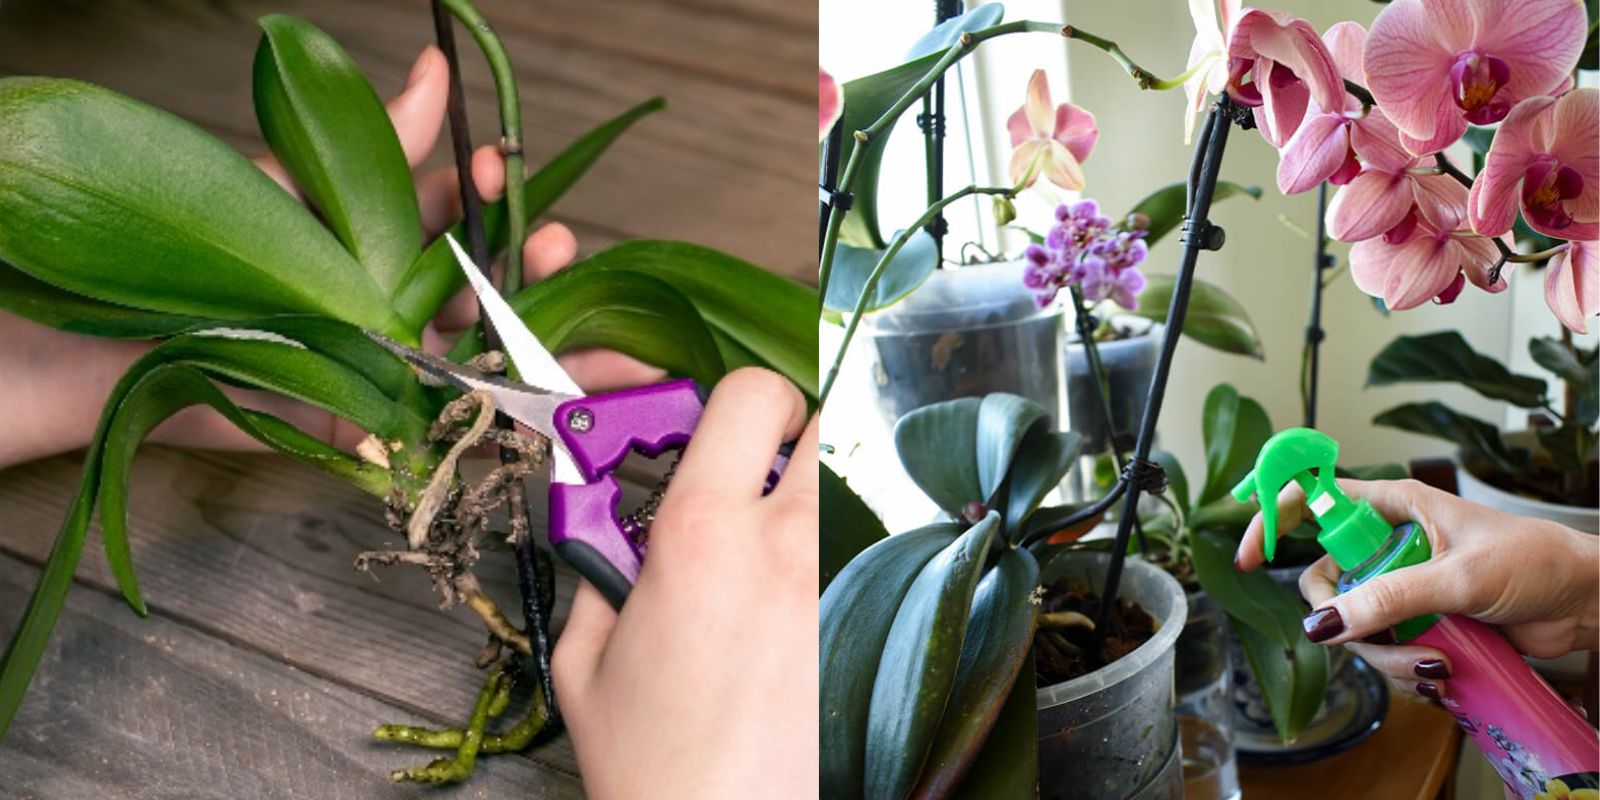
1. Inspect the Roots
Carefully remove the orchid from its pot and examine the roots. Healthy roots are firm and green or silver in color. Rotten roots will appear brown, mushy, or slimy.
- What to do: Use sterilized scissors to trim away any unhealthy roots. This prevents the spread of rot and encourages new growth.
2. Give It a Hydration Boost
Orchids love water—but not too much! To rehydrate your plant, try this water-soaking technique:
- Fill a bowl with room-temperature water.
- Place the orchid roots in the water and let them soak for 10–15 minutes.
- After soaking, let the roots air dry completely before repotting.
💡 Tip: Never leave your orchid sitting in water for too long, as this can lead to further root rot.
3. Remove Dead or Damaged Parts
Once the roots are taken care of, turn your attention to the leaves and stems.
- Trim away any yellowing or dried leaves using sterilized scissors.
- Cut back flower spikes that have turned brown to allow the plant to focus its energy on recovery.
4. Repot with Fresh Bark
Orchids thrive in well-draining media, such as orchid bark or sphagnum moss. Repotting your orchid in fresh media will prevent further damage from old, compacted material.
- Choose a pot with good drainage holes to avoid waterlogging.
- Place the orchid in the center of the pot and fill it with bark, ensuring the roots are supported but not buried.
5. Provide the Right Environment
The placement of your orchid is crucial to its recovery. Orchids need bright, indirect light to thrive.
- Avoid direct sunlight, which can scorch the leaves.
- Maintain a temperature of 65–75°F (18–24°C).
- Ensure good air circulation to prevent mold and pests.
6. Boost Humidity
Orchids love humidity! To create a humid environment:
- Use a humidity tray: Place a shallow dish filled with water and pebbles under your orchid pot.
- Mist the leaves daily with room-temperature water, but avoid the crown (where leaves meet the roots) to prevent rot.
7. Be Patient
Reviving an orchid takes time. Monitor its progress and look for signs of new growth, such as fresh leaves or healthy root tips. Orchids may not bloom immediately, but consistent care will prepare them for their next flowering cycle.
Common Mistakes to Avoid
- Overwatering
Watering too often is the most common mistake. Only water your orchid when the bark feels dry. - Neglecting Drainage
Always use a pot with drainage holes. Orchids dislike standing water, which leads to root rot. - Ignoring Light Needs
While orchids need indirect light, keeping them in a dark corner can hinder recovery. - Using Tap Water
Chlorine and minerals in tap water can harm orchids. Use distilled, filtered, or rainwater for best results.
The Role of Fertilizer in Recovery
Once your orchid shows signs of improvement, you can introduce a balanced orchid fertilizer to encourage growth. Look for a formula labeled 20-20-20 or similar, and dilute it to half strength.
- Feed your orchid every two weeks during its active growing phase.
- Avoid fertilizing when the plant is stressed or dormant.
When to Seek Professional Help
If your orchid doesn’t improve after following these steps, it may have a more serious issue, such as a pest infestation or disease. In this case, consult a local plant nursery or orchid specialist.
Celebrate the Comeback!
Once your orchid begins to recover, it’s a rewarding experience to see new leaves, roots, and eventually flowers. Orchids are resilient plants when given the proper care, and your efforts will be worth it!
Motivation to Engage
💬 Have you ever saved a struggling orchid? Share your story in the comments below! Let’s inspire each other to grow thriving plants.
Gardening Hashtags for Your Orchid Journey
OrchidCare #PlantRescue #GreenThumbGoals #GardeningMagic #OrchidTips #HouseplantLovers #GrowWithLove
By applying these steps and staying patient, you’ll master the art of reviving orchids with the magic of water. Before you know it, your orchid will reward you with its stunning blooms once again! 🌸✨