
Gardening can be a fulfilling hobby that offers relaxation and a sense of accomplishment, but not everyone has the time or resources to dedicate long hours to their garden. Fortunately, with the rise of DIY culture, quick and creative gardening projects have become more popular than ever. One such source of inspiration is 5-Minute Crafts, known for its innovative and easy-to-follow ideas that can transform your garden in just a few minutes. In this article, we’ll explore a variety of these projects that are perfect for beginners and seasoned gardeners alike.
1. Vertical Garden with Plastic Bottles
Overview
Vertical gardens are an excellent solution for those with limited space. Using recycled plastic bottles to create a vertical garden is not only eco-friendly but also a great way to display your favorite plants.
Steps to Create Your Vertical Garden
- Materials Needed:
- Plastic bottles (1-2 liters)
- Scissors
- Twine or sturdy string
- Soil
- Plants or seeds of your choice
- Instructions:
- Prepare the Bottles: Rinse the bottles thoroughly and cut them in half lengthwise. Keep the top half for planting.
- Create Drainage: Puncture small holes in the bottom of each bottle to allow excess water to escape.
- Assemble the Structure: Using twine, tie the top halves together at the neck to create a cascading effect.
- Fill with Soil: Fill each bottle with potting soil, leaving enough space at the top for planting.
- Plant Your Seeds or Seedlings: Choose herbs, flowers, or small vegetables and plant them in the soil.
- Hang Your Garden: Find a sunny spot on a wall or fence to hang your vertical garden.
Benefits
This project allows you to maximize your gardening space while adding a unique decorative touch to your outdoor area. Plus, it’s a fantastic way to recycle!
2. Hanging Herb Garden
Overview
Having fresh herbs readily available can enhance your culinary creations. A hanging herb garden allows you to grow your favorites without taking up valuable ground space.
Steps to Create a Hanging Herb Garden
- Materials Needed:
- Old mugs or small pots
- S-hooks or sturdy wire
- Potting soil
- Herb seedlings (e.g., basil, mint, parsley)
- Instructions:
- Prepare the Mugs: If you’re using mugs, ensure they have drainage holes. If not, carefully drill a hole at the bottom.
- Fill with Soil: Add potting soil to each mug, leaving some space at the top.
- Plant Your Herbs: Plant the herb seedlings into the soil, pressing them gently to ensure good soil contact.
- Hang the Mugs: Use S-hooks or sturdy wire to hang the mugs on a fence, wall, or railing where they can receive sunlight.
Benefits
A hanging herb garden is visually appealing and provides easy access to fresh herbs while saving space. The herbs also release lovely scents that can enhance your garden experience.
3. DIY Garden Markers
Overview
Keeping track of what you’ve planted can be a challenge, especially in larger gardens. DIY garden markers are a simple and effective way to label your plants.
Steps to Make Garden Markers
- Materials Needed:
- Rocks, wooden sticks, or popsicle sticks
- Waterproof paint or permanent markers
- Clear sealant (optional)
- Instructions:
- Choose Your Markers: Gather rocks, wooden sticks, or popsicle sticks that you’d like to use for labeling.
- Decorate: Use waterproof paint or permanent markers to write the names of your plants on the markers.
- Seal (Optional): If desired, apply a clear sealant to protect the markers from the elements.
- Place the Markers: Insert the markers into the soil next to the corresponding plants.
Benefits
DIY garden markers not only help keep your garden organized but also add a personalized touch. You can customize them to match your garden’s aesthetic.
4. Mason Jar Planters
Overview
Mason jars can be repurposed as charming planters, perfect for small flowers or herbs. They add a rustic and unique look to your gardening space.
Steps to Create Mason Jar Planters
- Materials Needed:
- Mason jars
- Potting soil
- Plants or seeds (e.g., succulents, small flowers)
- Instructions:
- Prepare the Jars: Clean the mason jars and remove any labels. If desired, you can paint or decorate the jars.
- Add Soil: Fill each jar with potting soil, leaving a little space at the top.
- Plant: Add your chosen plants or seeds to the jars, gently packing the soil around them.
- Water and Place: Water the plants lightly and place the jars in a sunny location.
Benefits
Mason jar planters are not only functional but also serve as attractive decor. They can be placed on windowsills, tables, or even hung from hooks for added charm.
5. Pallet Garden
Overview
A pallet garden is an innovative way to create a raised bed using recycled materials. It’s ideal for growing herbs, flowers, or even small vegetables.
Steps to Build a Pallet Garden
- Materials Needed:
- An old wooden pallet
- Landscape fabric
- Soil
- Plants or seeds
- Instructions:
- Prepare the Pallet: Choose a sturdy pallet and inspect it for any damaged boards. Ensure it’s free from chemicals (look for “HT” stamped pallets).
- Line the Pallet: Attach landscape fabric to the back and sides of the pallet using a staple gun. This will hold the soil in place.
- Fill with Soil: Lay the pallet flat and fill it with potting soil, ensuring each compartment is filled.
- Plant Your Seeds or Seedlings: Add your chosen plants, making sure to water them well after planting.
- Stand It Up: Once planted, lean the pallet against a wall or fence for support.
Benefits
Pallet gardens are an excellent way to recycle materials while providing a space-efficient solution for growing a variety of plants. They add a rustic aesthetic to your garden.
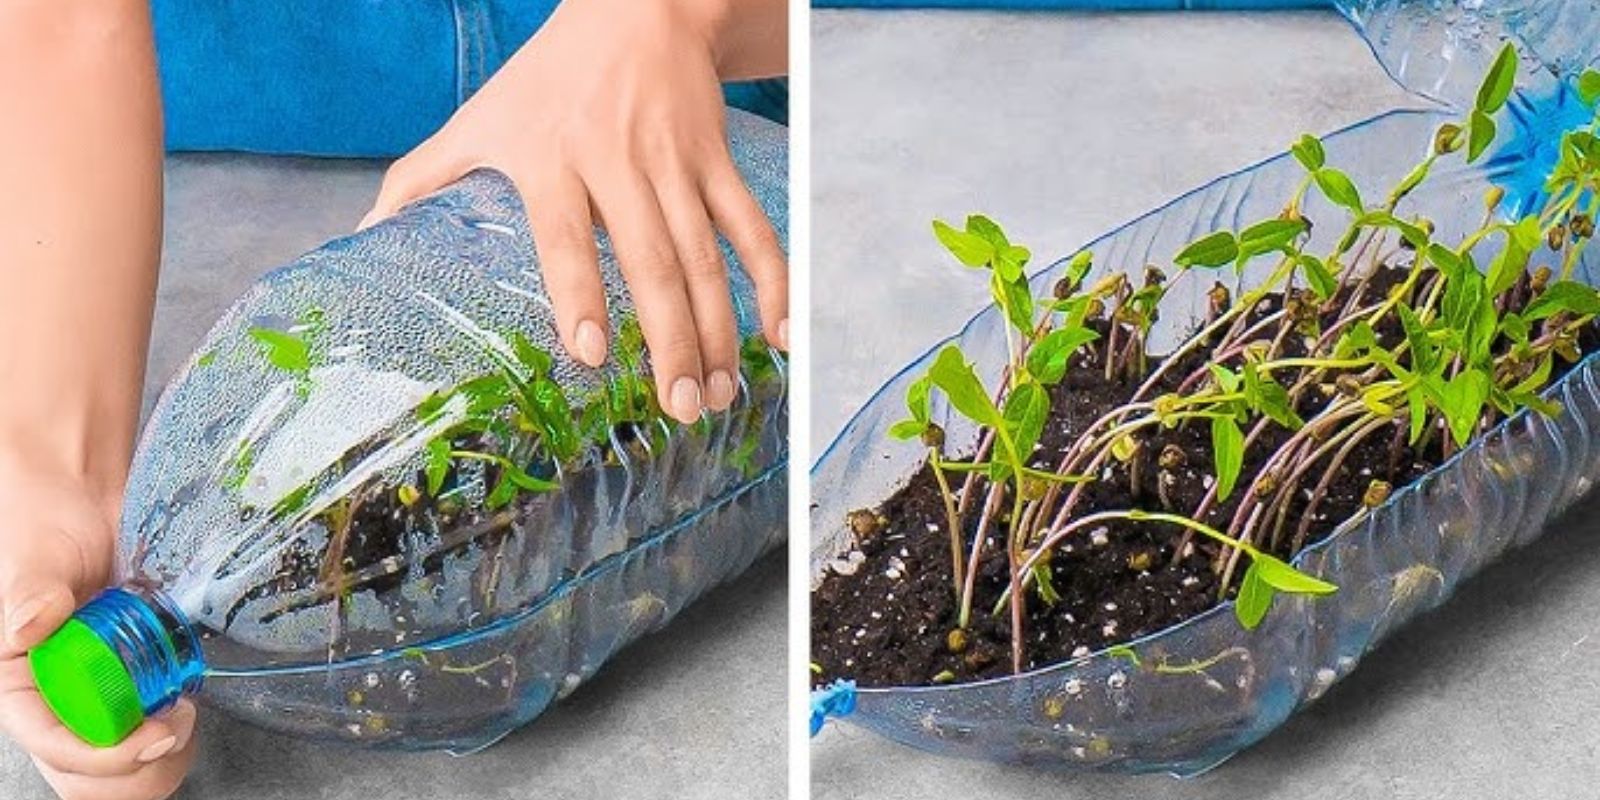
6. Plastic Bottle Self-Watering Planter
Overview
Self-watering planters can simplify your watering routine, ensuring your plants receive adequate moisture without the hassle of daily care.
Steps to Create a Self-Watering Planter
- Materials Needed:
- A plastic bottle (1-2 liters)
- Scissors
- Potting soil
- Plants or seeds
- Instructions:
- Prepare the Bottle: Cut the bottle in half and keep the bottom half.
- Create Drainage: Make a few holes in the bottom of the top half to allow excess water to escape.
- Fill with Soil: Fill the top half with potting soil.
- Plant: Add your plants or seeds to the soil.
- Assemble: Invert the top half into the bottom half, with the neck submerged in the water collected in the bottom.
Benefits
This self-watering planter reduces the frequency of watering and keeps your plants consistently hydrated. It’s an efficient solution for busy gardeners!
7. Upcycled Tin Can Planters
Overview
Old tin cans can be transformed into charming planters, perfect for herbs or small flowers. This project is not only eco-friendly but also budget-friendly.
Steps to Create Tin Can Planters
- Materials Needed:
- Empty tin cans
- Hammer and nail (for drainage holes)
- Paint (optional)
- Soil
- Plants or seeds
- Instructions:
- Prepare the Cans: Clean the cans and remove labels. Use a hammer and nail to puncture drainage holes in the bottom.
- Decorate (Optional): Paint the cans in your desired colors or patterns to add personality.
- Fill with Soil: Add potting soil, leaving space at the top.
- Plant: Add your plants or seeds and water them lightly.
Benefits
Using tin cans as planters is a creative way to recycle and adds a unique flair to your gardening. Plus, it’s a great conversation starter!
8. DIY Bird Feeders
Overview
Creating DIY bird feeders can attract local birds to your garden, adding beauty and life to your outdoor space. Plus, it’s a fun project for all ages!
Steps to Make a DIY Bird Feeder
- Materials Needed:
- Pine cones
- Peanut butter
- Birdseed
- String (optional)
- Instructions:
- Prepare the Pine Cone: Gather pine cones and clean them if necessary.
- Spread Peanut Butter: Coat the pine cones with peanut butter, ensuring they are well-covered.
- Roll in Birdseed: Roll the peanut butter-coated pine cones in birdseed until fully coated.
- Hang the Feeders: Use string to hang the feeders in trees or from hooks in your garden.
Benefits
DIY bird feeders not only provide food for birds but also enhance the beauty of your garden. Watching birds can be a relaxing and rewarding experience.
Conclusion
Gardening doesn’t have to be a time-consuming or costly endeavor. With these quick and creative projects from 5-Minute Crafts, you can enhance your outdoor space while enjoying the satisfaction of DIY gardening. Whether you’re creating a vertical garden with recycled plastic bottles, crafting charming mason jar planters, or making upcycled tin can planters, each project offers a unique way to express your creativity.
These projects are perfect for anyone looking to add a personal touch to their garden, and they serve as great family activities that can involve kids and adults alike. So, gather your materials and get started on these fun gardening hacks today! Share your results on social media and inspire others to explore the world of gardening with you. Happy gardening! 🌱✨
Call to Action
Feeling inspired? Try one of these projects today and share your gardening journey with us! Use hashtags like #5MinuteCrafts #GardenHacks #DIYGardening #EcoFriendlyGardening to connect with fellow garden enthusiasts. Your garden transformation starts now!