
Introduction
Orchids are beloved for their delicate and exotic blooms, often considered the epitome of elegance in the plant world. While many admire these beautiful flowers, fewer people know that orchids can be propagated using a surprisingly common household item: a potato. This method is not only innovative but also cost-effective and accessible, making it an excellent option for both novice and experienced gardeners. In this article, we will explore the steps to propagate orchids using a potato, the science behind this method, and tips for ensuring success.
The Science Behind the Potato Method
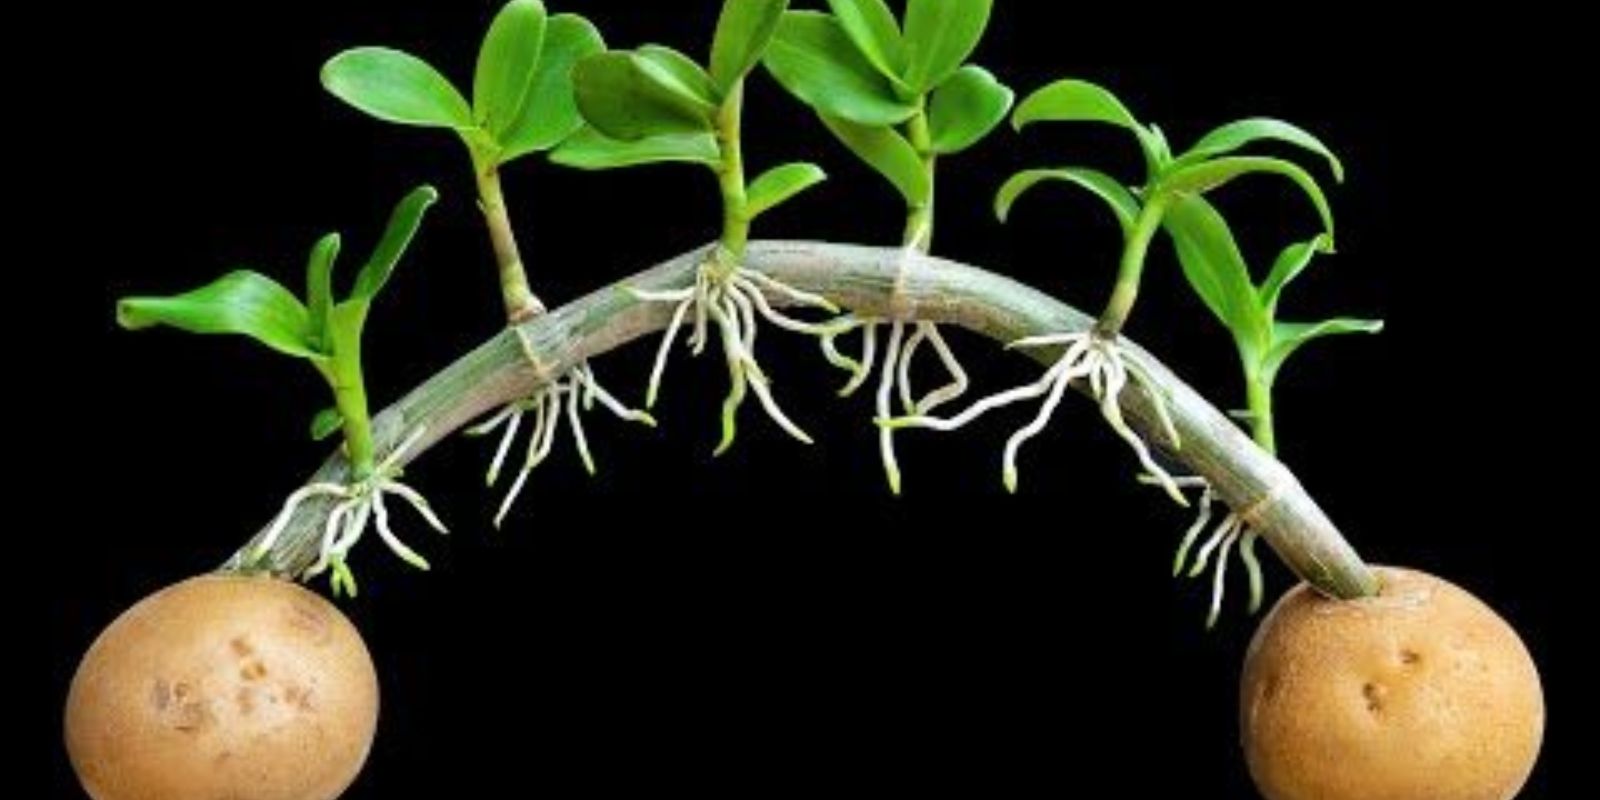
The potato method for propagating orchids is grounded in the principles of plant tissue culture and nutrient supply. Potatoes are rich in starch, vitamins, and minerals, making them an ideal medium for supporting the initial growth of orchid cuttings. The potato’s flesh provides a moist and nutrient-rich environment, encouraging root development and providing a stable base for the cuttings.
Orchids can be propagated through various methods, including seed propagation, division, and cuttings. The potato method focuses on using cuttings, which involves taking a part of the plant, typically a stem or root, and encouraging it to grow into a new plant. This method is particularly useful for species that produce keikis (baby plants) or those with suitable nodes for rooting.
Steps to Propagate Orchids with a Potato
1. Selecting the Right Orchid and Potato
Not all orchids are suitable for this propagation method. Choose orchids that are healthy and free of pests or diseases. Orchids with pseudobulbs or nodes that can develop roots are ideal. Phalaenopsis (moth orchids) and Dendrobium are good candidates.
For the potato, select a healthy, medium-sized potato that is firm and free of sprouts or blemishes. Organic potatoes are preferable as they are less likely to have been treated with growth inhibitors.
2. Preparing the Potato
Start by washing the potato thoroughly to remove any dirt or chemicals. Pat it dry with a clean cloth. Using a clean knife, cut the potato in half or into slices, depending on the number of cuttings you plan to use. Each piece should be large enough to hold the orchid cutting securely.
Using a small tool or your finger, create holes in the potato pieces. These holes should be deep enough to accommodate the base of the orchid cuttings without them tipping over. Ensure the holes are not too tight to avoid damaging the cuttings.
3. Preparing the Orchid Cuttings
Take cuttings from the orchid using sterilized scissors or a knife. The cuttings should include at least one node, which is a small bump along the stem where new roots or leaves can develop. If the orchid produces aerial roots, include some of these in the cutting as they can help with nutrient absorption.
Before inserting the cuttings into the potato, you can dip the cut ends in a rooting hormone powder. This step is optional but can enhance root development and increase the chances of successful propagation.
4. Inserting the Cuttings
Gently insert the orchid cuttings into the holes in the potato. The base of the cutting should be securely positioned in the potato, with the node(s) covered. Be careful not to force the cuttings in, as this can damage the delicate plant tissue.
5. Planting and Care
Place the potato with the orchid cuttings in a pot with a well-draining orchid substrate. You can use a mix of bark, perlite, and sphagnum moss. The potato should be partially buried in the substrate, with the cuttings above the surface.
Water the substrate lightly, ensuring it is moist but not waterlogged. Overwatering can lead to rot, especially with the potato. Maintain consistent moisture levels and avoid letting the substrate dry out completely.
Place the pot in a bright area with indirect sunlight. Orchids prefer a warm environment with good air circulation. Avoid placing the pot in direct sunlight, as this can cause overheating and damage the plant.
6. Monitoring Growth
Over the next few weeks, monitor the cuttings for signs of new growth. You may see new roots or leaves emerging from the nodes. This indicates that the cuttings are successfully rooting and starting to establish themselves.
If the potato begins to decay or mold, carefully remove it without disturbing the new roots. The orchid should continue to grow in the substrate, drawing nutrients from it instead.
Tips for Success
1. Patience is Key
Orchid propagation, especially through unconventional methods like using a potato, requires patience. It may take several weeks to months before you see significant growth. Be patient and consistent with your care routine.
2. Maintain Optimal Conditions
Orchids are sensitive to their environment. Keep the humidity levels moderate, and ensure the potting mix is well-draining to prevent root rot. Use a humidity tray or mist the plants occasionally to maintain adequate moisture levels.
3. Use Clean Tools and Materials
Always use clean and sterilized tools to prevent the spread of diseases. The same goes for the potato and any other materials used in the propagation process.
4. Experiment with Different Orchids
Not all orchid species respond equally to this method. While Phalaenopsis and Dendrobium are commonly used, don’t hesitate to experiment with other species to see what works best for you.
Conclusion
Propagating orchids using a potato is a fascinating and unconventional method that showcases the creativity and resourcefulness of gardening enthusiasts. By providing a nutrient-rich environment and a stable base for cuttings, the potato helps kickstart the growth process, making it a valuable tool for orchid lovers. Whether you’re a beginner looking to expand your collection or an experienced gardener experimenting with new techniques, this method offers a unique way to propagate these beautiful plants. So why not give it a try? With patience and care, you might soon have a thriving new orchid blooming in your home. Happy gardening!