
Iris plants are known for their vibrant colors and stunning, intricate blooms that grace gardens all around the world. From the regal bearded iris to the delicate Dutch iris, these flowers come in a vast array of hues, shapes, and sizes, making them a favorite among gardeners. While many gardeners propagate irises through division, growing them from seed is a satisfying and exciting process that allows you to grow unique varieties while nurturing a deeper connection with nature. In this article, we will dive into the essential steps of propagating irises from seed, offering tips, tricks, and everything you need to know to successfully start iris plants from scratch.
Why Propagate Irises from Seed?
Growing irises from seed can be a slow process, but it offers several benefits. First and foremost, it allows you to grow irises that may not be available through traditional nursery purchases. Seed propagation is also a more affordable way to multiply your irises, and you may even find that certain seeds result in new and exciting hybrids, giving you a one-of-a-kind garden. Additionally, growing irises from seed is a fantastic way to experience the entire lifecycle of these beautiful plants, from seedling to full bloom.
Understanding Iris Seed Propagation
Before you begin, it’s essential to understand how iris seeds work. Iris plants produce small, round seed pods after they have finished blooming, and these seeds are typically harvested when they’re fully mature and dry. However, iris seeds need some special treatment before they can germinate. Unlike other plants, iris seeds need a process called cold stratification, which mimics the natural conditions they would experience in the wild. Cold stratification helps break the seed dormancy and prepares the seed for germination.
Step-by-Step Guide to Propagating Irises from Seed
Let’s break down the steps for propagating irises from seed, providing clear instructions for each phase of the process:
1. Collecting Iris Seeds
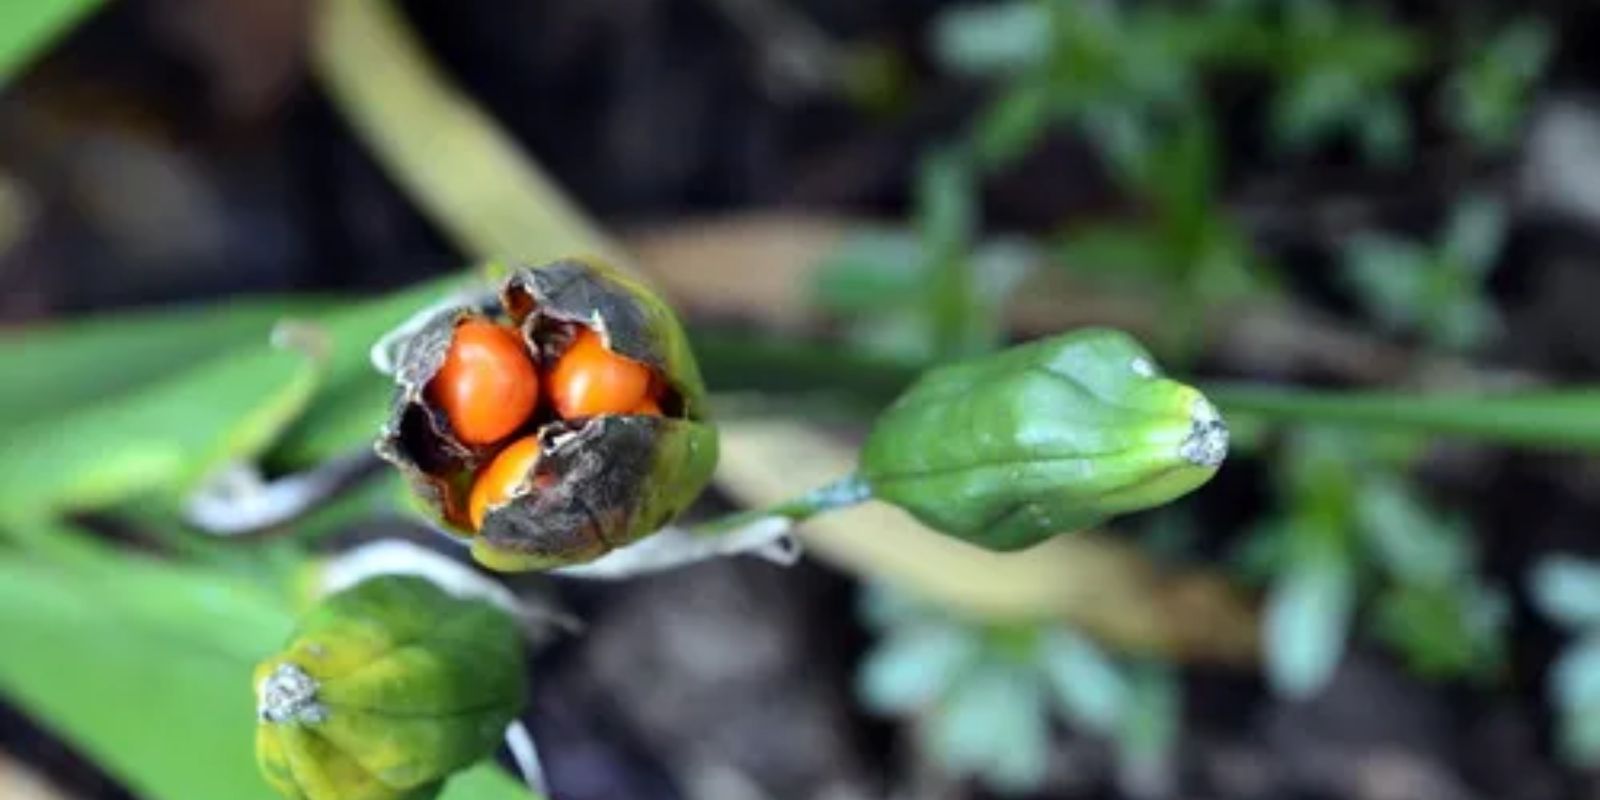
The first step in propagating irises from seed is collecting the seeds from mature plants. After the iris flowers have faded, they form seed pods that contain small, round seeds. Wait until the seed pods turn brown and dry out completely, usually around late summer or early fall. If you harvest the seeds too early, they may not be fully developed and won’t germinate effectively.
- How to Collect: Once the seed pods are dry, open them carefully and extract the seeds. Be sure to handle the pods gently, as they can crack open unexpectedly. The seeds should be small, round, and slightly shiny.
2. Cold Stratification (Breaking Dormancy)
Iris seeds require cold stratification to germinate properly. This is a process in which you mimic the natural conditions that the seeds would experience during the winter months. Cold stratification breaks down the natural dormancy of the seeds, encouraging them to sprout when the weather warms.
- How to Stratify: Take the collected seeds and place them in a moist paper towel. Seal the towel in a plastic bag to retain moisture, and then refrigerate the seeds for 6-8 weeks. You can also use a small container with a lid if you prefer. This process helps soften the seed coat and stimulates the necessary biochemical changes for germination.
3. Preparing the Soil for Sowing
While the seeds are undergoing cold stratification, it’s important to prepare the soil where you’ll plant them once they’re ready to germinate. Irises thrive in well-drained, fertile soil, so choose a soil mix that ensures good drainage and provides adequate nutrients. A mixture of potting soil and sand or perlite is a good choice for starting iris seeds.
- Soil Preparation Tips:
- Use shallow containers or seed trays for planting.
- Make sure the container has drainage holes to prevent waterlogging.
- If sowing directly into the ground, choose a sunny location with well-drained soil.
4. Sowing the Iris Seeds
Once your iris seeds have completed the cold stratification process, it’s time to plant them. It’s best to sow iris seeds in late winter or early spring when the weather begins to warm up. Although irises are typically grown from rhizomes, sowing seeds is a fantastic way to experiment with different varieties and hybrids.
- How to Sow:
- Fill your container or seed tray with the prepared soil.
- Gently press the seeds into the surface of the soil, ensuring that they are evenly spaced.
- Cover the seeds with a thin layer of soil, about 1/4 inch deep. Irises don’t require deep planting.
- Lightly water the soil to keep it moist but not waterlogged.
5. Caring for the Seedlings
After sowing the iris seeds, you’ll need to provide the proper conditions for germination. Iris seeds need warmth, light, and moisture to sprout. The germination process can take several weeks to a couple of months, depending on the variety and the environmental conditions.
- Optimal Conditions for Germination:
- Keep the soil consistently moist but not soggy.
- Place the seed tray or container in a bright, warm location with indirect sunlight.
- Maintain temperatures around 65°F to 75°F (18°C to 24°C) for optimal germination.
Patience is key at this stage, as it can take time for the seeds to germinate fully.
6. Transplanting Seedlings
Once your iris seeds have germinated and the seedlings are large enough to handle, it’s time to transplant them into larger pots or directly into your garden. Transplanting irises from seed can be tricky, as they are delicate at this stage, so handle them with care.
- How to Transplant:
- Gently lift the seedlings from the soil, being careful not to damage the roots.
- If transplanting to pots, use a well-draining potting mix to give the seedlings ample space to grow.
- If planting in the garden, choose a sunny, well-drained area and space the seedlings about 6-12 inches apart to allow room for growth.
Transplant your seedlings in early spring or fall when the weather is mild and there’s no threat of frost.
7. Ongoing Care and Maintenance
After transplanting, continue to care for your iris plants by providing them with adequate water, nutrients, and sunlight. Irises prefer full sun and well-drained soil, so avoid overwatering and make sure the plants have enough space to spread out.
- Key Care Tips:
- Water the plants regularly, but avoid waterlogging.
- Fertilize lightly with a balanced, slow-release fertilizer during the growing season.
- Remove any spent flowers to promote new growth and prevent seed formation, as irises can self-seed and may become overcrowded if left unchecked.
- Be patient – it may take a few years for your seed-grown irises to bloom for the first time.
Challenges of Growing Irises from Seed
While propagating irises from seed is a rewarding experience, it does come with some challenges. One of the most significant challenges is the long germination period. It can take months, and sometimes even years, before you see blooms. Moreover, the resulting flowers may not resemble the parent plant, as iris seeds can produce a variety of traits, including different colors, sizes, and shapes.
Additionally, seed-grown irises may need more time and attention to thrive compared to those propagated through division. Be prepared for a bit of a wait before your seedlings reach their full potential.
Conclusion
Growing irises from seed is a fulfilling process that gives gardeners the chance to create unique varieties, experiment with hybrids, and enjoy the slow, steady growth of these magnificent flowers. Although it requires patience and careful attention to detail, propagating irises from seed can be an extremely rewarding experience. Whether you’re looking to expand your iris collection or are simply looking for a fun gardening project, starting irises from seed is an excellent way to immerse yourself in the beauty of nature and watch your hard work blossom into stunning, colorful flowers.
By following the steps outlined in this guide, you’ll be well on your way to growing healthy iris plants from seed and enjoying their striking beauty in your garden for years to come. So, roll up your sleeves, gather your seeds, and get ready to embark on a beautiful journey with irises!