
Introduction
Gardenias are cherished for their exquisite, fragrant flowers and glossy evergreen leaves, making them popular additions to gardens and indoor spaces alike. Propagating gardenia plants from cuttings is a rewarding way to multiply these beauties and ensure their presence in your garden or home. This comprehensive guide will walk you through the step-by-step process of propagating gardenias from cuttings, enabling you to grow new plants and enjoy their fragrance and beauty wherever you choose.
Understanding Gardenia Propagation
Propagation through cuttings is a common method used to reproduce gardenias because it allows for the preservation of desirable traits from parent plants. Gardenia cuttings can root relatively easily under the right conditions, producing new plants that maintain the same characteristics as their parent, including flower color and fragrance. This method is ideal for gardeners looking to expand their garden with genetically identical plants or to replace aging specimens.
Step-by-Step Guide to Propagating Gardenias from Cuttings
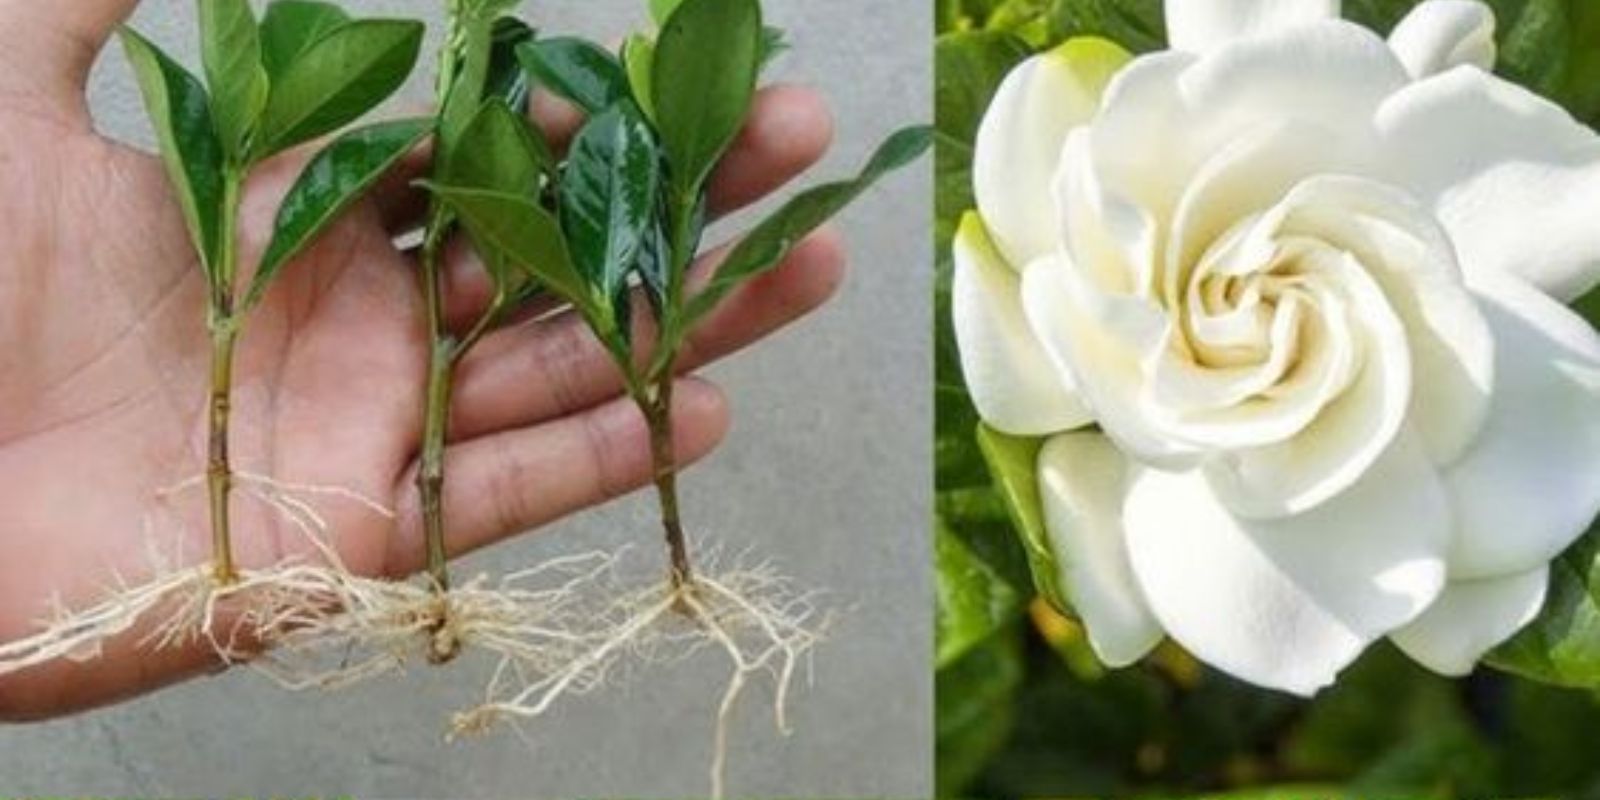
- Preparing the Cuttings
- Selecting Cuttings: Choose healthy gardenia cuttings that are approximately 4-6 inches long. Opt for softwood cuttings, which are taken from new, green growth rather than older, woody stems.
- Cutting Technique: Use sharp, clean pruning shears to cut just below a leaf node (where leaves attach to the stem). Remove any flowers or buds to redirect the plant’s energy towards root development.
- Preparing the Planting Medium
- Choosing the Medium: Use a well-draining, lightweight planting medium such as a mixture of equal parts peat moss and perlite. This combination retains moisture while allowing for adequate airflow around the cutting’s base.
- Container Selection: Select small pots or trays with drainage holes to prevent water stagnation, which can lead to root rot. Clean and sterilize containers before use to minimize the risk of disease.
- Planting the Cuttings
- Insertion Depth: Dip the cut end of each gardenia cutting into rooting hormone powder to encourage root growth, then gently insert it into the prepared planting medium. Ensure at least one node (the point where leaves emerge) is buried in the medium.
- Spacing: Place multiple cuttings in the container, leaving space between them to allow for air circulation and future growth.
- Providing Optimal Conditions
- Light and Temperature: Place the containers in a location with bright, indirect light. Avoid direct sunlight, which can scorch tender cuttings. Maintain a consistent temperature between 70-75°F (21-24°C) to promote root development.
- Humidity: Maintain high humidity around the cuttings to prevent excessive moisture loss. Cover the container with a clear plastic bag or place it in a humidity dome to create a mini greenhouse effect.
- Watering and Care
- Moisture Management: Keep the planting medium consistently moist but not waterlogged. Water the cuttings from the bottom to prevent disturbing them and to encourage downward root growth.
- Aeration: Periodically remove the plastic covering or dome to allow fresh air circulation and prevent fungal diseases like damping-off.
- Monitoring and Patience
- Root Development: Check for root development after 4-6 weeks by gently tugging on the base of the cutting. Resist the temptation to check too frequently, as disturbing the cuttings can hinder root formation.
- Transplanting: Once roots are well-established (typically when roots are 1-2 inches long), transplant each cutting into its individual pot filled with a well-draining potting mix. Gradually acclimate the new plants to normal light conditions over a period of days to prevent shock.
- Caring for Established Plants
- Growing Conditions: Place newly rooted gardenia plants in a location with bright, indirect light and consistent humidity. Water regularly to keep the soil evenly moist, and fertilize with a balanced, water-soluble fertilizer diluted to half-strength every 4-6 weeks during the growing season.
- Pruning and Maintenance: Prune gardenias regularly to promote bushy growth and remove dead or diseased foliage. Monitor for pests like aphids and treat promptly if detected.
Benefits of Propagating Gardenias from Cuttings
Propagating gardenia plants from cuttings offers several advantages:
- Cost Efficiency: Saves money on purchasing new plants.
- Preservation of Characteristics: Maintains desirable traits of parent plants.
- Sustainability: Reduces reliance on commercially grown plants.
Conclusion
Propagating gardenia plants from cuttings is a rewarding and cost-effective way to expand your garden and enjoy the beauty of these fragrant flowers. By following the steps outlined in this guide, you can successfully propagate gardenias and cultivate new plants that enhance your garden or indoor space with their exquisite blooms and sweet fragrance. Whether you’re a beginner gardener or an experienced enthusiast, mastering the art of propagating gardenias from cuttings will deepen your appreciation for these beloved plants and empower you to create a thriving garden filled with natural beauty.
Start your journey of gardenia propagation today and experience the joy of growing these stunning plants from cuttings, bringing their charm and fragrance into your garden or home!
This article provides a detailed guide to successfully propagating gardenia plants from cuttings, empowering gardeners to multiply their favorite flowers and enhance their gardening experience.