
Introduction
Celery is a versatile vegetable that can be used in a variety of dishes, from salads to soups. Traditionally, growing celery requires a garden bed or pots filled with soil, along with regular watering to keep the plants healthy. However, there’s an innovative method that allows you to grow celery without soil or extensive watering. This method is not only cost-effective but also incredibly simple, making it accessible for everyone, including those with limited space or gardening experience. In this article, we’ll explore this unique approach to growing celery and guide you through the steps to achieve a successful harvest.
Understanding the Soil-Free Growing Method
What is Soil-Free Growing?: Soil-free growing, also known as hydroponics or aquaponics, involves growing plants without traditional soil. Instead, plants are grown in a nutrient-rich water solution that provides them with the necessary minerals and nutrients. This method can be applied to a variety of vegetables, including celery.
Why Choose This Method?: Growing celery without soil has several advantages:
- Simplicity: No need to manage soil or deal with soil-borne pests and diseases.
- Cost-Efficiency: Reduces the need for expensive soil and watering systems.
- Space-Saving: Ideal for small spaces or indoor gardening setups.
Steps to Grow Celery Without Soil
1. Choose Celery Stalks
Selecting Celery: Start with fresh celery stalks from your grocery store. Choose stalks with a firm base and vibrant green leaves. Avoid stalks that are wilted or overly dry.
Preparing the Celery: Cut the celery stalks, leaving a small portion of the base intact. This base will be used to grow new celery shoots.
2. Prepare Containers
Choosing Containers: Use a shallow container or dish that can hold a small amount of water. This container should be wide enough to support the celery base and provide enough stability.
Container Options: You can use various containers, such as:
- Plastic or Glass Dishes: Ideal for holding water and easy to clean.
- Recycled Containers: Old jars or food containers can also work well.
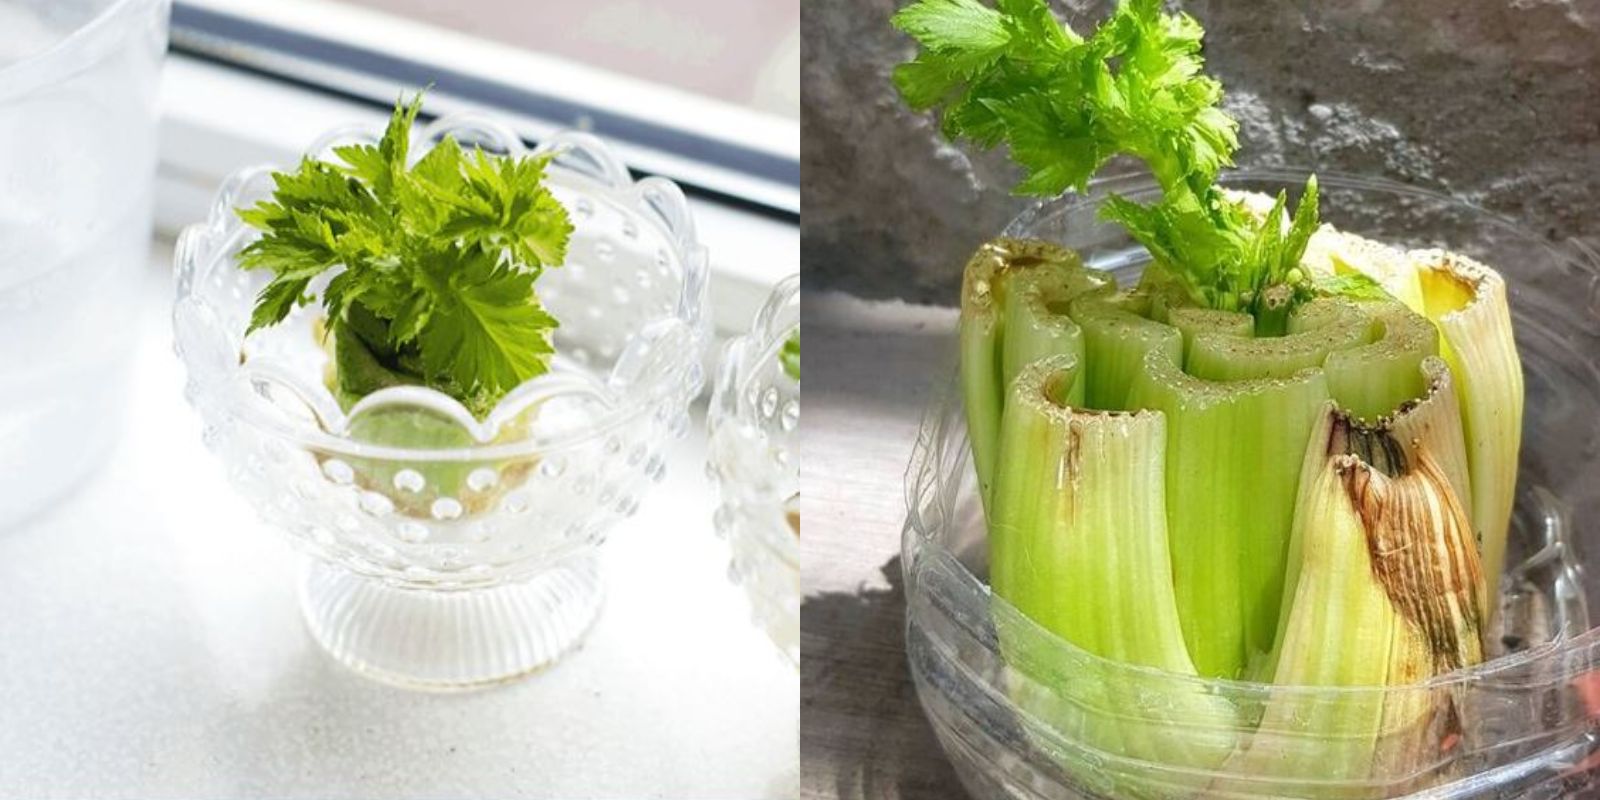
3. Place Celery
Positioning the Celery: Place the celery base in the container. Ensure that the base is partially submerged in water, but the leaves should remain above the water level to prevent rot.
Spacing: If growing multiple stalks, make sure to space them out to allow for adequate air circulation and growth.
4. Provide Light
Lighting Requirements: Celery needs bright, indirect light to grow successfully. Position the container in a sunny spot, such as a south-facing window, where it can receive ample light throughout the day.
Artificial Lighting: If natural light is insufficient, consider using fluorescent grow lights or LED grow lights. Place the lights a few inches above the celery and keep them on for 12-14 hours a day to mimic natural sunlight.
5. Change Water
Maintaining Water Quality: Regularly refresh the water in the container to keep it clean and prevent algae growth. Change the water every 2-3 days to ensure the celery has access to fresh, oxygenated water.
Water Level: Keep an eye on the water level and add more if necessary to ensure the celery base remains submerged.
Caring for Your Celery
Growth Monitoring: After a few days, you should begin to see new celery shoots emerging from the base. As the celery grows, you’ll notice the formation of new leaves and stems.
Nutrient Supplementation: While celery can grow in plain water, adding a small amount of liquid fertilizer to the water every few weeks can help boost growth. Use a balanced, water-soluble fertilizer and follow the manufacturer’s instructions to avoid over-fertilizing.
Pest Management: Although soil-free growing reduces the risk of soil-borne pests, keep an eye out for pests like aphids or spider mites. If you spot any, gently wash them off with a mixture of water and mild soap.
Harvesting Celery
Timing: Celery typically takes 4-6 weeks to grow from a base to a harvestable size. You can harvest the celery when the stalks reach a desirable size, usually when they are about 6-8 inches tall.
Harvesting Method: To harvest, gently pull the celery stalks from the base or cut them off at the base. If you prefer, you can also harvest individual stalks as needed, allowing the rest of the plant to continue growing.
Benefits of Soil-Free Celery Growing
Cost Savings: This method eliminates the need for soil, reducing costs associated with gardening. You’ll also save on water, as the system requires minimal maintenance.
Simplicity: Growing celery in water is straightforward and requires minimal equipment. This makes it a great option for beginners or those with limited space.
Healthier Plants: Without soil, there are fewer risks of soil-borne diseases and pests. This can lead to healthier, more robust plants.
Year-Round Gardening: Soil-free growing allows you to grow celery indoors year-round, regardless of outdoor weather conditions.
Troubleshooting Common Issues
Yellowing Leaves: If the celery leaves turn yellow, it may be a sign of nutrient deficiency or poor water quality. Ensure you are using clean water and consider adding a diluted liquid fertilizer.
Slow Growth: Slow growth can result from inadequate light or insufficient nutrients. Ensure your celery receives enough light and refresh the water regularly.
Rotting Base: If the celery base begins to rot, check the water level and ensure the base is not submerged too deeply. Remove any rotting parts to prevent the spread of decay.
Conclusion
Growing celery without soil is a revolutionary method that simplifies gardening and makes it accessible to everyone. By following these steps, you can enjoy fresh, home-grown celery with minimal effort and cost. This soil-free approach not only saves money but also allows you to grow celery in small spaces or indoors throughout the year.
Motivation
Ready to revolutionize your gardening routine? Try growing celery in water and share your success with fellow gardeners. This simple method could be your gateway to a more innovative and cost-effective gardening experience!