
Pests in your garden can be a gardener’s worst nightmare. They can destroy months of hard work in a matter of days, chewing on leaves, damaging stems, and causing plants to wither. Instead of turning to chemical pesticides, which can harm the environment and beneficial insects, a more sustainable approach is to make your own natural pesticide. Using just two common household ingredients, you can create an effective solution that keeps pests at bay without the negative side effects. Let’s dive into how you can create your very own pesticide and keep your garden healthy and thriving.
Why Choose Natural Pest Control?
Before we get into the steps for making a DIY pesticide, let’s first explore why natural pest control methods are so important. Many chemical pesticides can kill not only harmful pests but also beneficial insects, such as bees, butterflies, and ladybugs, which play crucial roles in pollination and maintaining a balanced ecosystem. Moreover, chemical pesticides can contaminate the soil, water, and air, posing risks to wildlife and human health.
By choosing natural solutions, you’re opting for a more eco-friendly approach that nurtures your garden’s overall health. Homemade pesticides are also safer to handle, making them ideal for gardeners of all experience levels, including those with children or pets.
The Two Simple Ingredients You Need
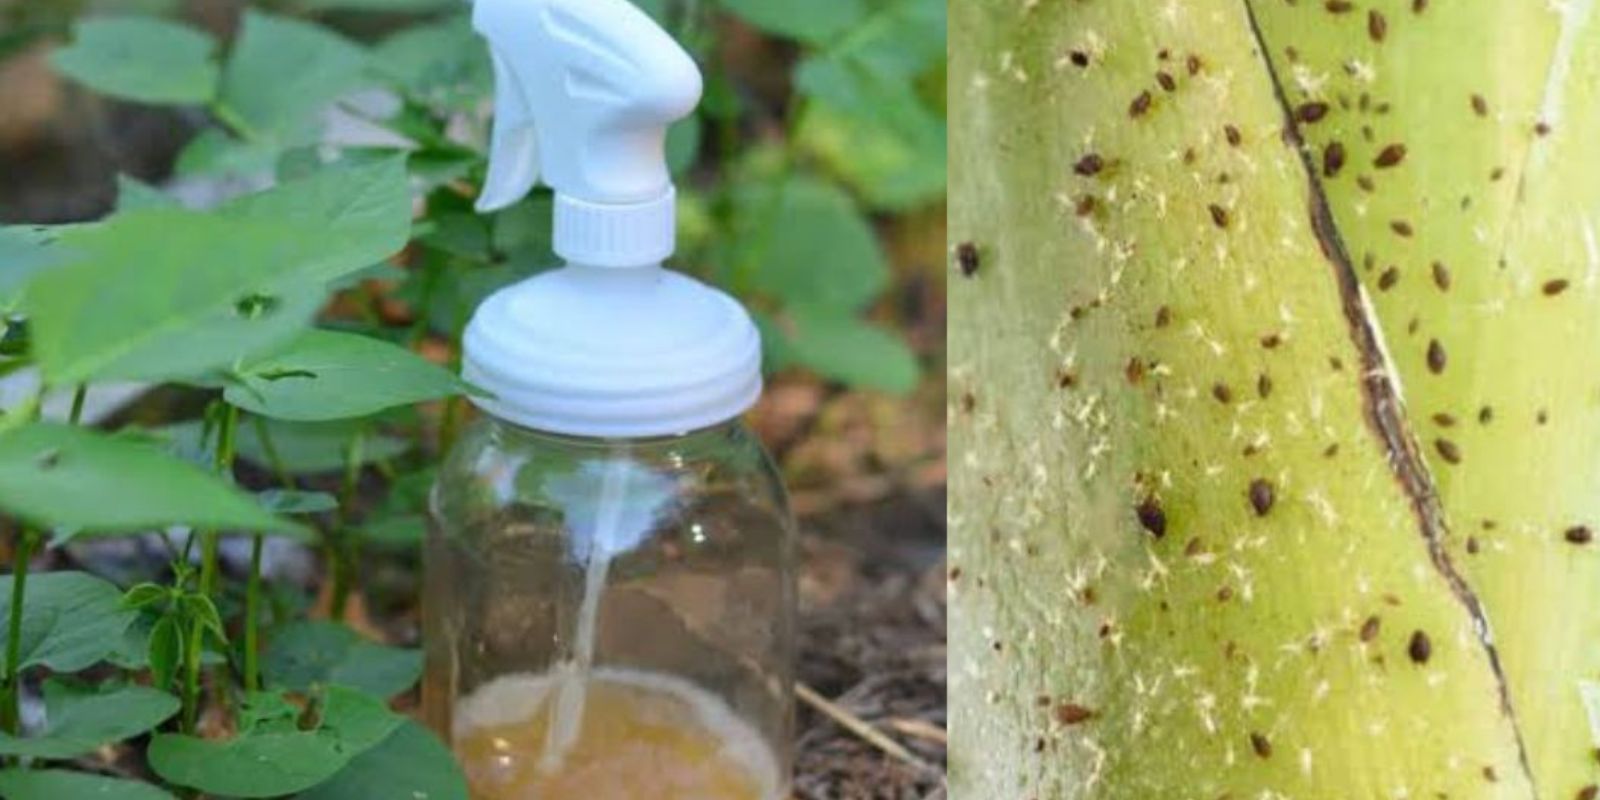
The beauty of this homemade pesticide lies in its simplicity. You don’t need to buy expensive or complicated ingredients—just two common household items: dish soap and water.
- Dish Soap: Choose a mild, biodegradable dish soap, preferably free of harsh chemicals and fragrances. Dish soap works by breaking down the waxy coating on pests’ exoskeletons, causing them to dehydrate and eventually die. It is particularly effective against soft-bodied insects like aphids, spider mites, and whiteflies.
- Water: The water serves as the solvent for the soap, ensuring an even distribution when applied to your plants. It also helps dilute the soap to a concentration that is safe for plants but strong enough to deter pests.
Together, these two ingredients make for an affordable, easy-to-use pesticide that is both effective and safe for your garden.
How to Make Your DIY Pesticide
Now that you understand why natural pest control is beneficial and what ingredients you need, let’s walk through the steps to make your own pesticide.
Step 1: Gather Your Materials
You’ll need:
- 1 tablespoon of mild dish soap (choose a plant-safe, biodegradable variety)
- 1 cup of water (room temperature)
- A clean spray bottle (preferably one that’s never been used for other chemicals)
Step 2: Mix the Solution
Fill the spray bottle with one cup of water. Add one tablespoon of dish soap into the water and close the bottle tightly. Shake it well to ensure that the soap is fully dissolved and mixed with the water. The soap should not form a thick foam, but the solution should appear slightly cloudy.
This mixture will be your base pesticide. The dish soap’s surfactants will help break down the pests’ protective outer layer, leading to dehydration and eventually death.
Step 3: Apply the Pesticide
It’s time to put your homemade pesticide to work. Shake the bottle again before using, as soap can settle to the bottom of the bottle.
Spray the solution directly onto the leaves, stems, and underside of your plants, where pests tend to hide. Focus on the areas where you have noticed pest activity, such as yellowing leaves or visible insects. Be sure to cover all affected areas but avoid drenching the plants too heavily.
For plants with delicate foliage, test a small patch first to make sure they’re not sensitive to the solution.
Step 4: Reapply as Needed
Depending on the severity of the pest infestation, you may need to apply the pesticide more than once. Typically, you’ll want to reapply every 7-10 days or whenever you see new pest activity. Regular monitoring of your plants will help ensure that the pests do not come back in full force.
If the infestation is particularly severe, you may need to apply the pesticide several times to completely eradicate the pests. However, be patient—natural methods often take a little longer than chemical pesticides, but the results are worth it.
Additional Tips for Effective Pest Control
While your homemade pesticide is a fantastic tool, there are a few additional steps you can take to create a more pest-resistant environment in your garden:
- Target Early Infestations: The earlier you catch a pest problem, the easier it will be to manage. Keep an eye on your plants regularly, especially during the growing season when pests are most active.
- Use a Handheld Magnifying Glass: Some pests are small and difficult to spot with the naked eye. A handheld magnifying glass can help you detect pests such as aphids, spider mites, and mealybugs early on.
- Water Your Plants Properly: Pests tend to target plants that are weak or stressed. Ensure your plants are properly watered and nourished to help them withstand pest invasions. Watering at the base of the plant helps avoid wetting the leaves, which can make them more attractive to pests.
- Encourage Beneficial Insects: In addition to using pesticides, encourage natural pest control by attracting beneficial insects like ladybugs, predatory beetles, and lacewings to your garden. These insects will help keep pest populations in check naturally.
- Consider Companion Planting: Some plants have natural pest-repellent properties. For example, planting basil, marigolds, or garlic near susceptible crops can help keep pests away without the need for pesticides.
When to Avoid Using Homemade Pesticides
Though the dish soap pesticide is gentle compared to chemical alternatives, there are times when you should avoid using it on certain plants:
- Sensitive Plants: Some delicate plants may be more sensitive to the soap mixture. Test a small section of the plant before applying it across the entire plant.
- Flowering Plants: Pesticides can harm pollinators such as bees and butterflies. If your plants are flowering and attracting pollinators, it’s best to use the pesticide in the evening when pollinators are less active.
The Benefits of Going Natural
Choosing natural pesticides over store-bought chemical alternatives comes with several distinct advantages:
- Environmental Safety: By using biodegradable ingredients, you reduce the risk of harming the environment, wildlife, and beneficial insects.
- Cost-Effective: Making your own pesticide is far less expensive than buying chemical versions. Many of the ingredients are likely already in your kitchen, making it an affordable option for gardeners on a budget.
- Healthier Plants: Plants treated with natural pesticides are not exposed to toxic chemicals, which can sometimes stress the plants and reduce their growth. Instead, they are nourished and protected in a way that enhances their overall health.
- Simplicity: The recipe is incredibly simple, with just two ingredients. This makes it easy to replicate and use whenever necessary.
Conclusion
Creating your own natural pesticide with just two simple ingredients is an easy, effective, and eco-friendly way to protect your garden from pests. Whether you’re dealing with aphids, spider mites, or other common pests, this homemade solution will keep your plants healthy and thriving without resorting to harmful chemicals. The key to success is consistency—apply your DIY pesticide regularly, monitor your plants, and enjoy the fruits of your labor as your garden flourishes.
By adopting natural pest control methods, you’re not only ensuring the safety of your plants but also contributing to a healthier environment for all living things. Start making your own pesticide today and watch as your garden grows strong and pest-free!
#NaturalPestControl #EcoFriendlyGardening #DIYGardeningTips #OrganicGardening #HomeGardenHacks #PlantProtection #GardeningMadeEasy #PestFreeGarden