
Zinnias are among the most vibrant and easy-to-grow flowers that grace home gardens. Known for their cheerful colors, long-lasting blooms, and ability to attract pollinators, zinnias are the perfect addition to any garden. But did you know that propagating zinnias is both easy and free? Whether you’re an experienced gardener or a newbie, propagating zinnias ensures your garden remains abundant and beautiful without breaking the bank. Here’s an in-depth look at four free ways to propagate zinnias and tips to get the most out of these methods.
Why Propagate Zinnias?
Propagation not only saves you money but also allows you to expand your garden and ensure that your favorite zinnia varieties continue to thrive year after year. These methods—saving seeds, taking cuttings, dividing clumps, and encouraging self-seeding—are simple, rewarding, and eco-friendly. Let’s dive into each method to help you become a zinnia propagation expert.
1. Saving Seeds from Mature Flowers
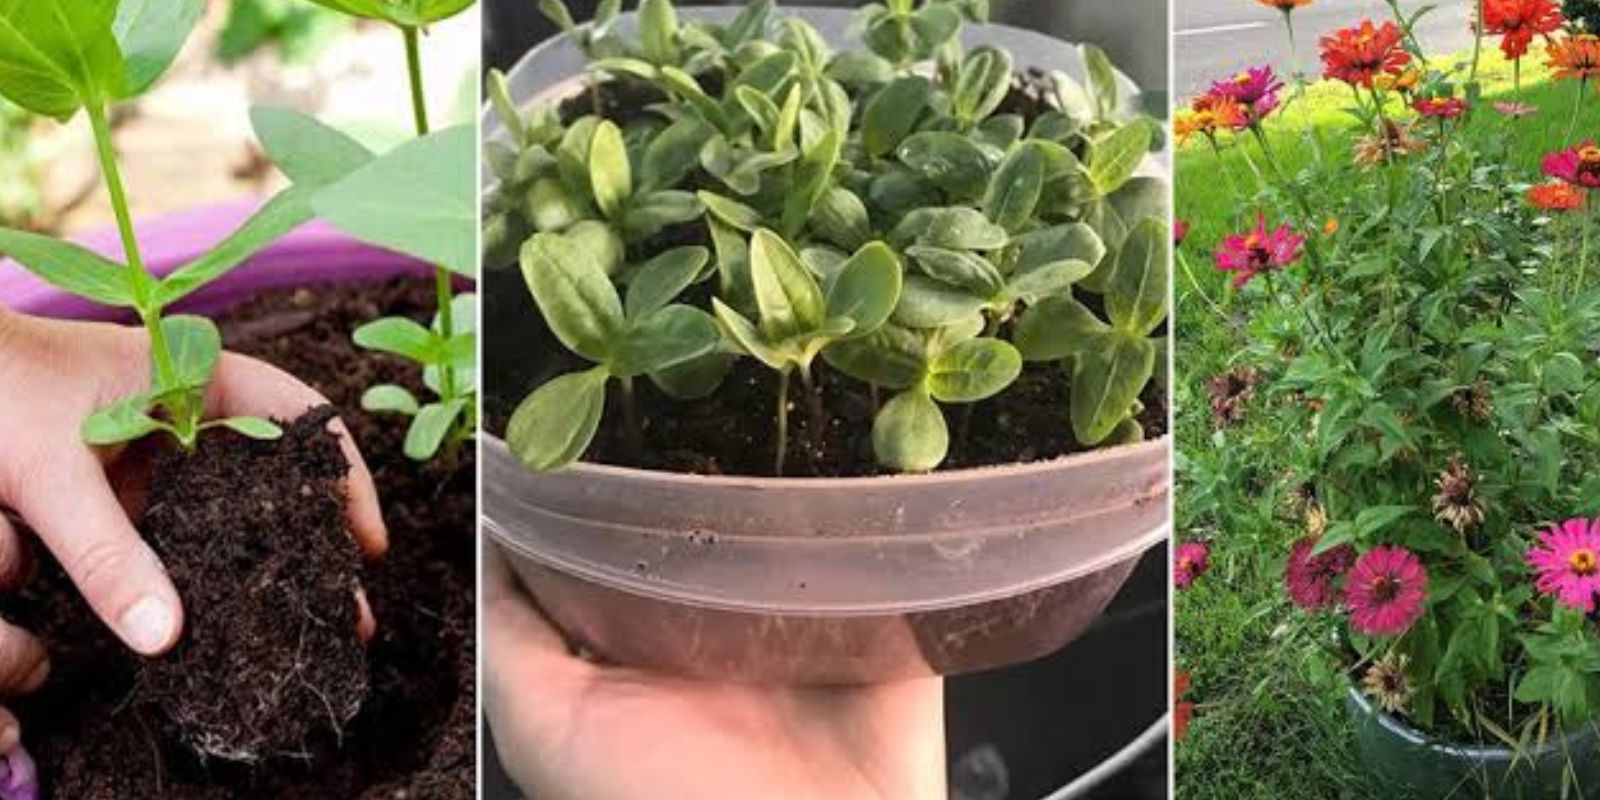
One of the easiest and most reliable ways to propagate zinnias is by collecting seeds from mature flowers.
Step-by-Step Guide:
- Allow Flowers to Dry: Leave some flowers on the plant until they completely dry and the center turns brown. This ensures the seeds are mature and ready for harvest.
- Harvest the Seeds: Snip off the dried flower heads. Gently pull away the petals to reveal the seeds. Zinnia seeds are small, flat, and shaped like tiny arrows.
- Store Seeds Properly: Place the seeds in a paper envelope or a glass jar, label them with the variety and date, and store them in a cool, dry place. Proper storage ensures the seeds remain viable until the next planting season.
Why It Works
This method allows you to preserve your favorite zinnia varieties and share seeds with fellow gardeners. Plus, zinnia seeds have a high germination rate, making this method foolproof.
2. Propagating Zinnias from Cuttings
Did you know zinnias can also be propagated through cuttings? This method works well when you want to replicate a particular plant quickly.
Step-by-Step Guide:
- Choose a Healthy Stem: Select a 4-6 inch stem that’s free from flowers and disease. The absence of flowers ensures the plant focuses energy on root development.
- Cut Below a Leaf Node: Using sharp scissors or pruning shears, make a clean cut just below a leaf node (the point where leaves meet the stem).
- Prepare the Cutting: Remove leaves from the lower half of the stem to reduce moisture loss and encourage rooting.
- Root in Water or Soil:
- If using water, place the stem in a jar with just the bottom of the cutting submerged. Change the water every 2-3 days to prevent rot.
- For soil, use well-draining potting mix and keep it moist but not waterlogged.
- Transplant: Once roots are 1-2 inches long (typically after a few weeks), transfer the cutting to a larger pot or your garden bed.
Why It Works
Cuttings provide an exact clone of the parent plant, ensuring the same bloom color and quality. This method is quick and highly satisfying as you can see roots forming in real time.
3. Dividing Perennial Zinnias (for Certain Varieties)
While most zinnias are annuals, some perennial varieties can be divided to propagate new plants.
Step-by-Step Guide:
- Choose the Right Time: Early spring or fall is ideal for dividing perennials, as the plants are not actively blooming.
- Dig Up the Plant: Carefully dig around the root ball to avoid damaging the roots.
- Divide the Clump: Use a sharp knife or garden spade to separate the root ball into smaller sections. Ensure each section has at least one healthy stem and a good portion of roots.
- Replant Immediately: Place the divided sections into prepared soil, ensuring they are well-watered and have enough sunlight to thrive.
Why It Works
Dividing perennial zinnias rejuvenates the parent plant while creating multiple new plants. It’s an efficient way to expand your garden without buying more plants.
4. Encouraging Self-Seeding
Letting nature take its course is another easy and effortless way to propagate zinnias.
Step-by-Step Guide:
- Leave Flowers on the Plant: At the end of the growing season, allow some flowers to remain on the plant. As they dry, seeds will naturally fall to the ground.
- Prepare the Soil: In the fall, lightly till the soil around the zinnia plants to help the seeds make contact with the soil. This improves germination rates.
- Monitor in Spring: When spring arrives, watch for zinnia seedlings sprouting in your garden. You can either let them grow where they sprout or carefully transplant them to a desired location.
Why It Works
This hands-off method mimics how zinnias grow in the wild. It’s perfect for gardeners who want a natural, cottage-style garden full of blooms.
Pro Tips for Successful Propagation
- Soil Preparation: Ensure your garden soil is well-draining and enriched with organic matter. Healthy soil supports strong growth for all propagation methods.
- Watering: Keep the soil consistently moist during the rooting and germination phases but avoid waterlogging.
- Label Your Plants: Especially when saving seeds or taking cuttings, label varieties to maintain a record of colors and types.
- Patience is Key: Some methods, like self-seeding, take time to yield results. Trust the process and enjoy watching your garden evolve.
Conclusion
Propagating zinnias is an easy, cost-effective way to keep your garden blooming with vibrant colors season after season. Whether you prefer saving seeds, rooting cuttings, dividing perennial clumps, or letting nature handle the work through self-seeding, there’s a method to suit every gardener’s style.
With a little effort and patience, you can create a thriving zinnia garden that will be the envy of your neighbors. Best of all, these methods are free, sustainable, and incredibly rewarding. So, grab your garden tools and start propagating today!
🌸 Which method will you try first? Let us know in the comments below! 🌼